Integrate Google Workspace SSO with your application
Learn how to integrate Google Workspace SSO with your application in minutes.

Developer

Google Workspace (formerly G Suite) is a collection of cloud computing, productivity, and collaboration tools developed by Google. It provides a set of enterprise-grade services, including Gmail, Docs, Drive, Calendar, Meet, and more.
As Google Workspace is widely used in the enterprise world, it is essential to allow enterprise users to sign in to your application through Logto with their Google Workspace accounts without creating a new account. In this tutorial, we will show you how to integrate your application with Google Workspace SSO in minutes.
Prerequisites
Before we start, you need to have an Google Cloud account and a Google Workspace organization. If you don't have one, you can sign up for a free Google Cloud account here.
Of course, you also need to have a Logto account. If you don't have one, you are very welcome to sign up for a Logto account. Logto is free for personal use. All the features are available for free dev tenants, including the SSO feature.
A well integrated Logto application is also needed. If you don't have one, please follow the integration guide to create a Logto application.
Create a new Google Workspace SSO connector in Logto
- Visit your Logto Cloud Console and navigate to the Enterprise SSO page.
- Click the Add Enterprise SSO button and select Google Workspace as the SSO provider.
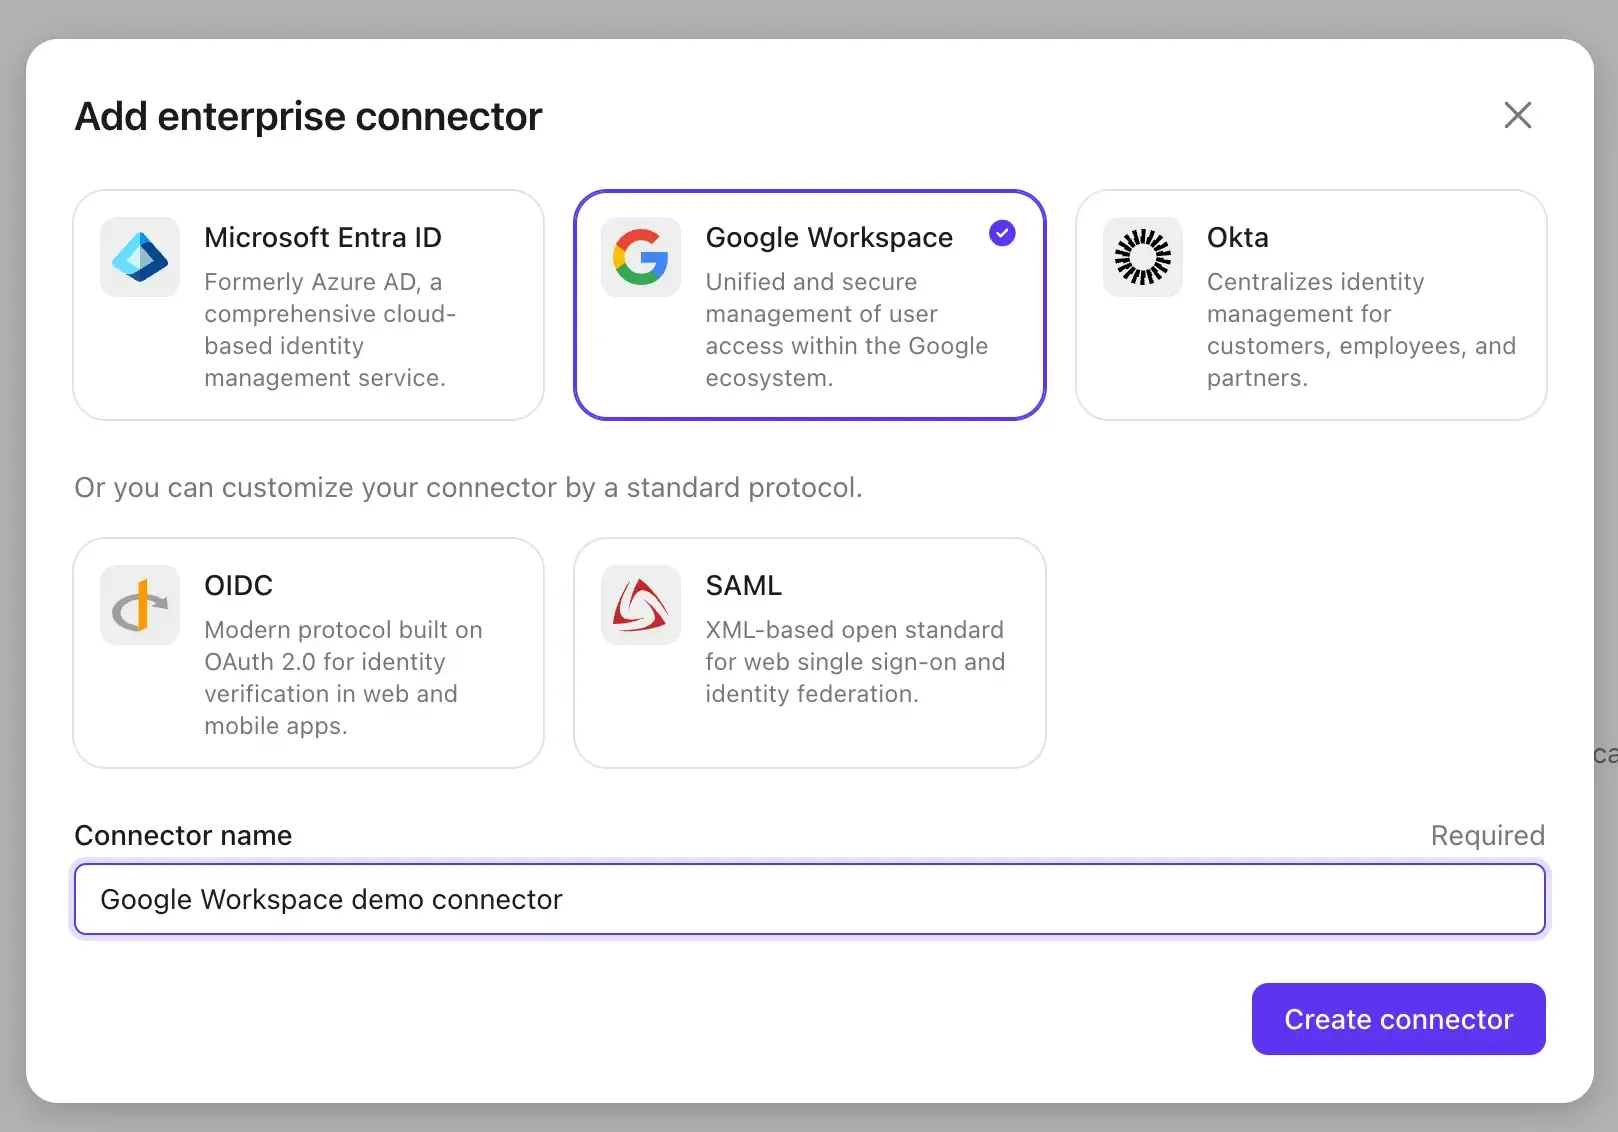
Before we proceed to the next step, we need to collect some information from your Google Workspace account.
Create a Google Workspace authentication project and configure the OAuth consent screen
-
Before you can use Google Workspace as an authentication provider, you must set up a project in the Google API Console to obtain OAuth 2.0 credentials. If you already have a project, you can skip this step. Otherwise, create a new project under your Google organization.
-
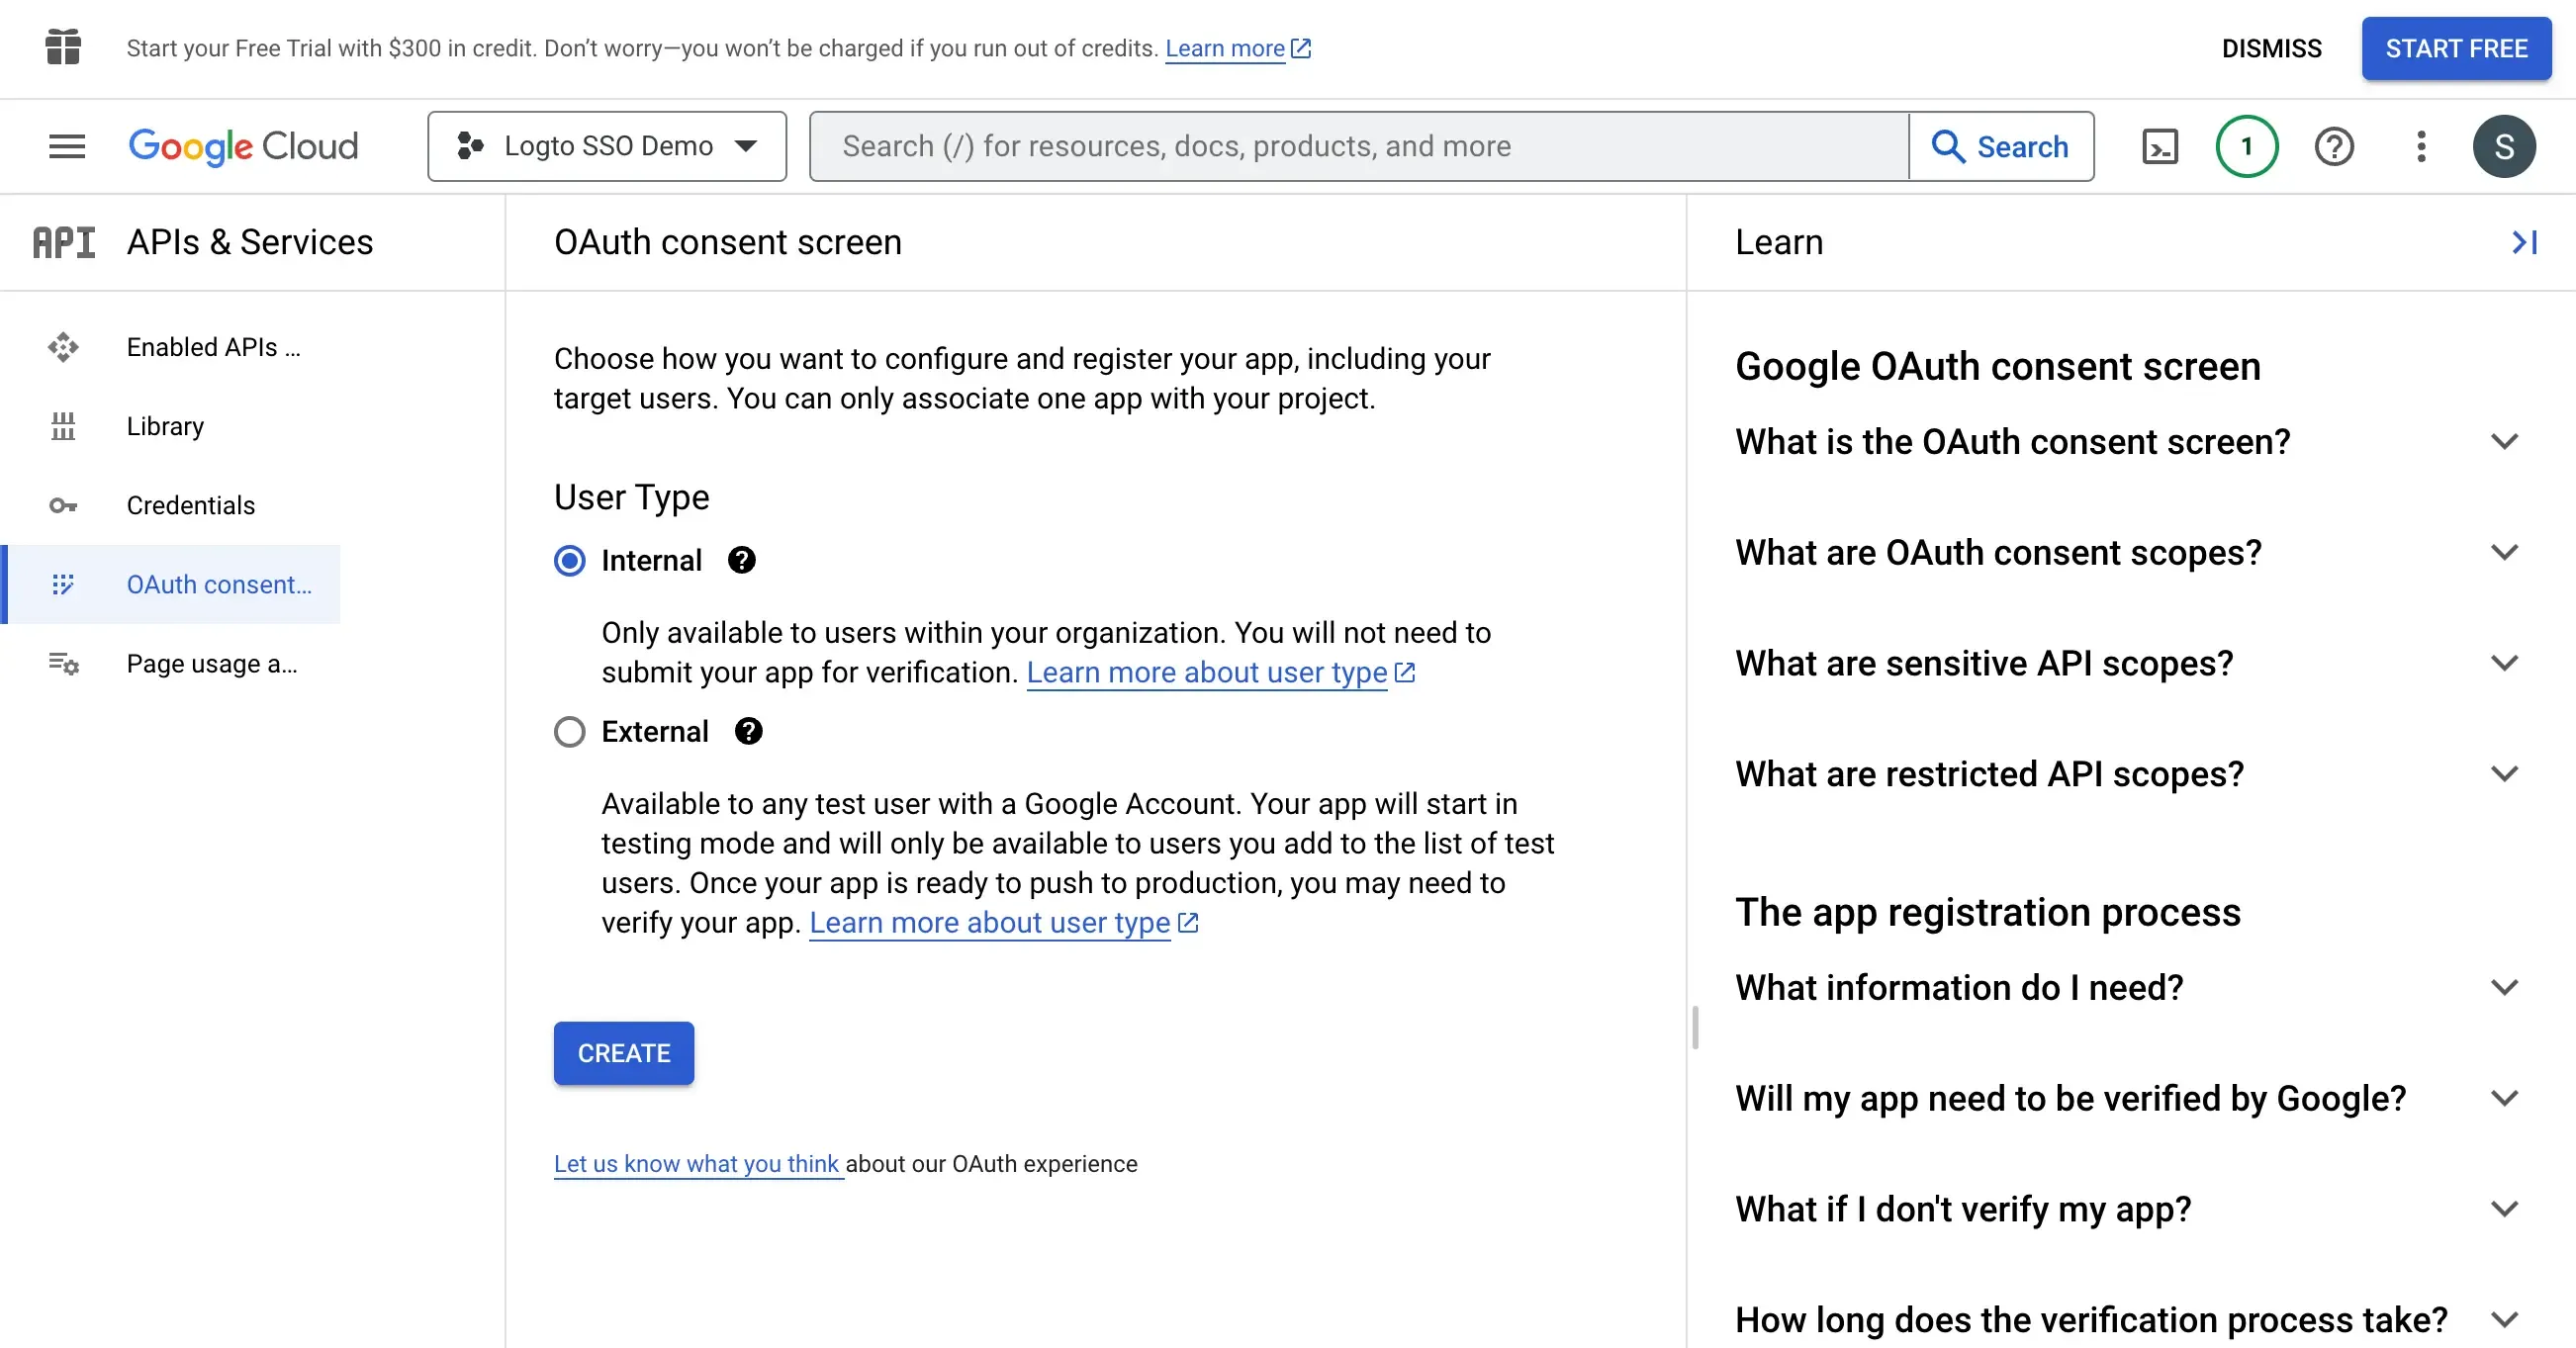
If this is the first time you have implemented Google Workspace authentication, you must configure your OAuth consent screen before you can create OAuth client credentials. To do this, click OAuth consent screen in the left navigation bar to configure your OAuth consent screen.
-
Select Internal as the user type. This will ensure that only users within your Google Workspace organization can access your application.
- Fill in the application general information following the instructions on the page. You need to provide the following information:
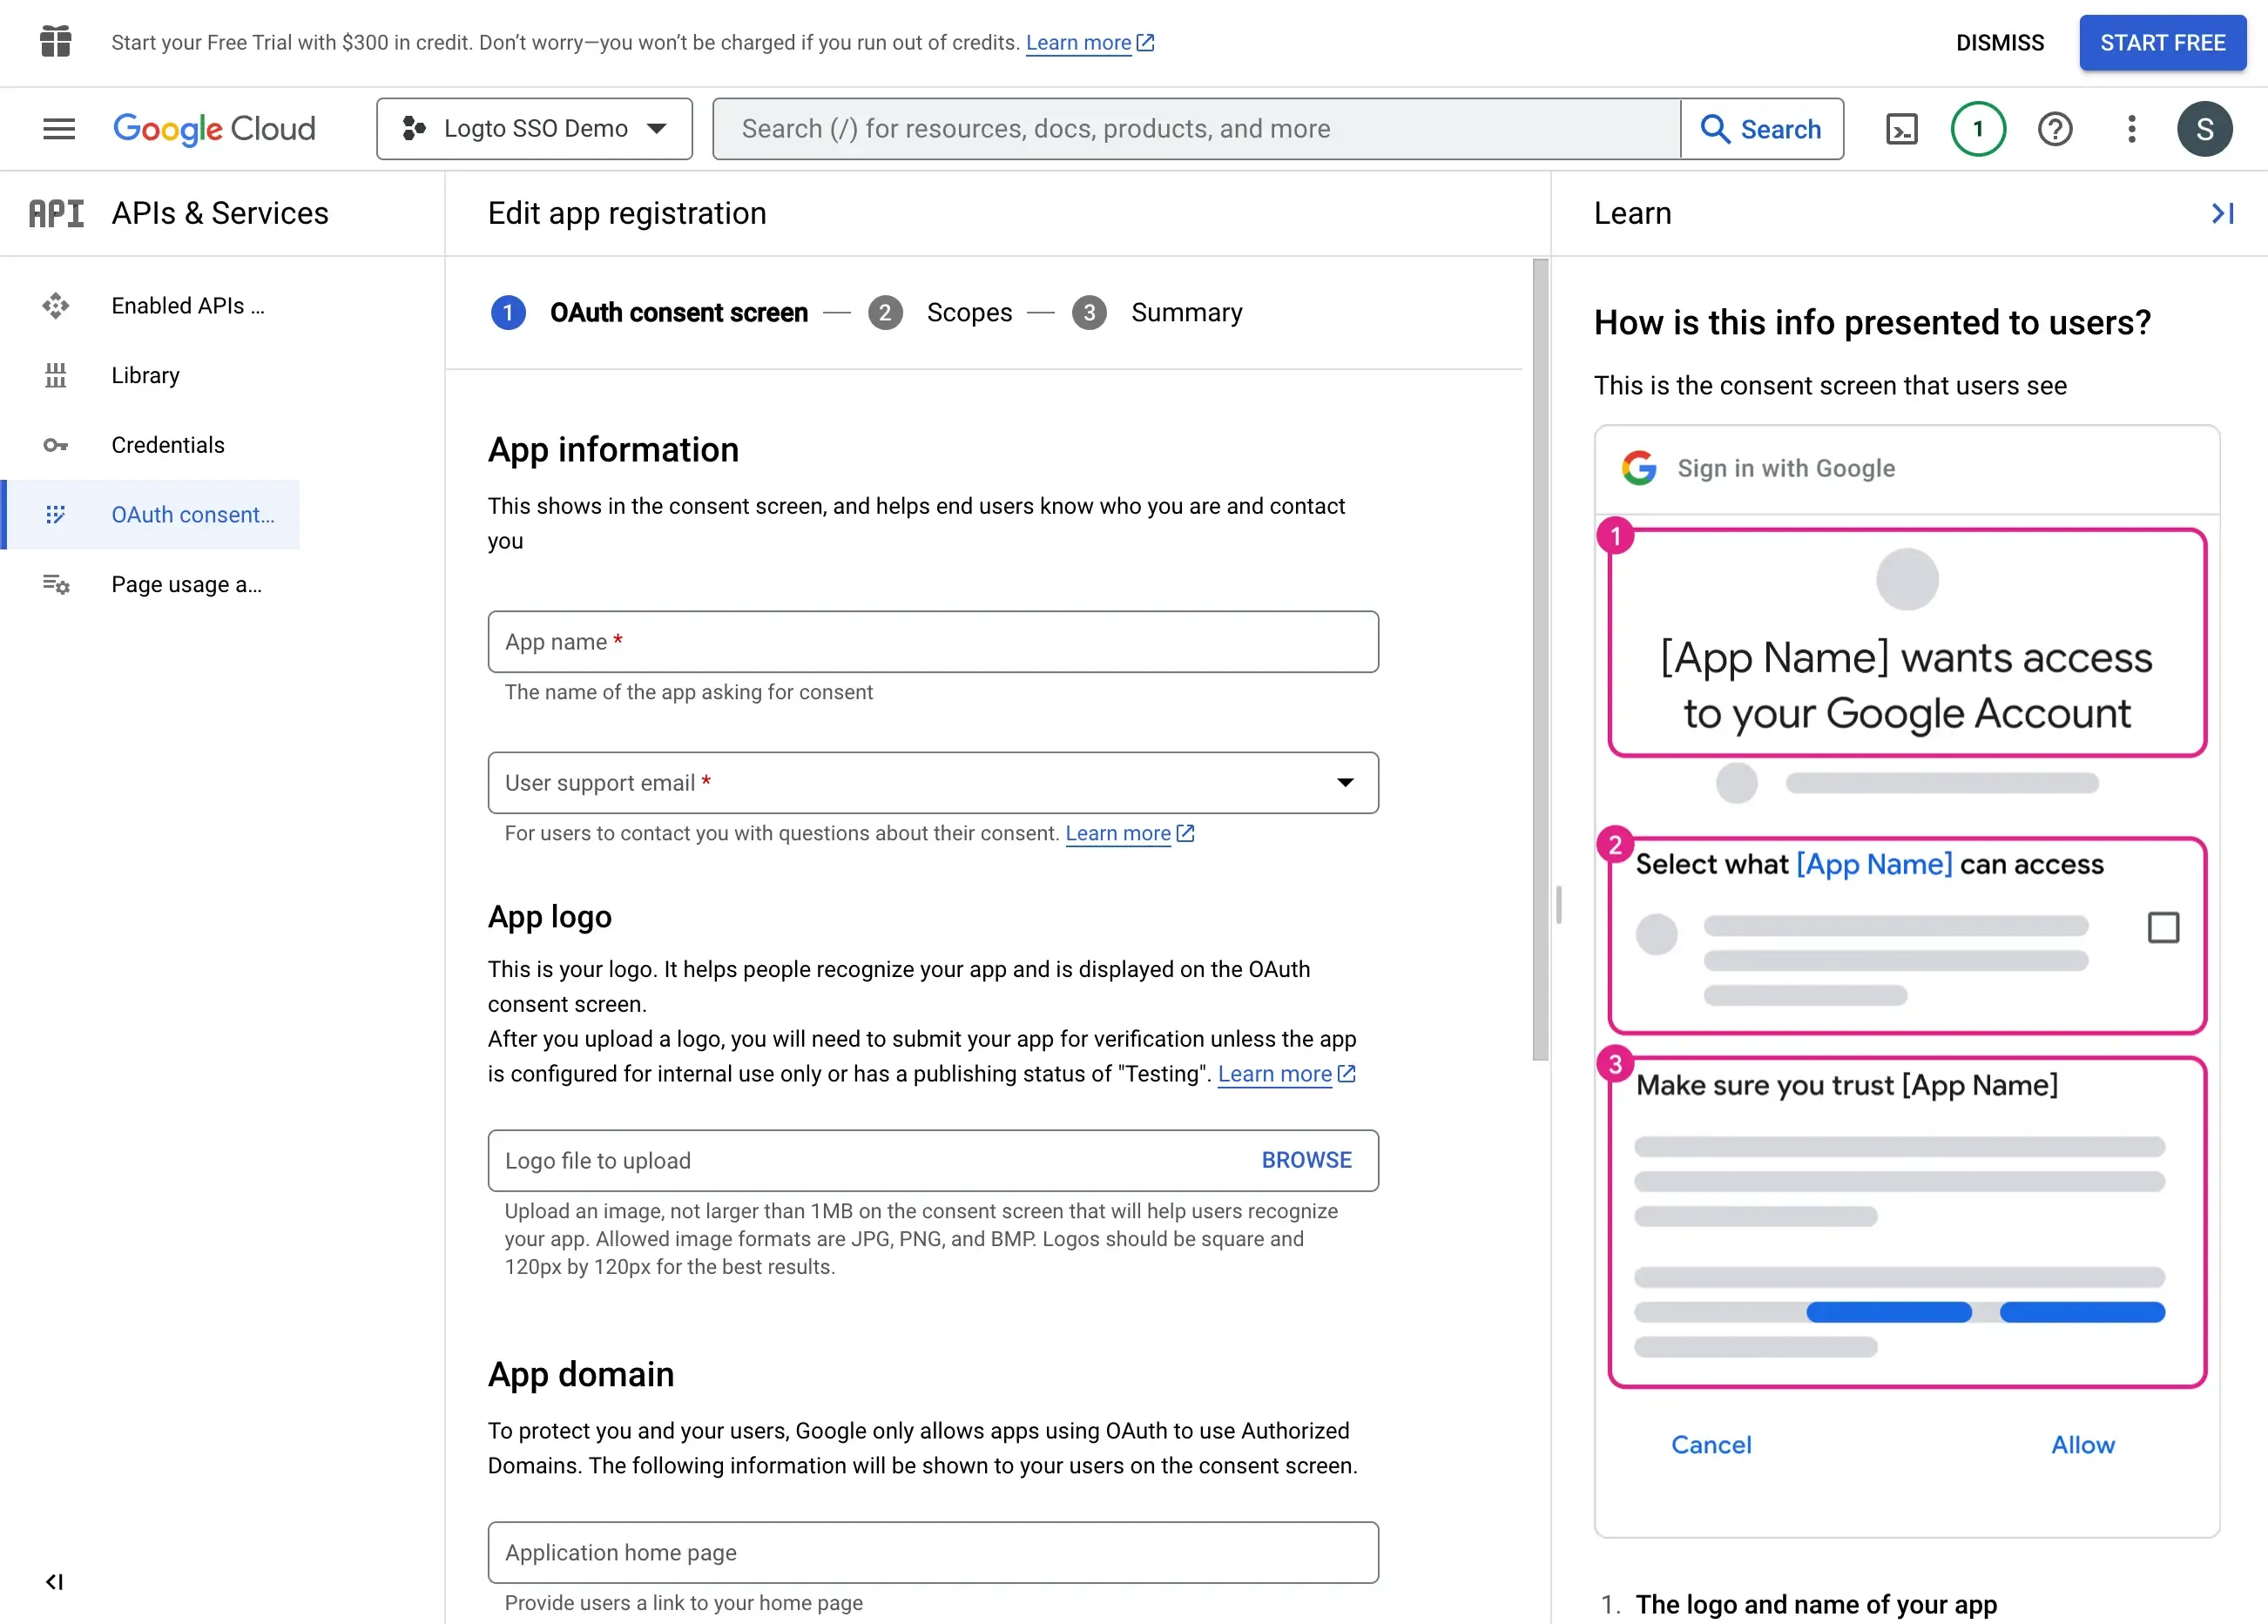
| Field Name | Description |
|---|---|
| Application name | The name of your application. This name will be displayed on the consent screen when users are asked to grant access to your application. |
| User support email | The email address that users can contact for support. |
| Authorized domains | The domain names that are allowed to access your application. You need to add your Logto tenant domain name here. e.g. https://${tenant_id}.logto.app |
Click the Save and Continue button to proceed to the next step
- Set the Scopes for your application. In order to use Google Workspace as an authentication provider and retrieve user's identity information, Logto SSO connector needs to access the following scopes:
openid- This scope is required to retrieve the user's identity information.profile- This scope is required to retrieve the user's basic profile information.email- This scope is required to retrieve the user's email address.
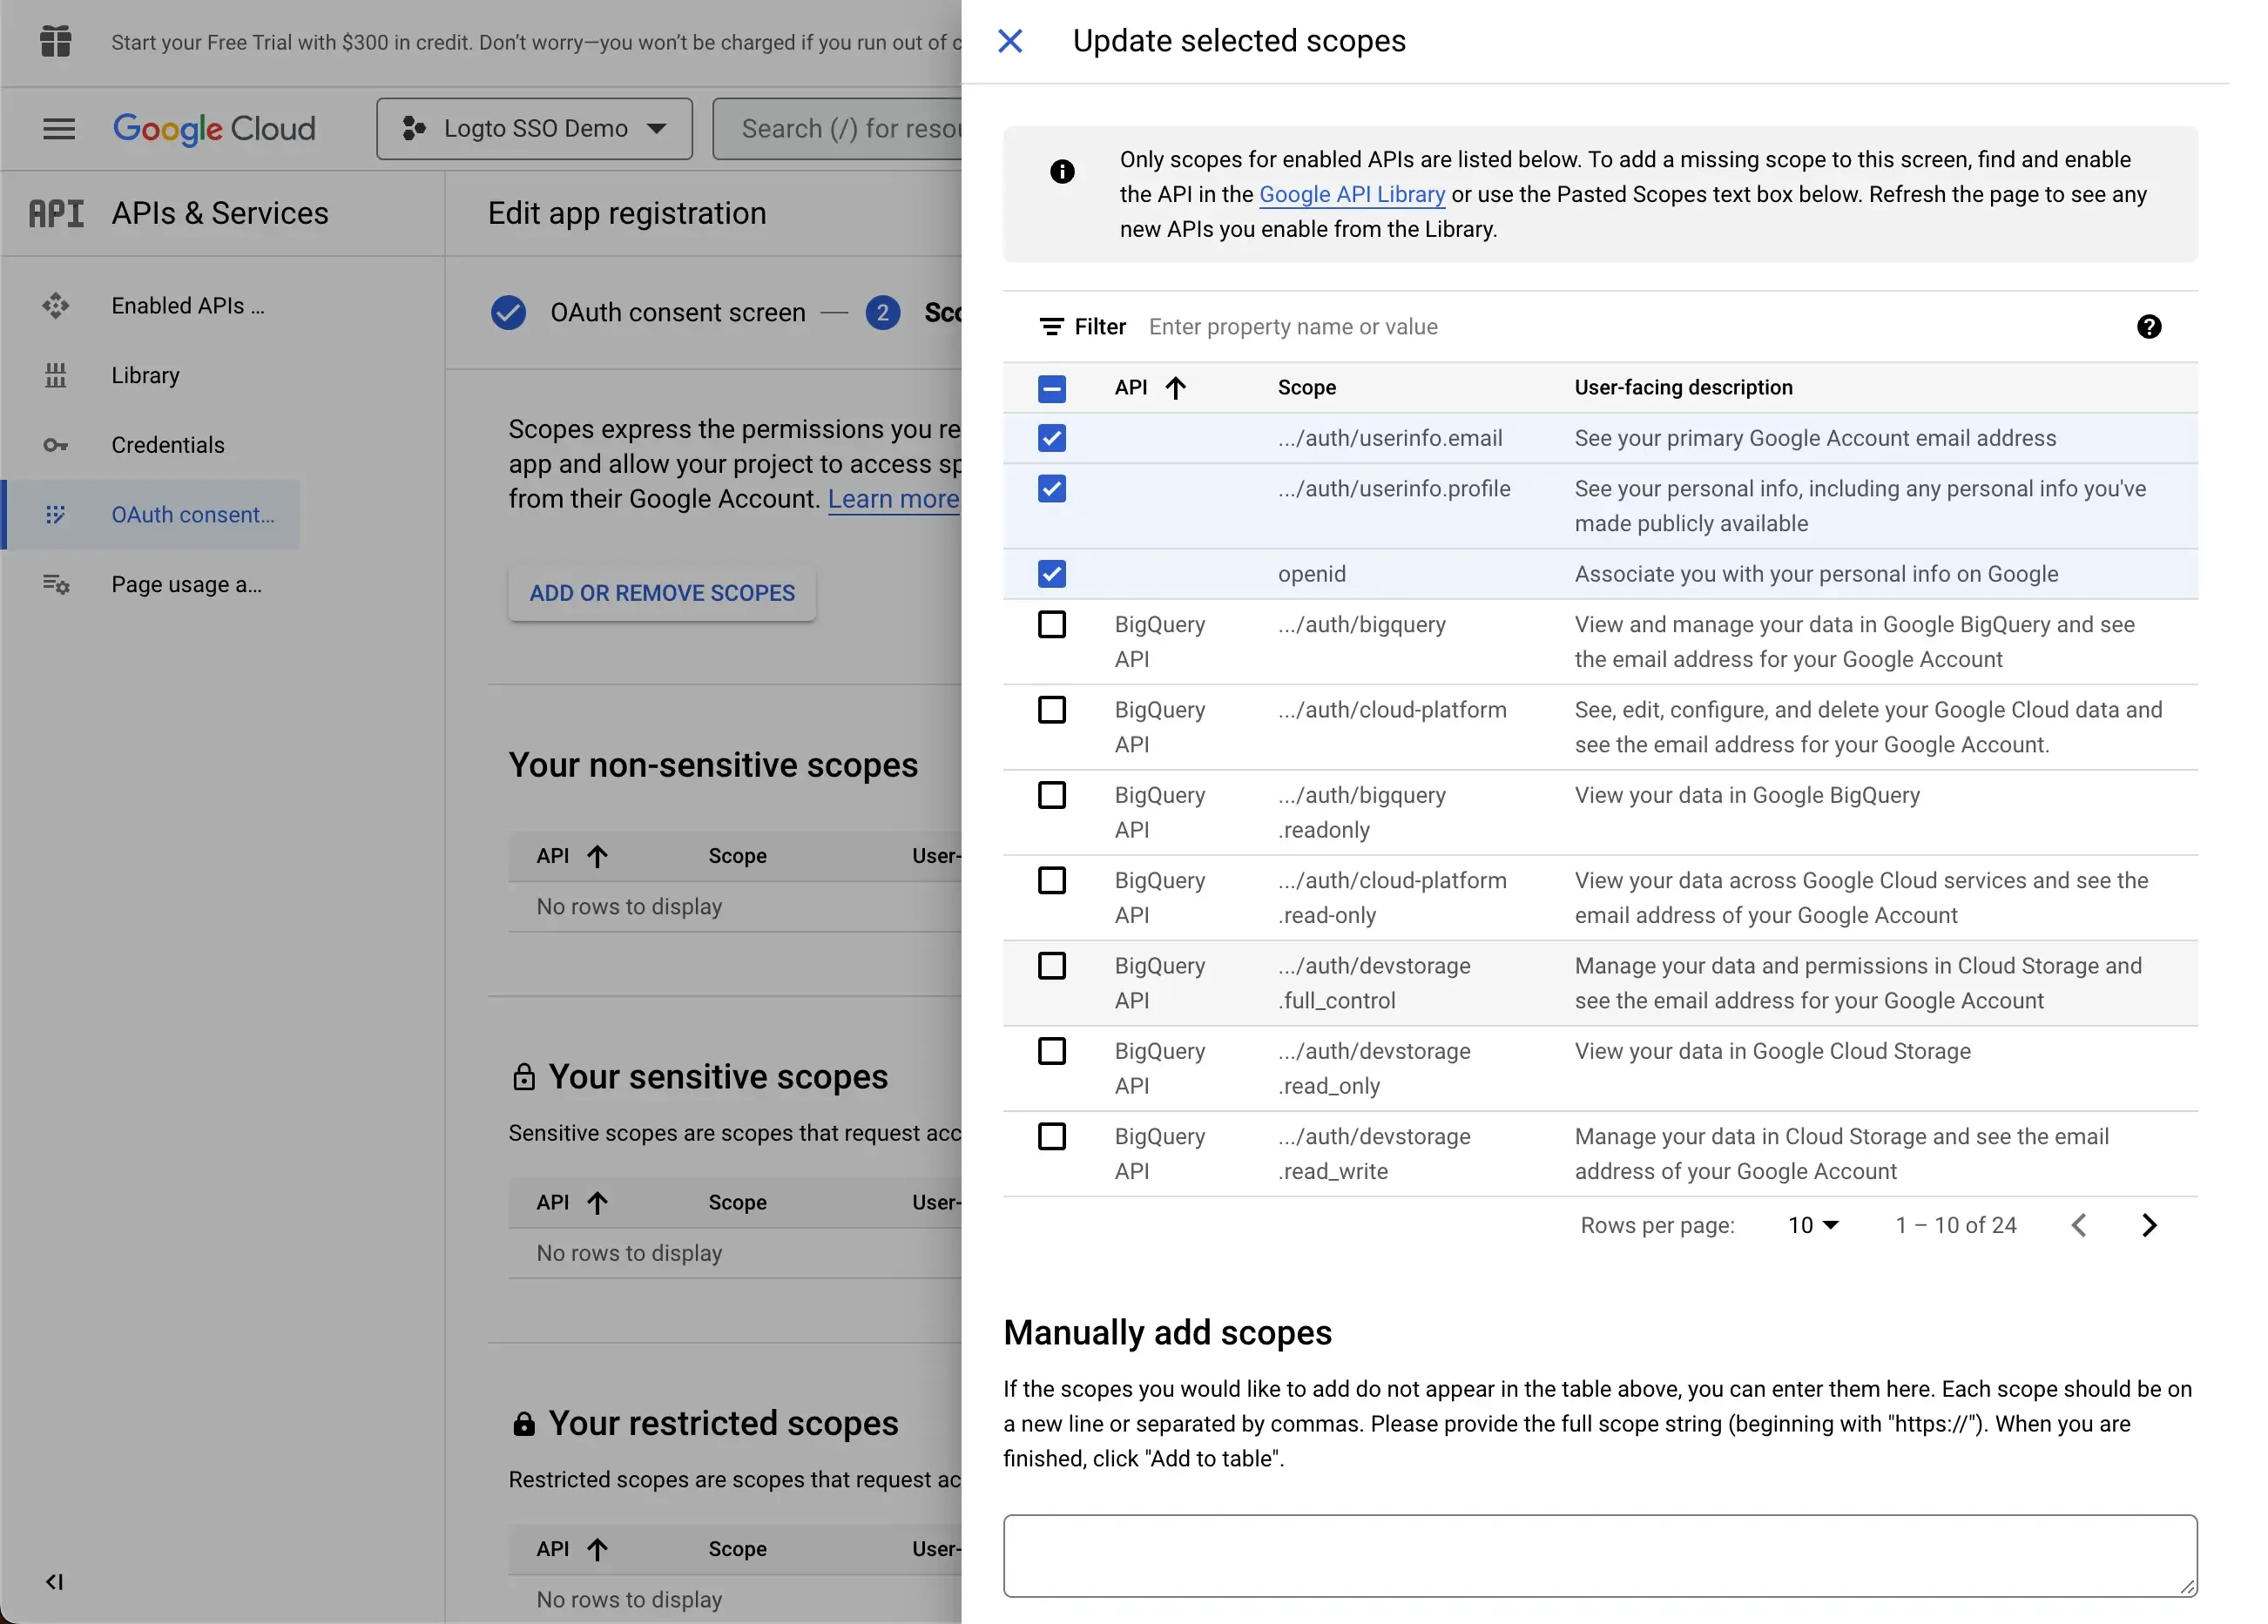
Click the Save and Continue button to proceed to the summary page.
Create a OAuth client credential for your Logto SSO connector
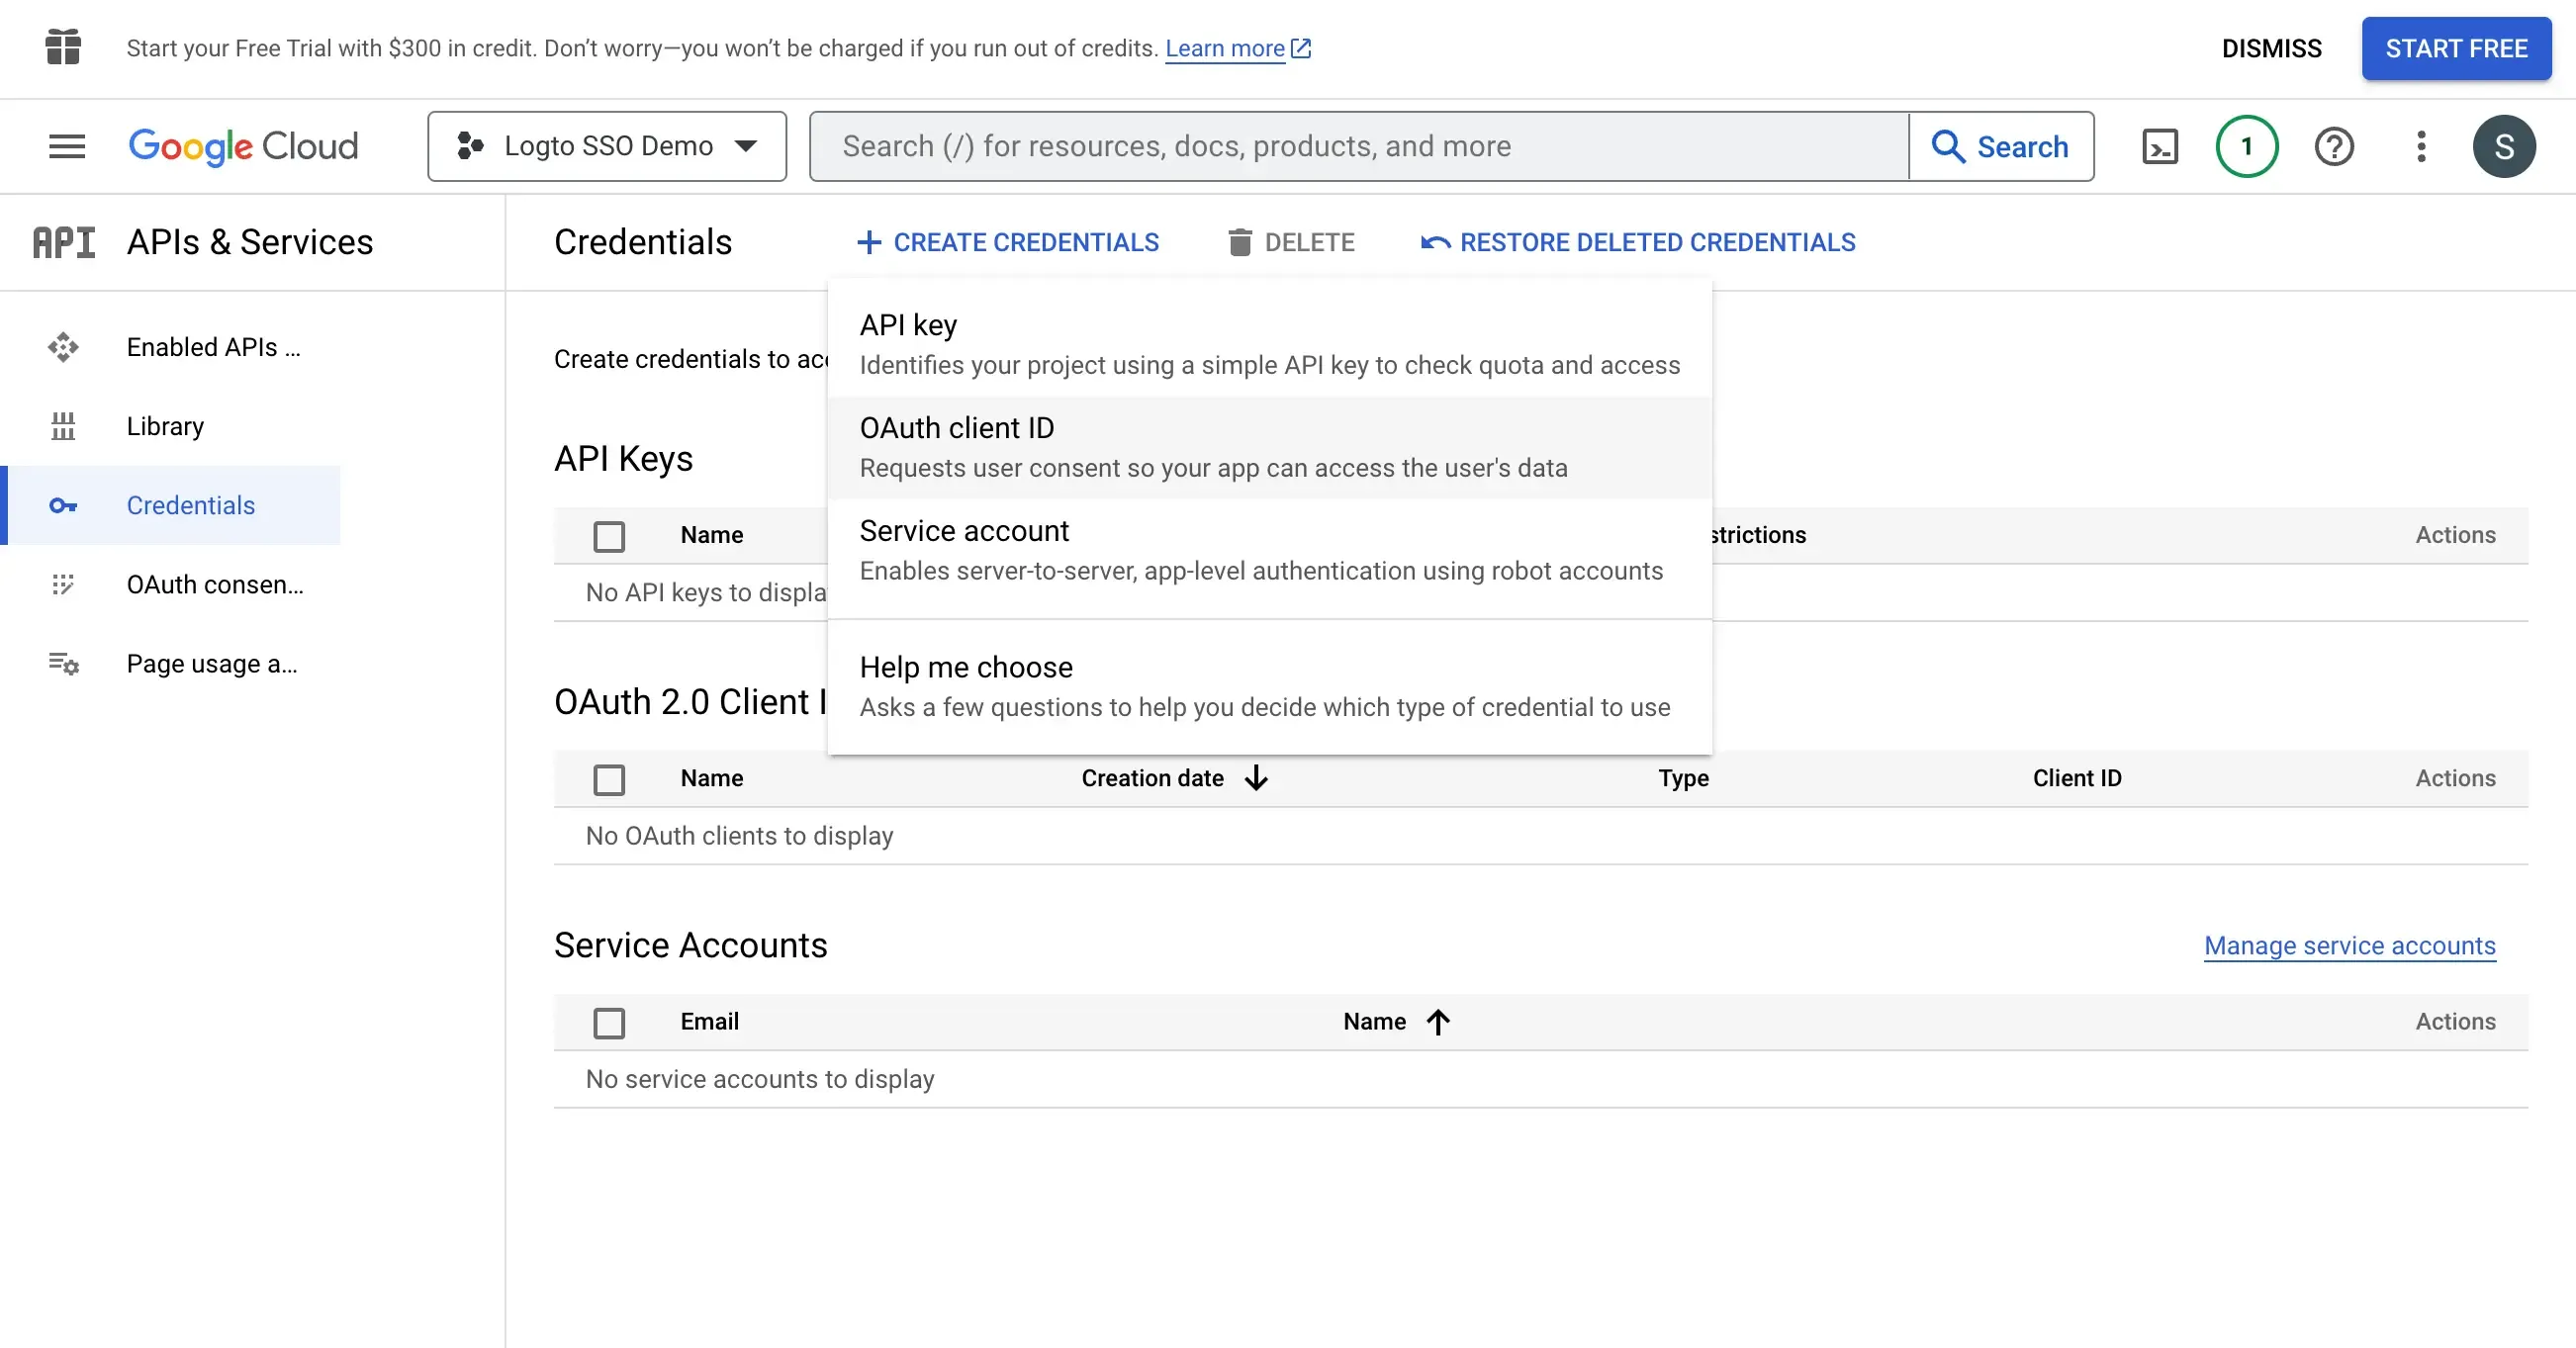
- Navigate to the Credentials page and click the Create Credentials button. Select OAuth client ID as the credential type.
- Configure the OAuth client credential as follows:

-
Application type: Select Web application as the application type.
-
Name: The name of the OAuth client credential.
-
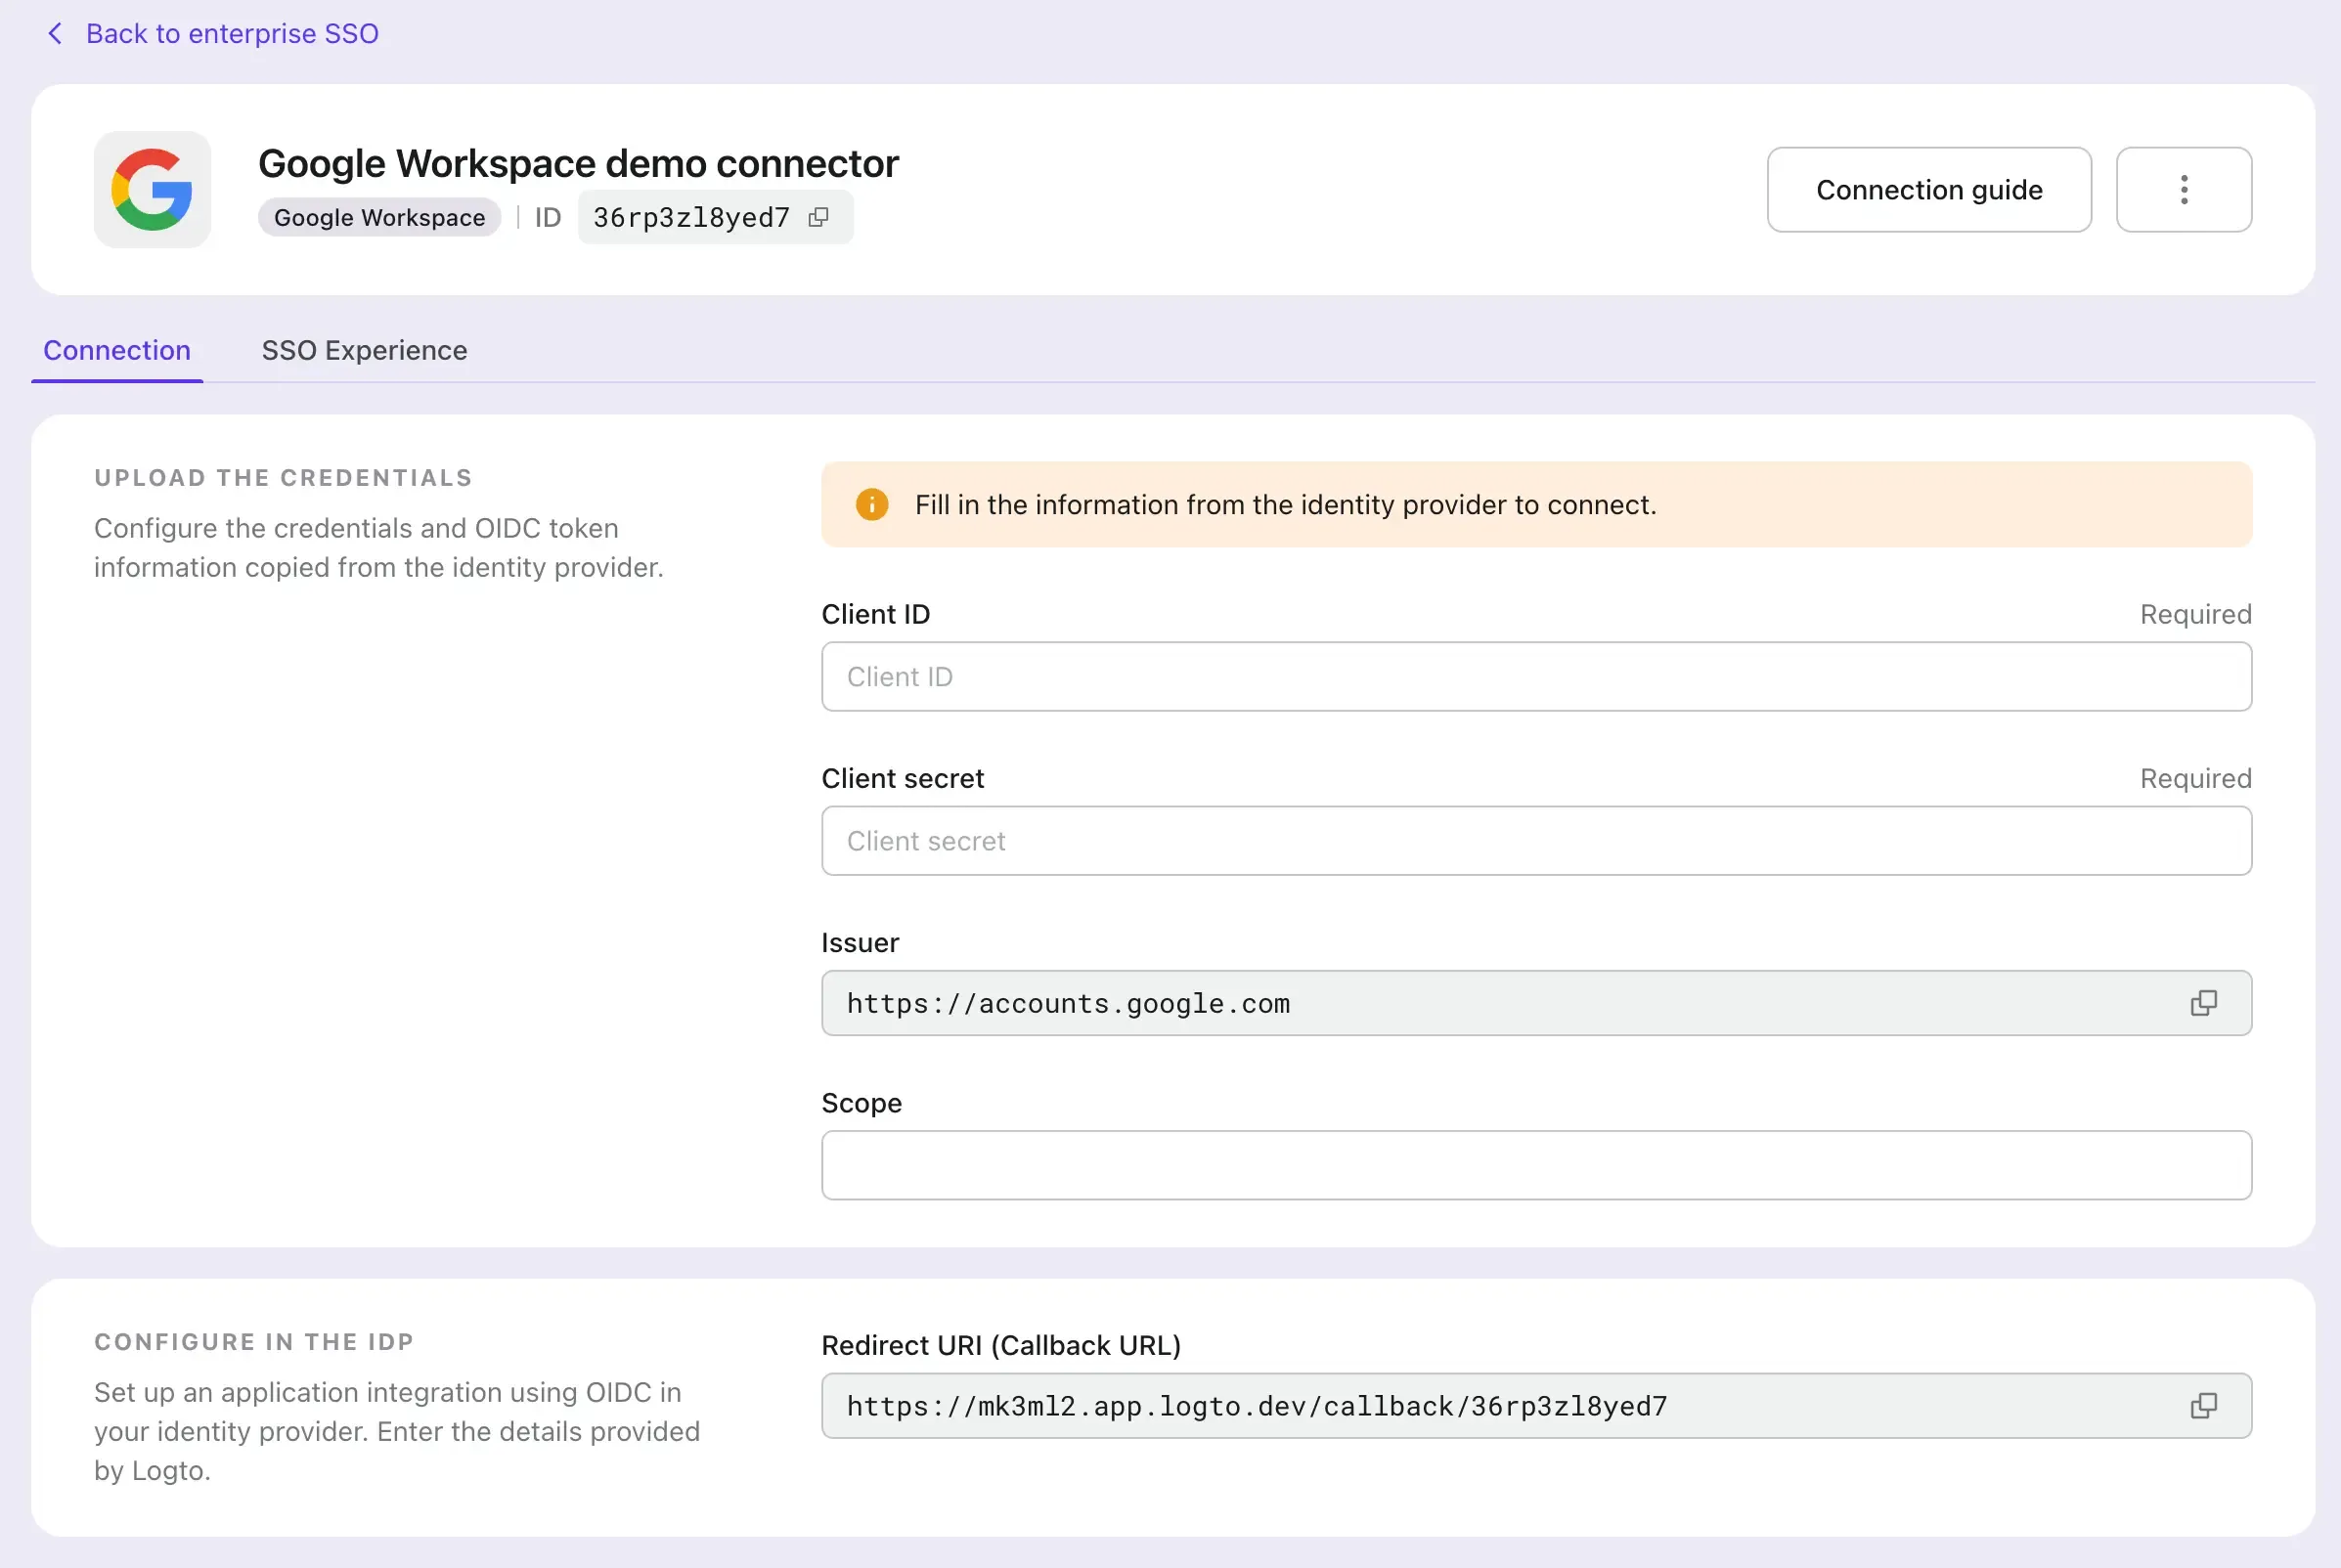
Authorized redirect URIs: The redirect URI is used to redirect the user to the Logto application after the SSO flow is completed. You may find the redirect URI value at your Logto's Google Workspace SSO connector page.
-
Authorized JavaScript origins: The origin of the Logto application. This is used to prevent the OAuth client credential from being used by other applications. Use the same origin as the redirect URI.
-
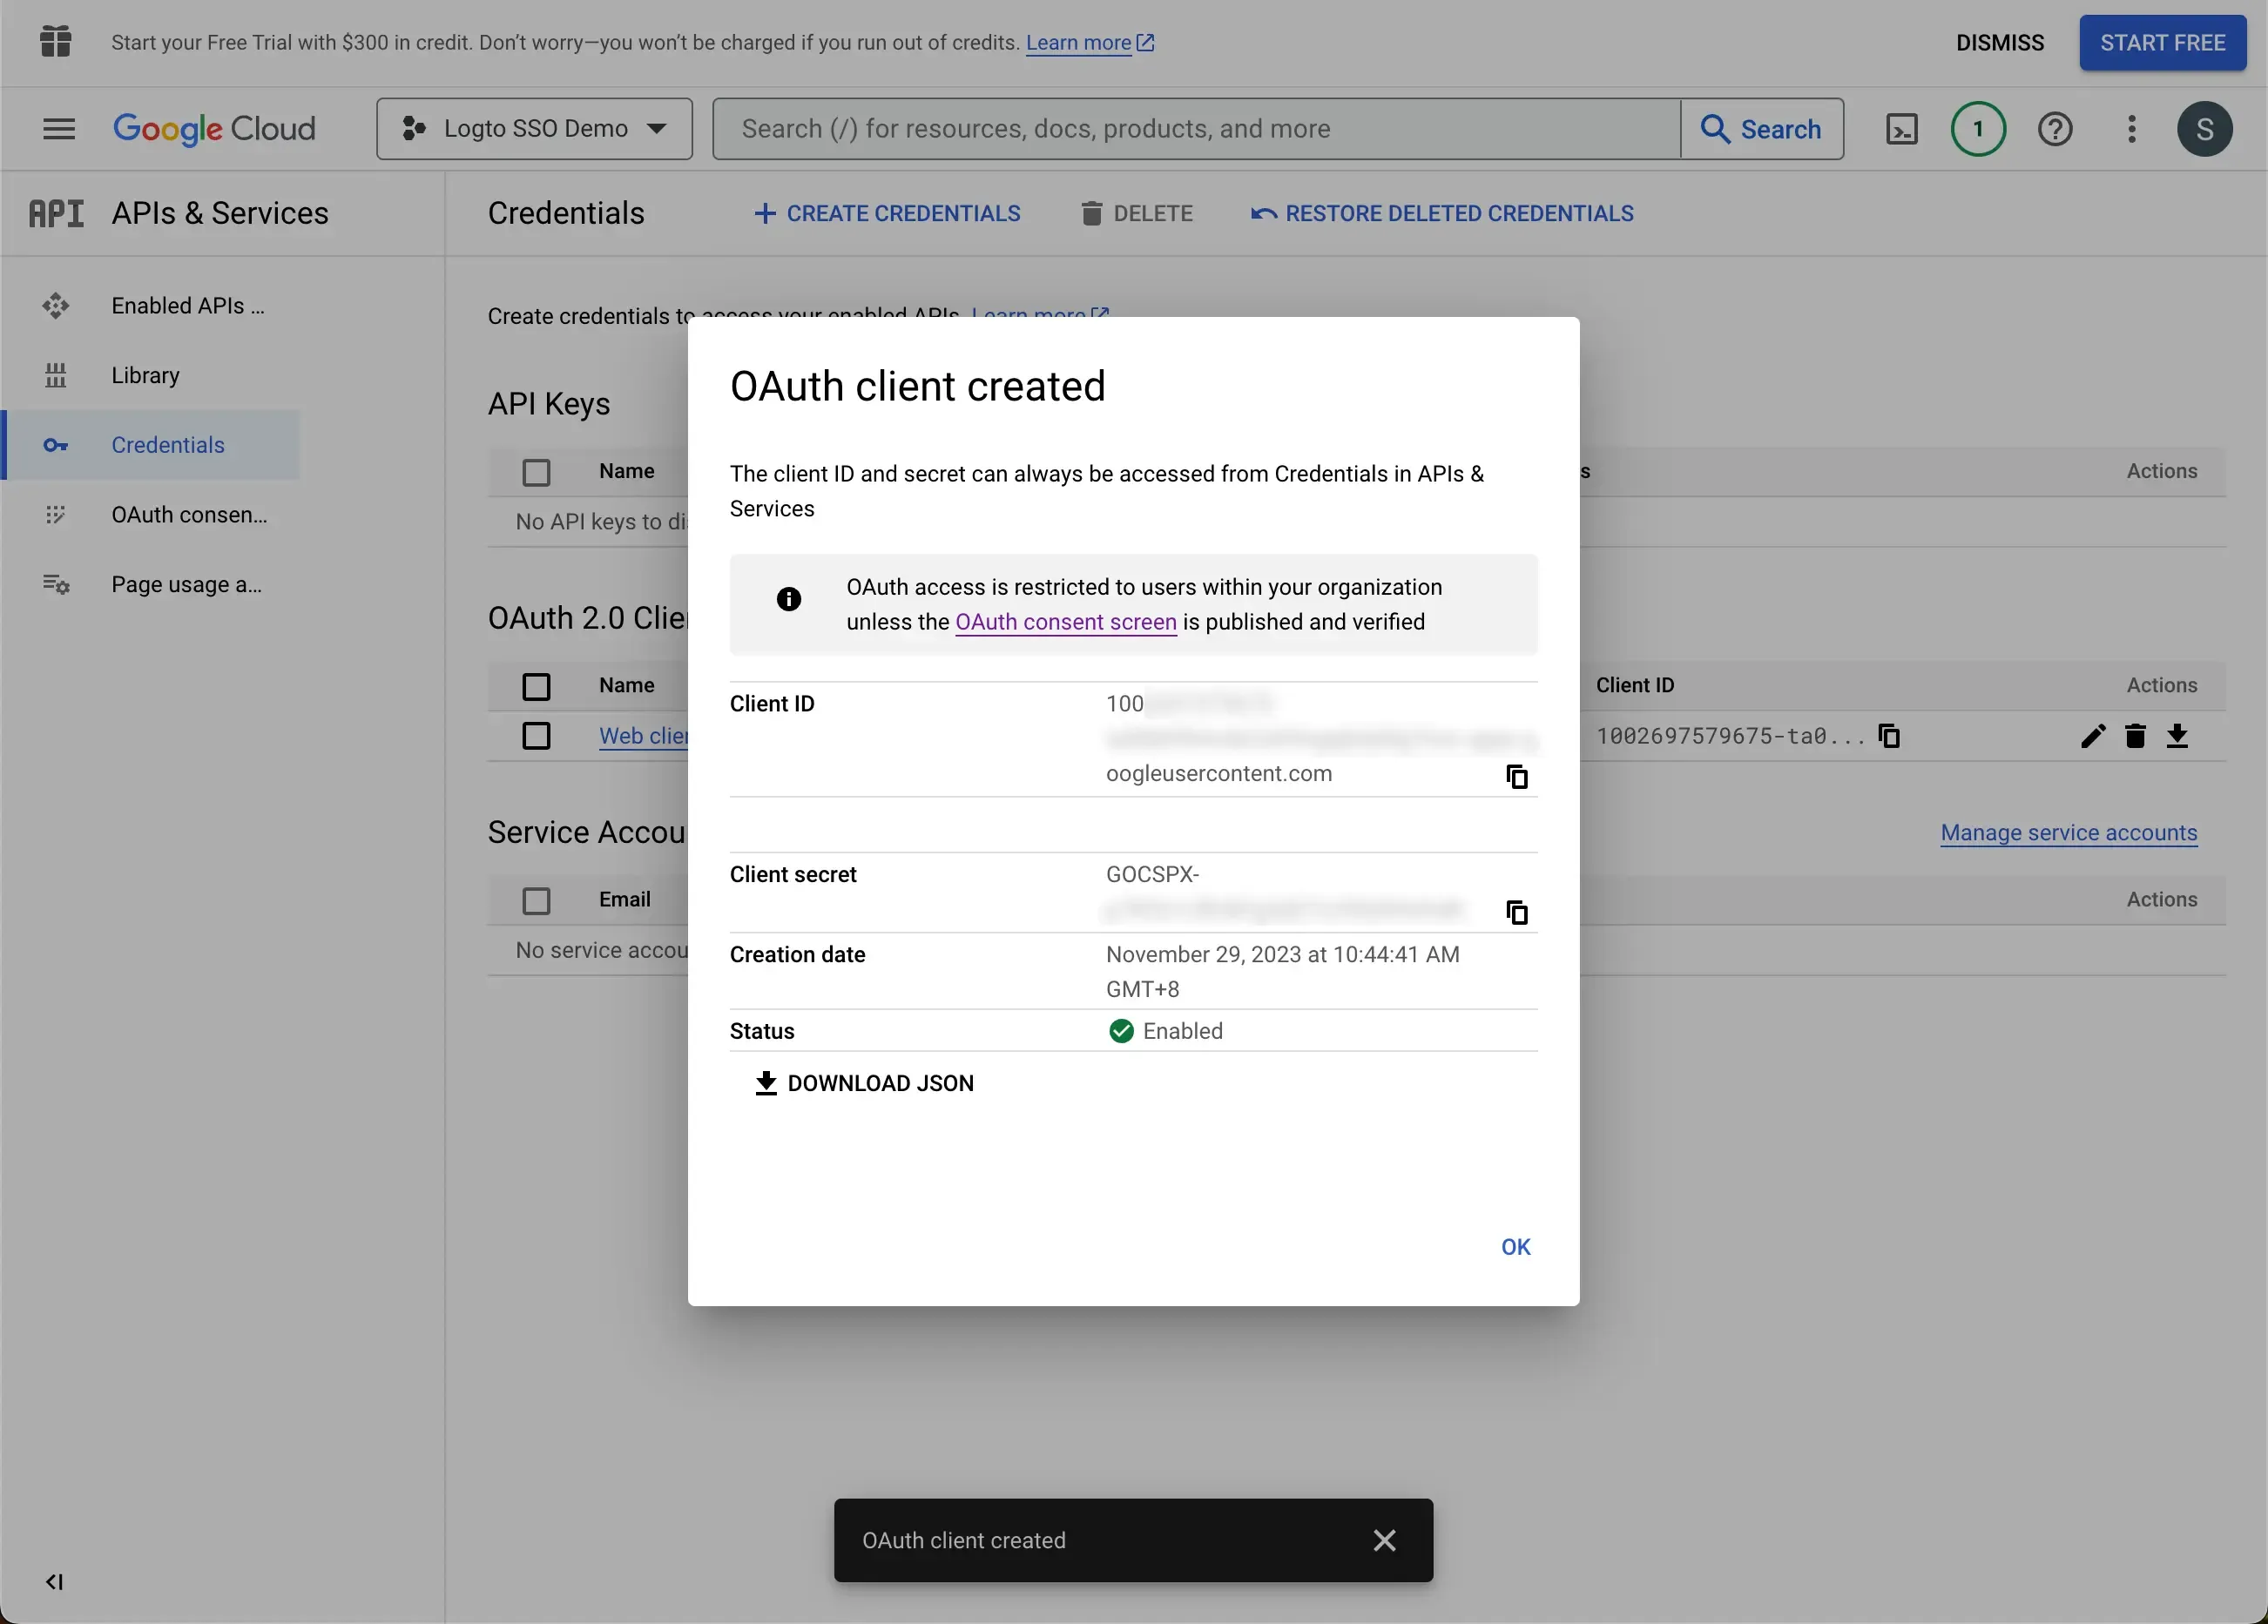
Click the Create button to finish the OAuth client credential creation.
Configure the Google Workspace SSO connector in Logto
- Copy the Client ID and Client Secret from the Google Workspace OAuth client credential page and paste them into the Logto Google Workspace SSO connector form. Click the Save button to finish the SSO connector creation.
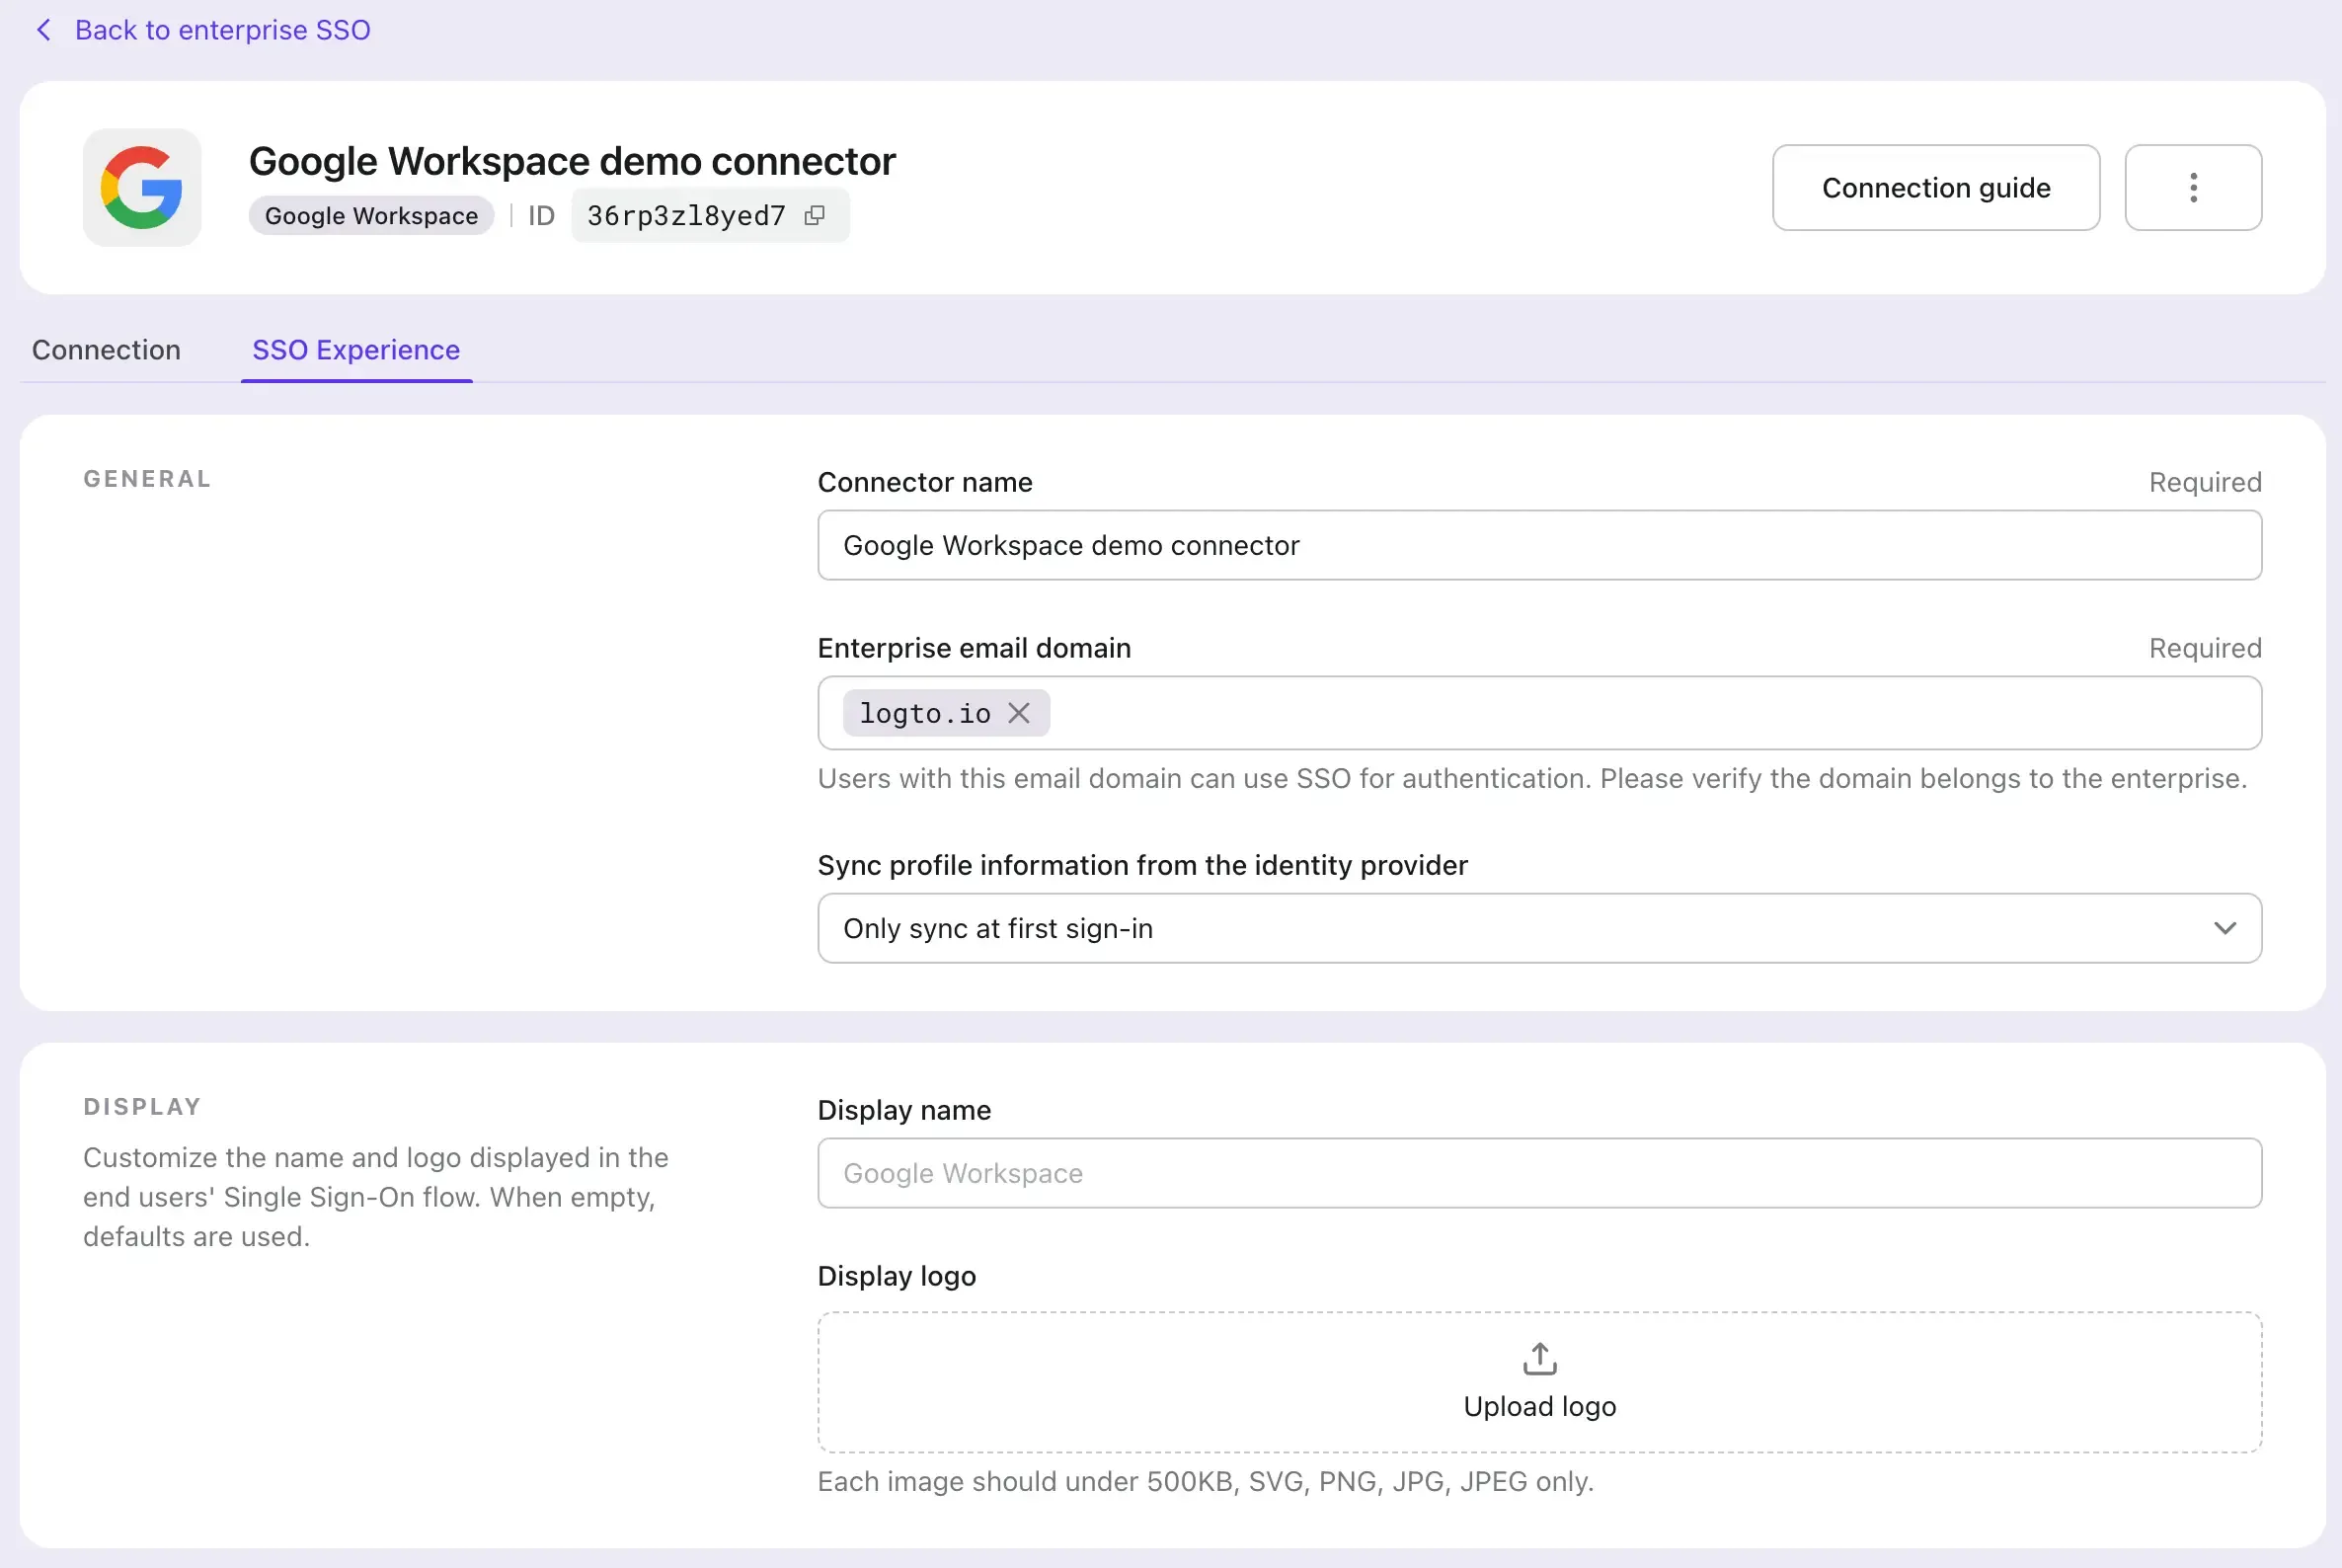
- Navigate to the SSO Experience tab on your Logto Google Workspace SSO connector page and fill in the Enterprise email domain field. This will enable the SSO connector as an authentication method for those users. For example, if you fill in
logto.ioas the enterprise email domain, all the users with an email address ends with@logto.iowill be restricted to use the Google Workspace SSO connector to sign in to the Logto application.
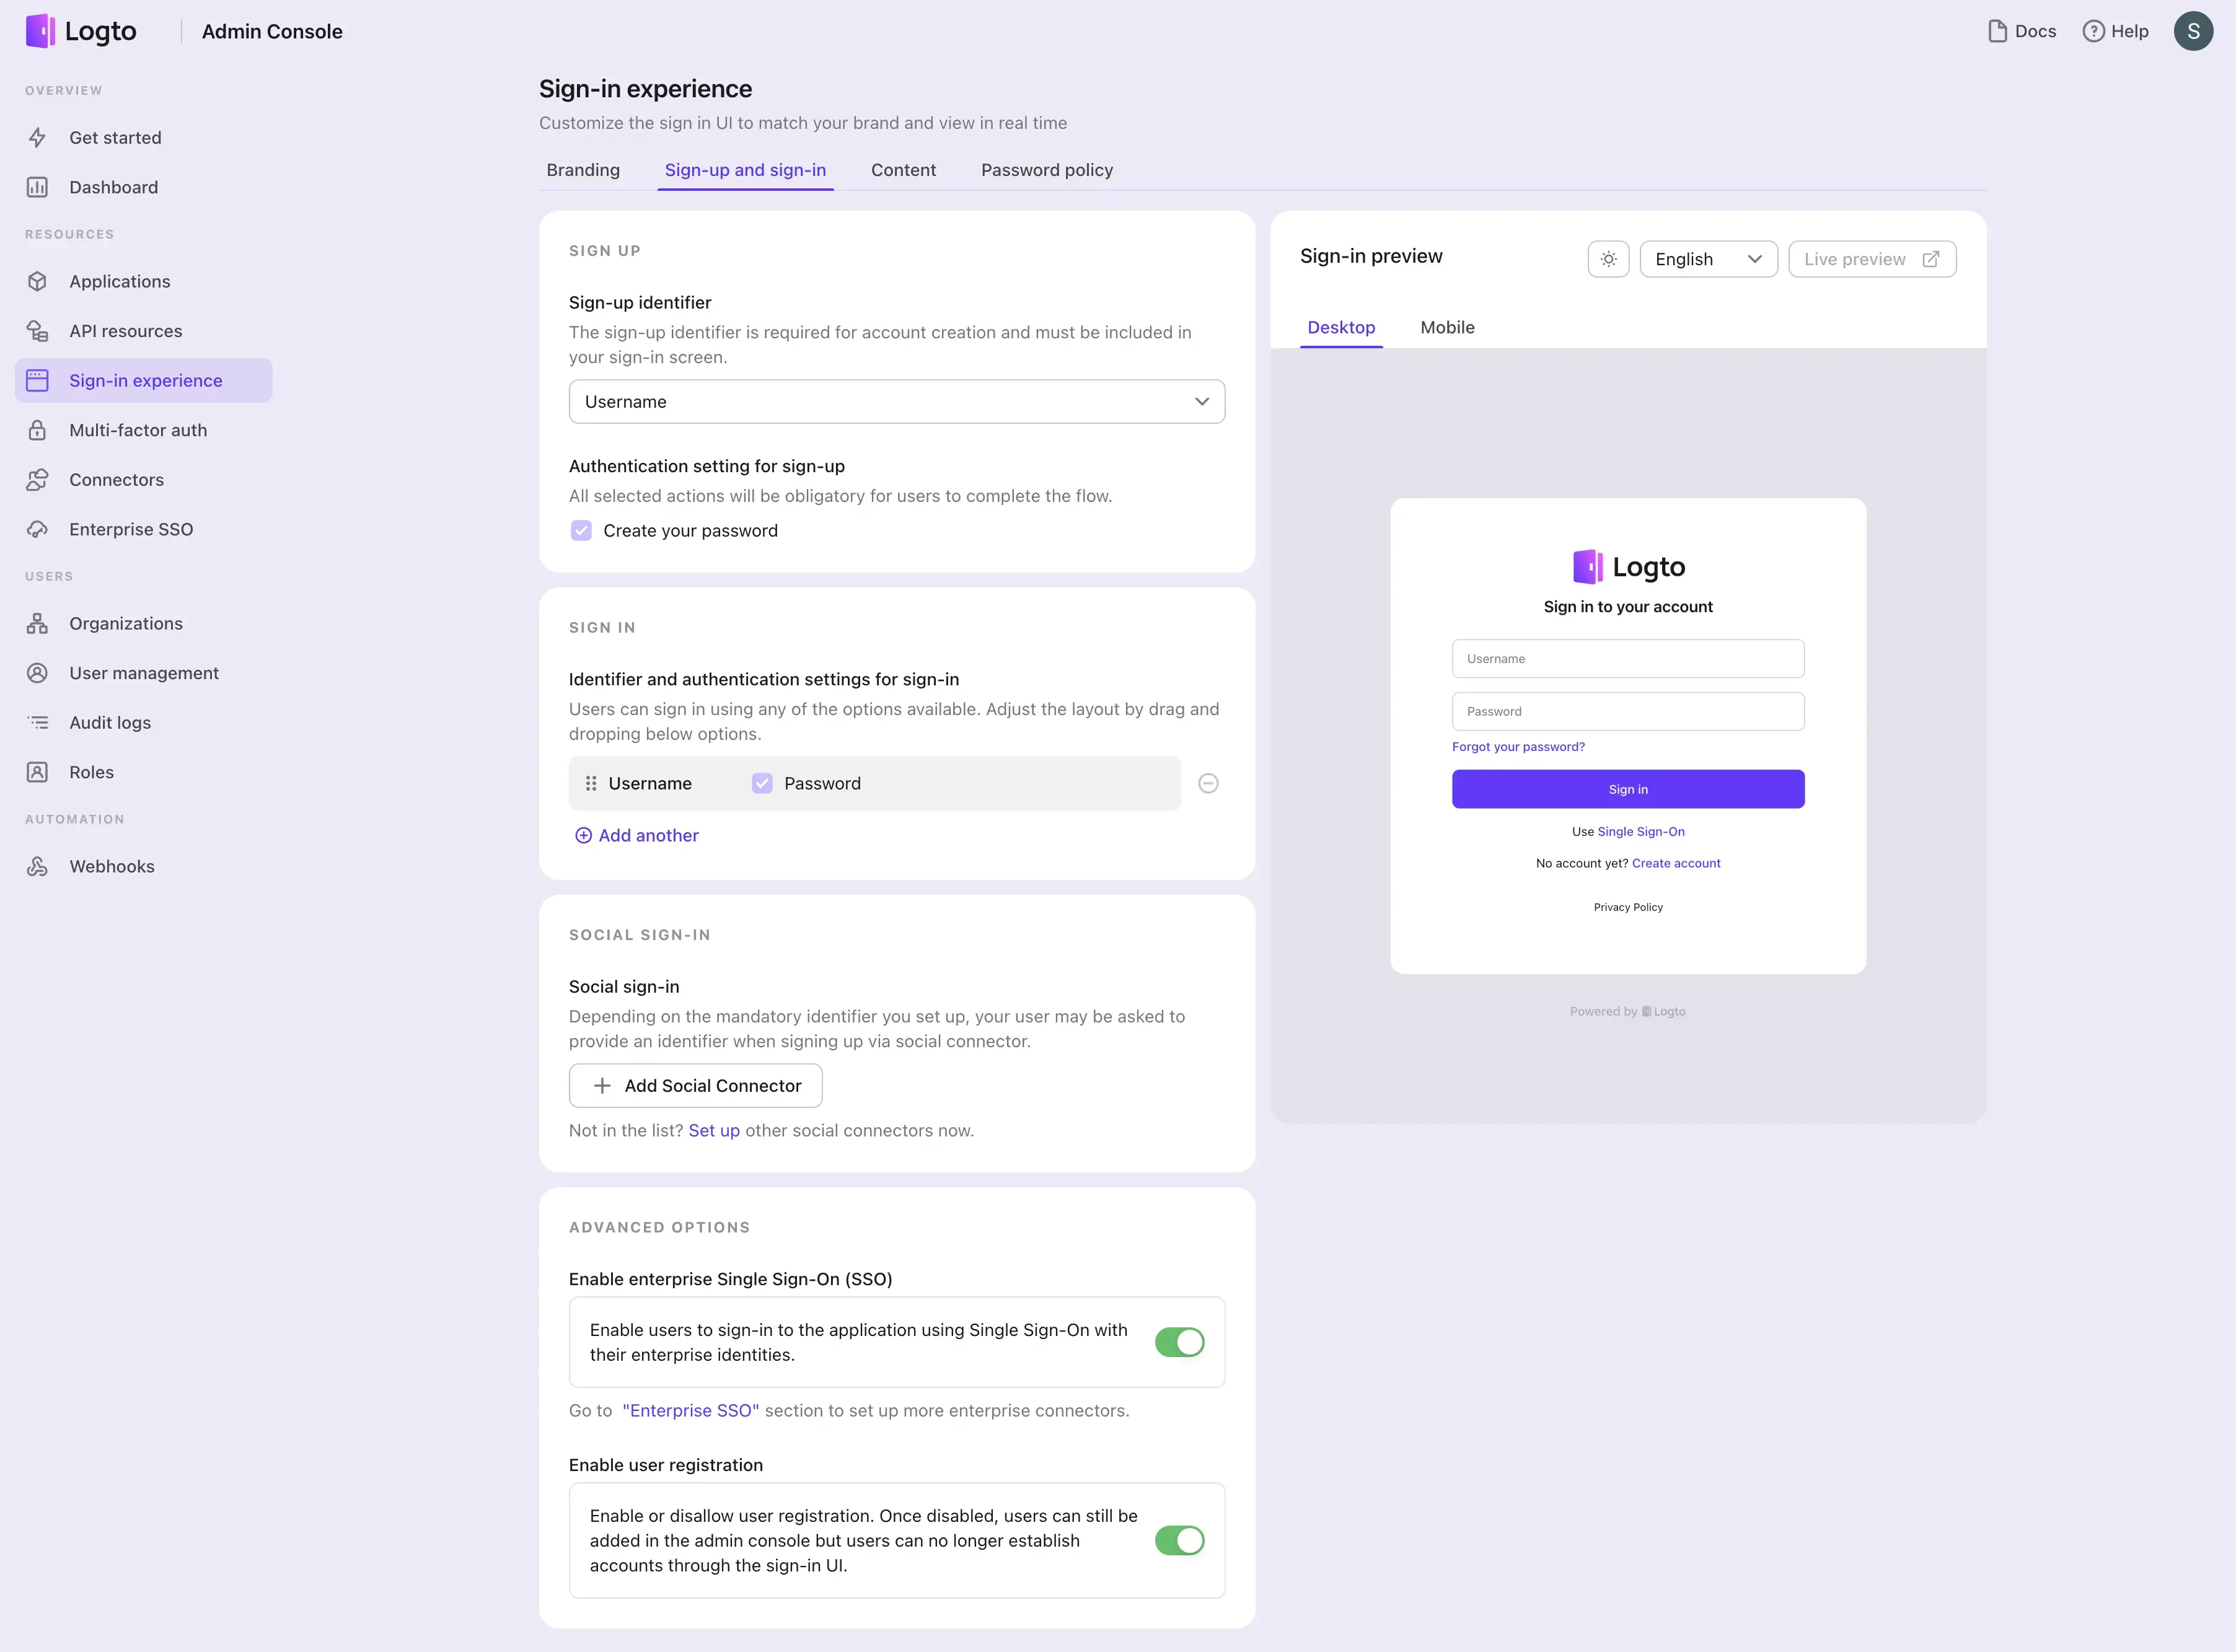
Enable the SSO in Logto's sign-in experience
- Navigate to the Sign-in Experience page.
- Click on the Sign-up and sign-in tab.
- Scroll down to the ADVANCED OPTIONS section and enable the Enterprise SSO toggle.
Test the SSO integration
Use the sign-in experience live preview to test the SSO integration. You can find the live preview button at the top right corner of the Sign-in Experience preview section.
A successful SSO integration will redirect the user to the Google sign-in page. After the user successfully signed in, the user will be redirected back to the Logto's demo App.