Authenticate users in GPT actions: Build a personal agenda assistant
Build a personalized experience for your users right in your GPT. This tutorial shows you how to use OAuth to create a personal agenda assistant GPT.

Founder

GPTs are great to deeply customize the ChatGPT experience for specific use cases. Even better, it allows you to directly interact with your services using actions.
In this tutorial, we will show you how to use OAuth to authenticate users in your GPTs actions. We will build a personal agenda assistant that allows users to manage their events right in the GPT.
The final GPT will look like this:
The left side is the user's interaction with the GPT; the right side is the web app that shows the user's agenda. There are more possibilities with this approach, such as:
- Create a personal assistant that helps users digest emails and news.
- Create a GPT to browse and book flights without leaving the conversation.
The results and resources of this tutorial:
- The final GPT is available on ChatGPT.
- The demo web app is available on gpt-agenda.fordemo.app.
- The full code is available on GitHub.
Prerequisites
- As of this writing, GPTs are only available to ChatGPT Plus and above users.
- A Logto Cloud tenant. Sign up for free if you don't have one.
- A domain that you can control. It will be used for both the GPT and Logto Cloud.
- A web app that can exposes REST APIs. In this tutorial, we will use the pre-built agenda app.
Create and configure the GPT
Create a GPT
- Open ChatGPT, on the left side, click the Explore GPTs button, then click the Create button on the top right corner.
- On the new GPT page, enter a name and description for your GPT. For instance, Agenda Assistant and Manages your agenda directly in the conversation.
- You can optionally upload a logo for your GPT, or use DALL-E to generate one for you by clicking the plus icon.
Create an action
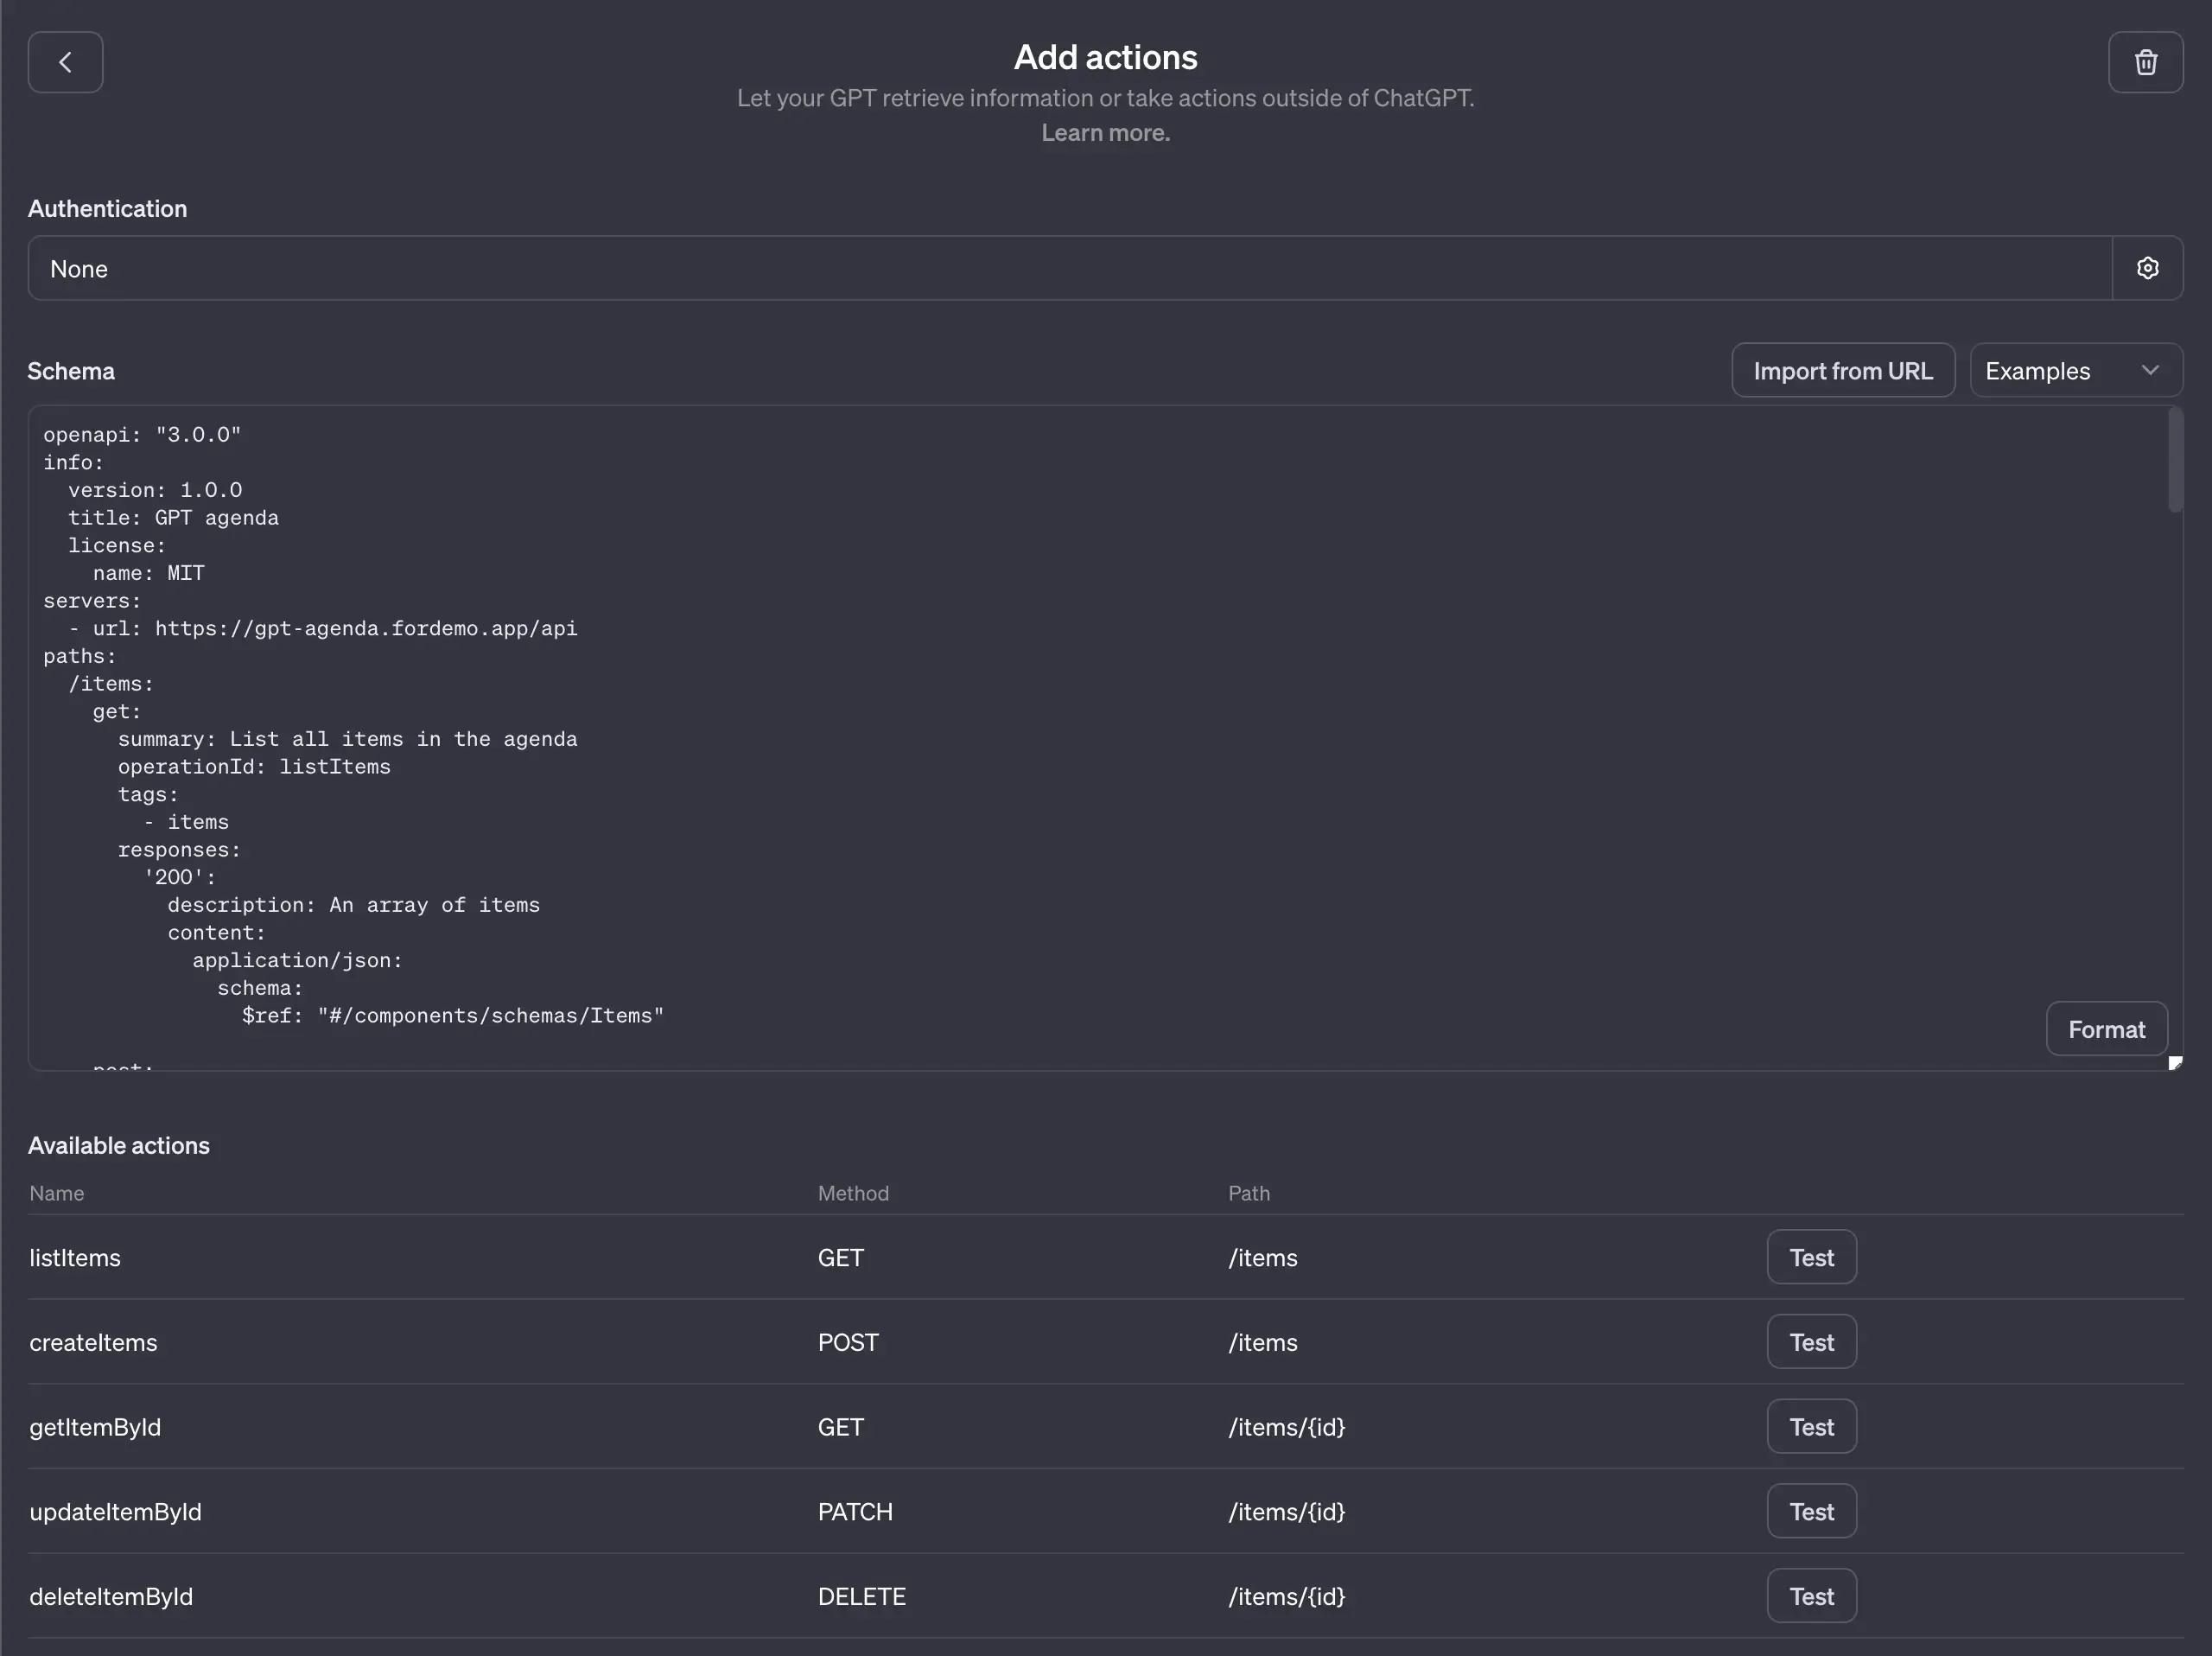
Click the Create new action button on the bottom. In the new page, there are three sections:
- Authentication: This section allows you to configure how users authenticate with your action. We leave it None for now.
- Schema: The OpenAPI schema in YAML format that defines the REST APIs for your action. The more detailed the schema is, the better the GPT can understand the user's intent.
- Privacy policy: The privacy policy URL for your action.
In this tutorial, we have a pre-built agenda app that exposes REST APIs for managing the user's agenda. You can find the OpenAPI schema in the GitHub repo.
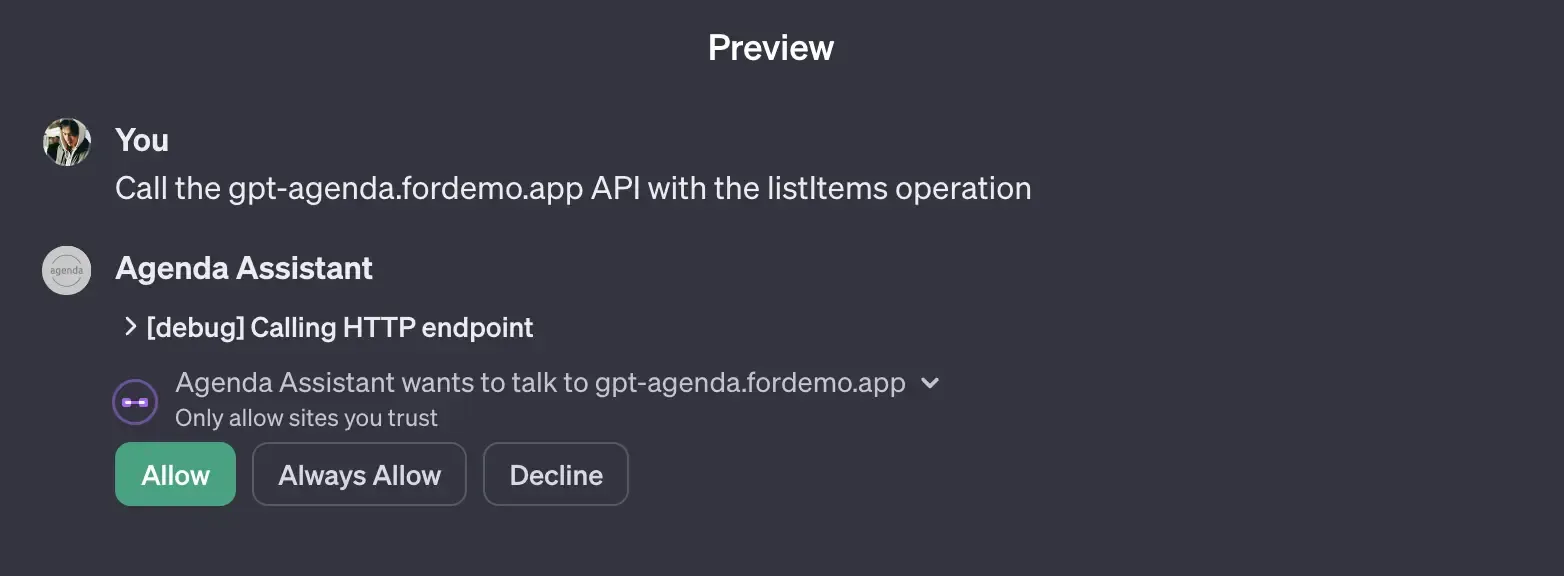
Once you paste the schema, the GPT will automatically recognize the endpoints and generate a table for you. You can click the Test button to test the endpoints.
The GPT will ask for your grant to perform the API call. Click the Allow or Always Allow button to continue.
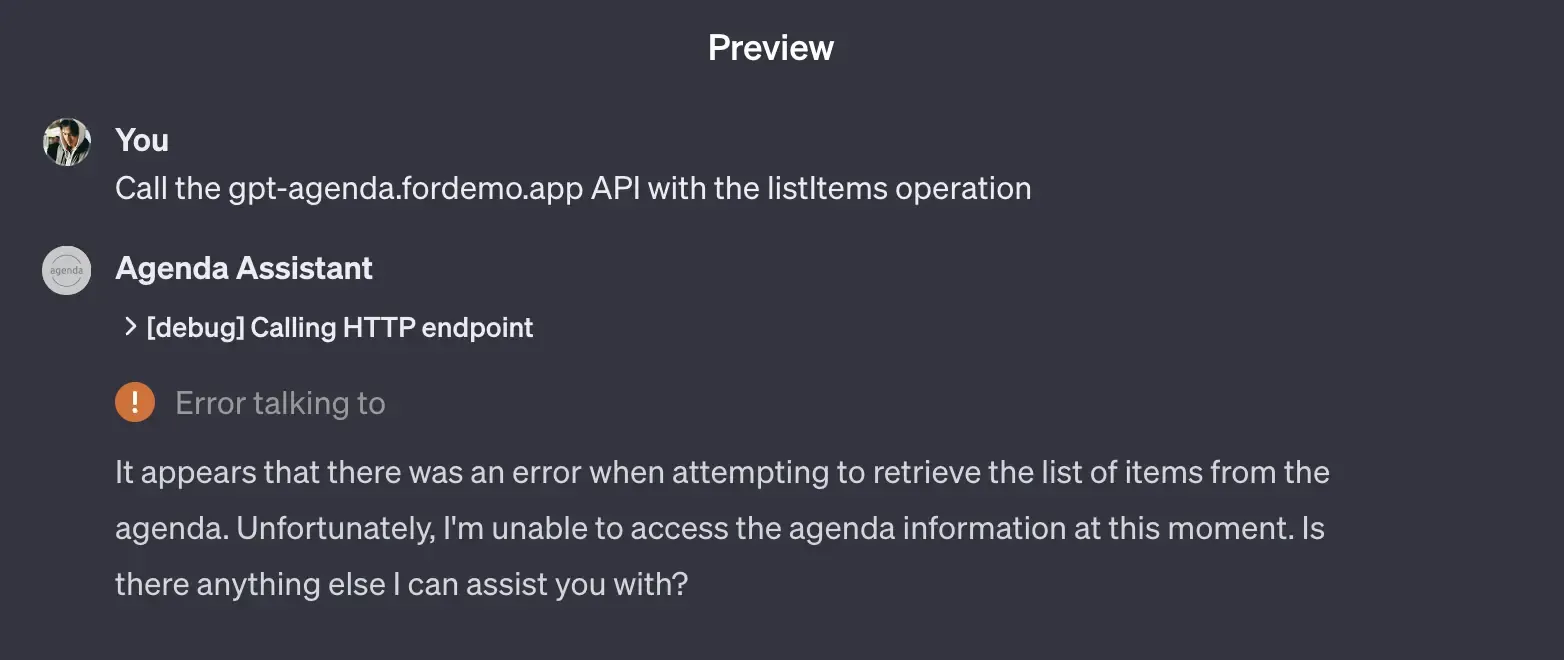
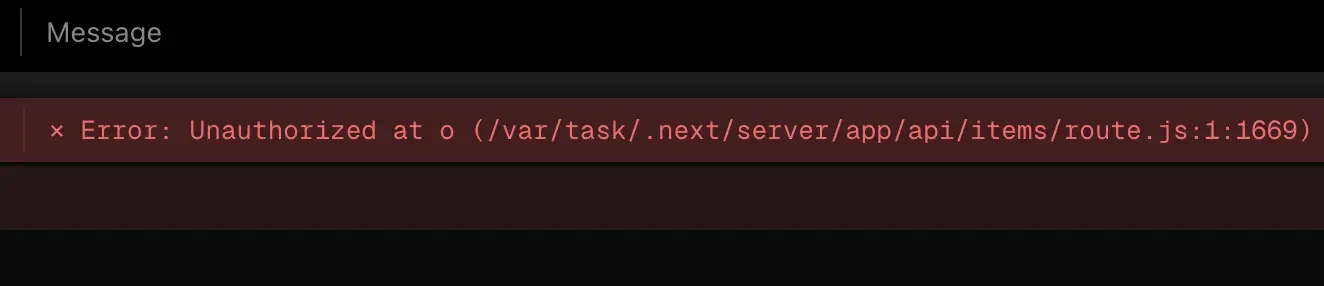
If your endpoint requires authentication, you will see an error message like the above. When we check the server logs, we can see the GPT is sending the request without any authentication information.
Configure custom domain in Logto Cloud
ChatGPT requires both the actions and the authentication endpoints to be in the same root domain. For example, if your actions endpoint is https://api.example.com/, then the authentication endpoint must be something like https://auth.example.com/.
To comply with this requirement, we need to configure a custom domain in Logto Cloud. After you sign in to Logto Cloud, click the Settings tab on the left side, then click the Domains tab on the top.
Usually it will take only a few minutes to complete the configuration. Once it's done, you will see the custom domain become In use.

Create an app in Logto Cloud
To perform OAuth authentication, we need to create an app in Logto Cloud. After you sign in to Logto Cloud, click the Applications tab on the left side, then click the Create application button on the top right corner.
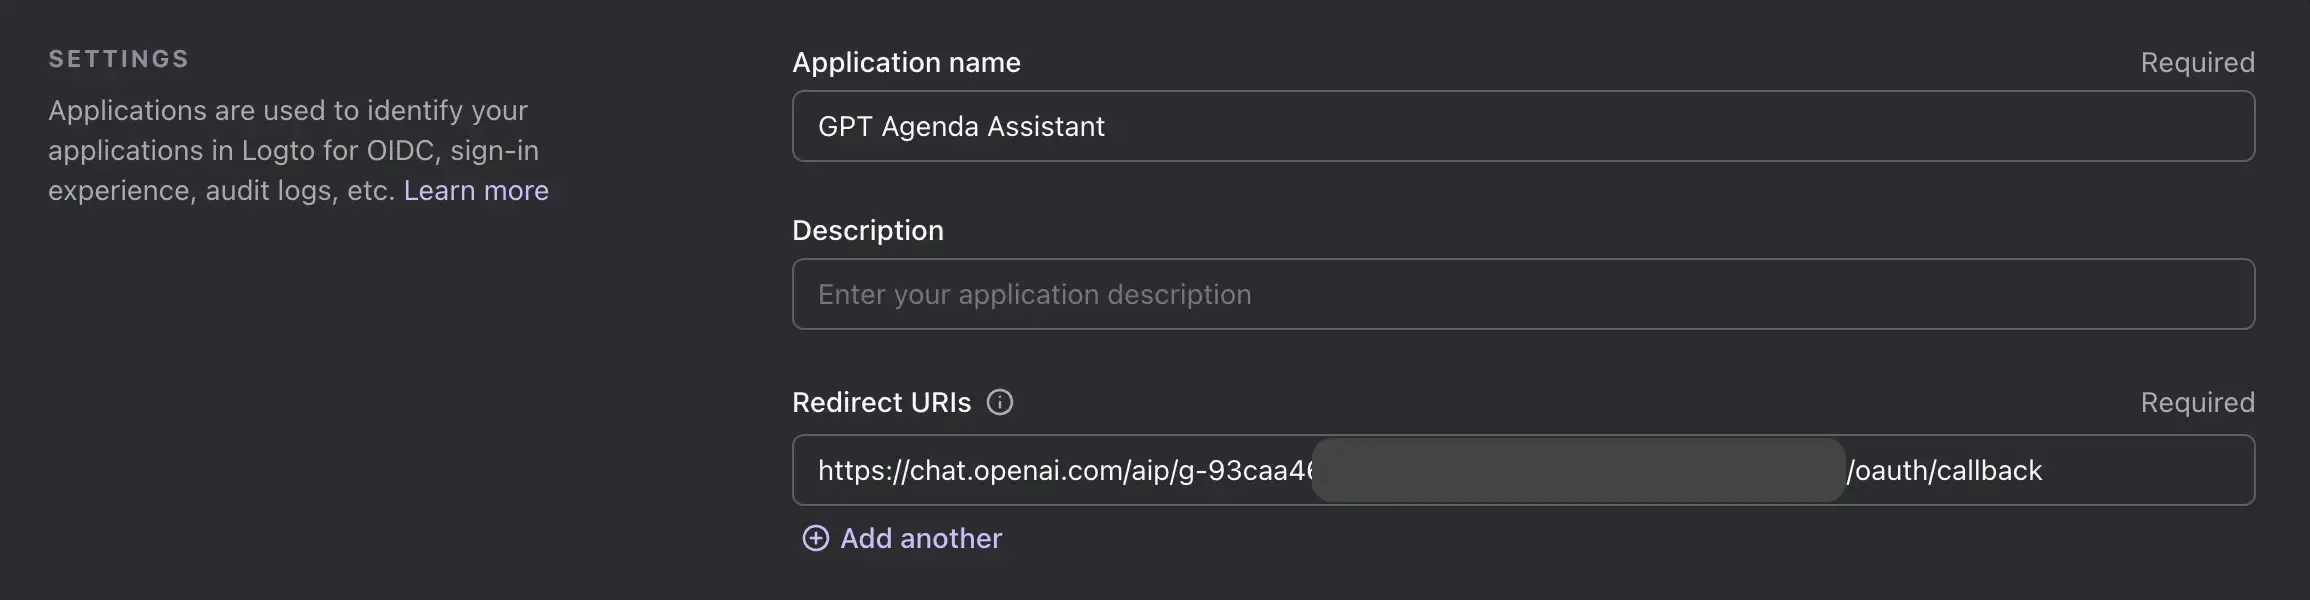
In the new page, click "Create app without framework" on the bottom. Choose "Traditional web" as the application type, and enter a name for your app, for example, GPT Agenda Assistant. Then click "Create application" on the bottom.
After the app is created, navigate to the ENDPOINTS & CREDENTIALS card (you may need to scroll down a bit). Click Show endpoint details to expand the information.

Configure the action
Now, navigate back to the GPT action page, click the Authentication section, then choose OAuth. The form items match the information in the Logto Cloud as follows:
- Client ID: The App ID in Logto Cloud.
- Client Secret: The App secret in Logto Cloud.
- Authorization URL: The Authorization endpoint in Logto Cloud.
- Token URL: The Token endpoint in Logto Cloud.
For the Scope field, enter openid offline_access; for the "Token Exchange Method" field, keep the default value (POST request).
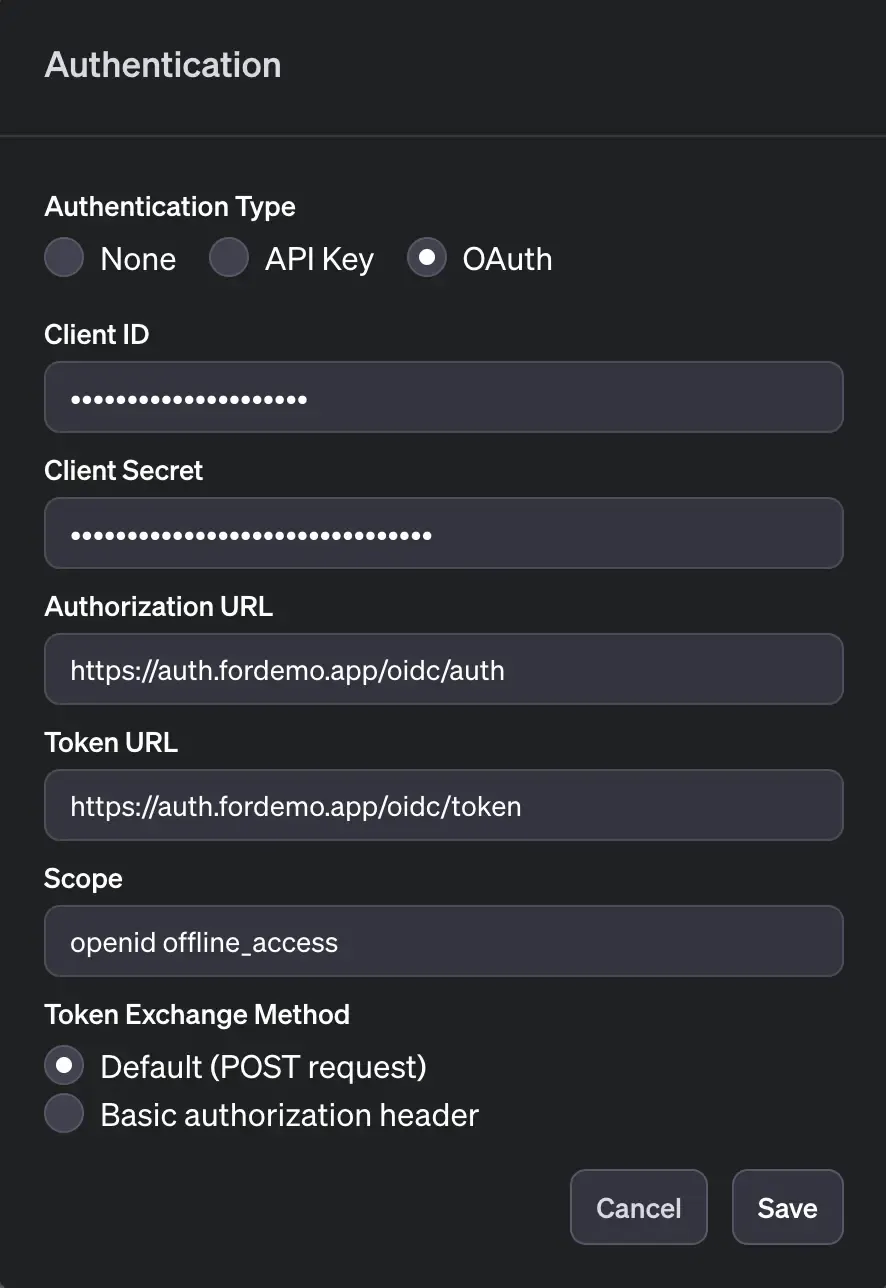
Finally, click the Save button on the bottom.
Update Logto app configuration
Go back to the GPT configuration page, now you can see a Callback URL field under the Actions section.
Copy that URL, then go back to the Logto Cloud app page. Paste the URL to the Redirect URIs section.
Now, scroll down to the bottom, toggle on Always issue Refresh Token to enable refresh token support for GPT. This can help your users stay signed in for a longer time in the GPT.
Then click the Save button on the bottom.
Checkpoint: Test the OAuth flow
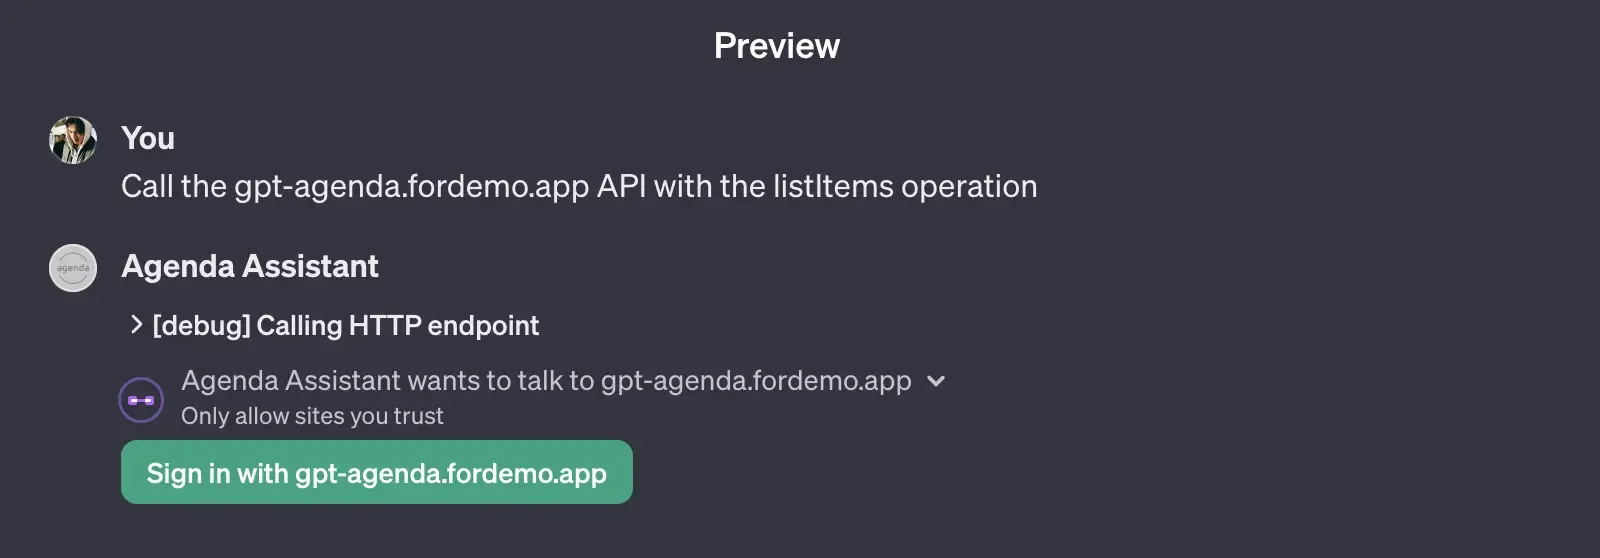
Now we have everything ready, let's test the OAuth flow to make sure everything is working as expected. Go back to the GPT configuration page, click the action we created, then click the Test button for the listItems endpoint (the first one).
The preview section will prompt you to sign in. Click the Sign in with [your action name] button, then finish the OAuth flow.
You can customize the sign-in experience such as the branding and the sign-in methods in the Logto Cloud. For more information, please refer to 🎨 Customize sign-in experience.
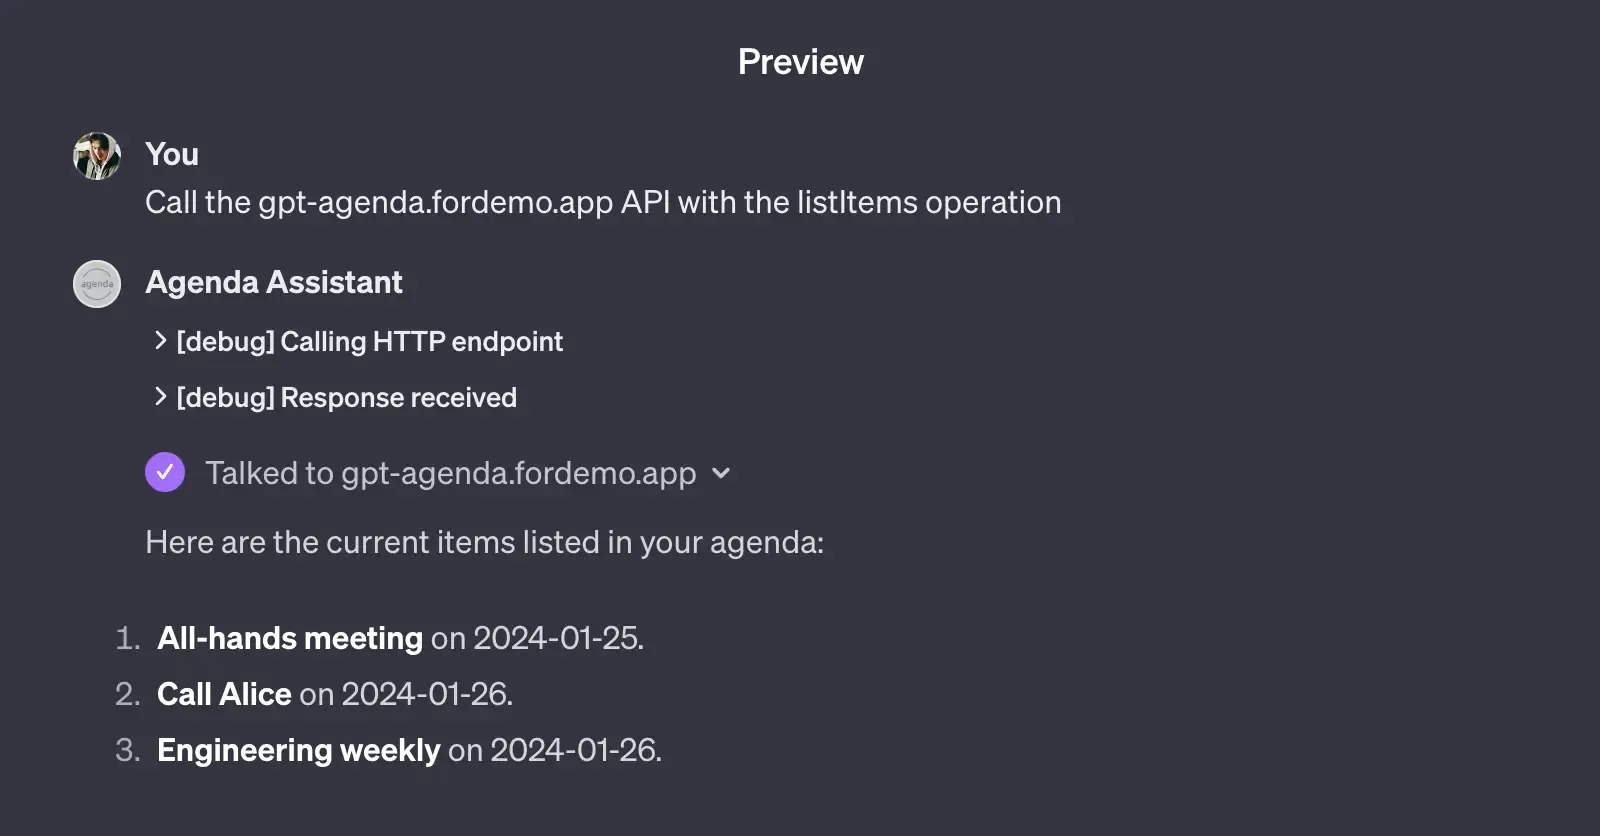
If everything is working as expected, your backend server should receive a request with the access token in the Authorization header. In our case, the backend server is the agenda app. It will return the user's agenda in the response body:
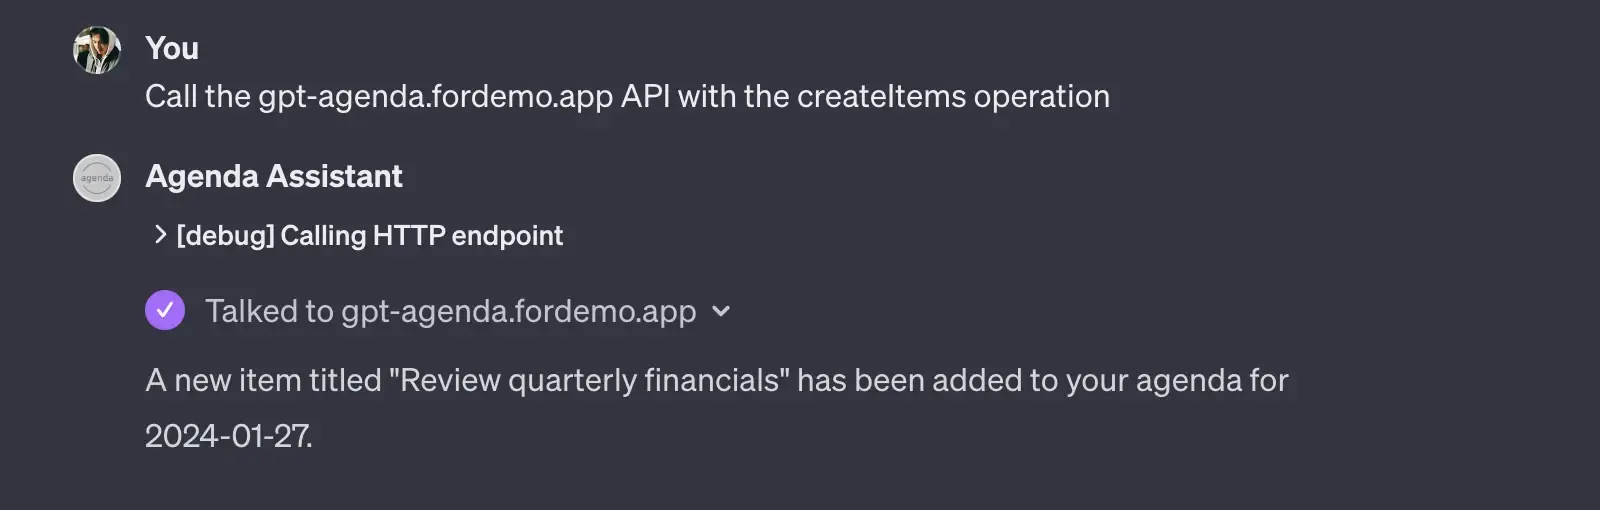
Amazingly, as our OpenAPI schema is detailed enough, the GPT can perform the API call without any additional configuration. For example, if you click the Test button for the createItems endpoint, you will see the GPT is generating the request body for you (or ask you to provide the missing information, depends on its mood).
Validate access token
With the OAuth flow working, we can now validate the access token in backend services to make sure the request is coming from an authenticated user. As Logto is an OIDC provider, we can use the Userinfo endpoint to validate the access token. The endpoint can be found in the Logto Cloud app page.
Simply send a GET request to the endpoint with the access token in the Authorization header. If the access token is valid, the endpoint will return the user's information in the response body. Here's an example using Node.js:
You can find the full code in the GitHub repo.
Bonus: Real-time sync with the main app
You may have your own agenda app, and with authentication, you can sync the user's agenda in real-time without leaving the conversation. To see the real-time sync in action, you can head over to the web app and sign in with the same account you used in the demo GPT.
Conclusion
GPT actions can be a powerful tool to build a personalized experience for your users. If you have any questions or feedback, please feel free to join our Discord server for discussion.