Logto x Hasura: Use JWT for access control
This comprehensive guide outlines the steps involved in integrating Logto with Hasura's JWT mode access control, effectively bolstering data security.

Developer

Hasura is a tool that can quickly provide corresponding GraphQL and REST APIs fit your data. Considering data security, Hasura also provides the ability to fine-tune access control for each different API.
Usually, Hasura users utilize other identity management and authentication services, Logto being a very popular one among them.
In this blog post, we will assume that you are already using Hasura services. We will introduce how to integrate Hasura and Logto to maximize the security of your data. If you do not have a Logto account, sign up and start using it now!
Background
Hasura employs role-based access management, while Logto uses the standard Role-based access control (RBAC).
In Logto's model and best practices for RBAC, we advise users to use scope to correspond to the finest granularity of permissions, use role as a bunch of scopes for convenient batch operations, and ultimately check scope (usually on resource providers’ side) to verify whether a user can perform a specific operation.
In Hasura, a role corresponds to the finest granularity of permissions, and permission checks are carried out against roles. Therefore, during the configuration of Logto, we recommend mapping one role to exactly one scope. This approach can link Logto's and Hasura's permissions together to avoid confusion and misuse.
Hasura can support access control using Webhooks or JWT. Our previous blog post introduced how to use Webhooks, and in the following sections, we will explain how to utilize Hasura's JWT mode access control.
Get started
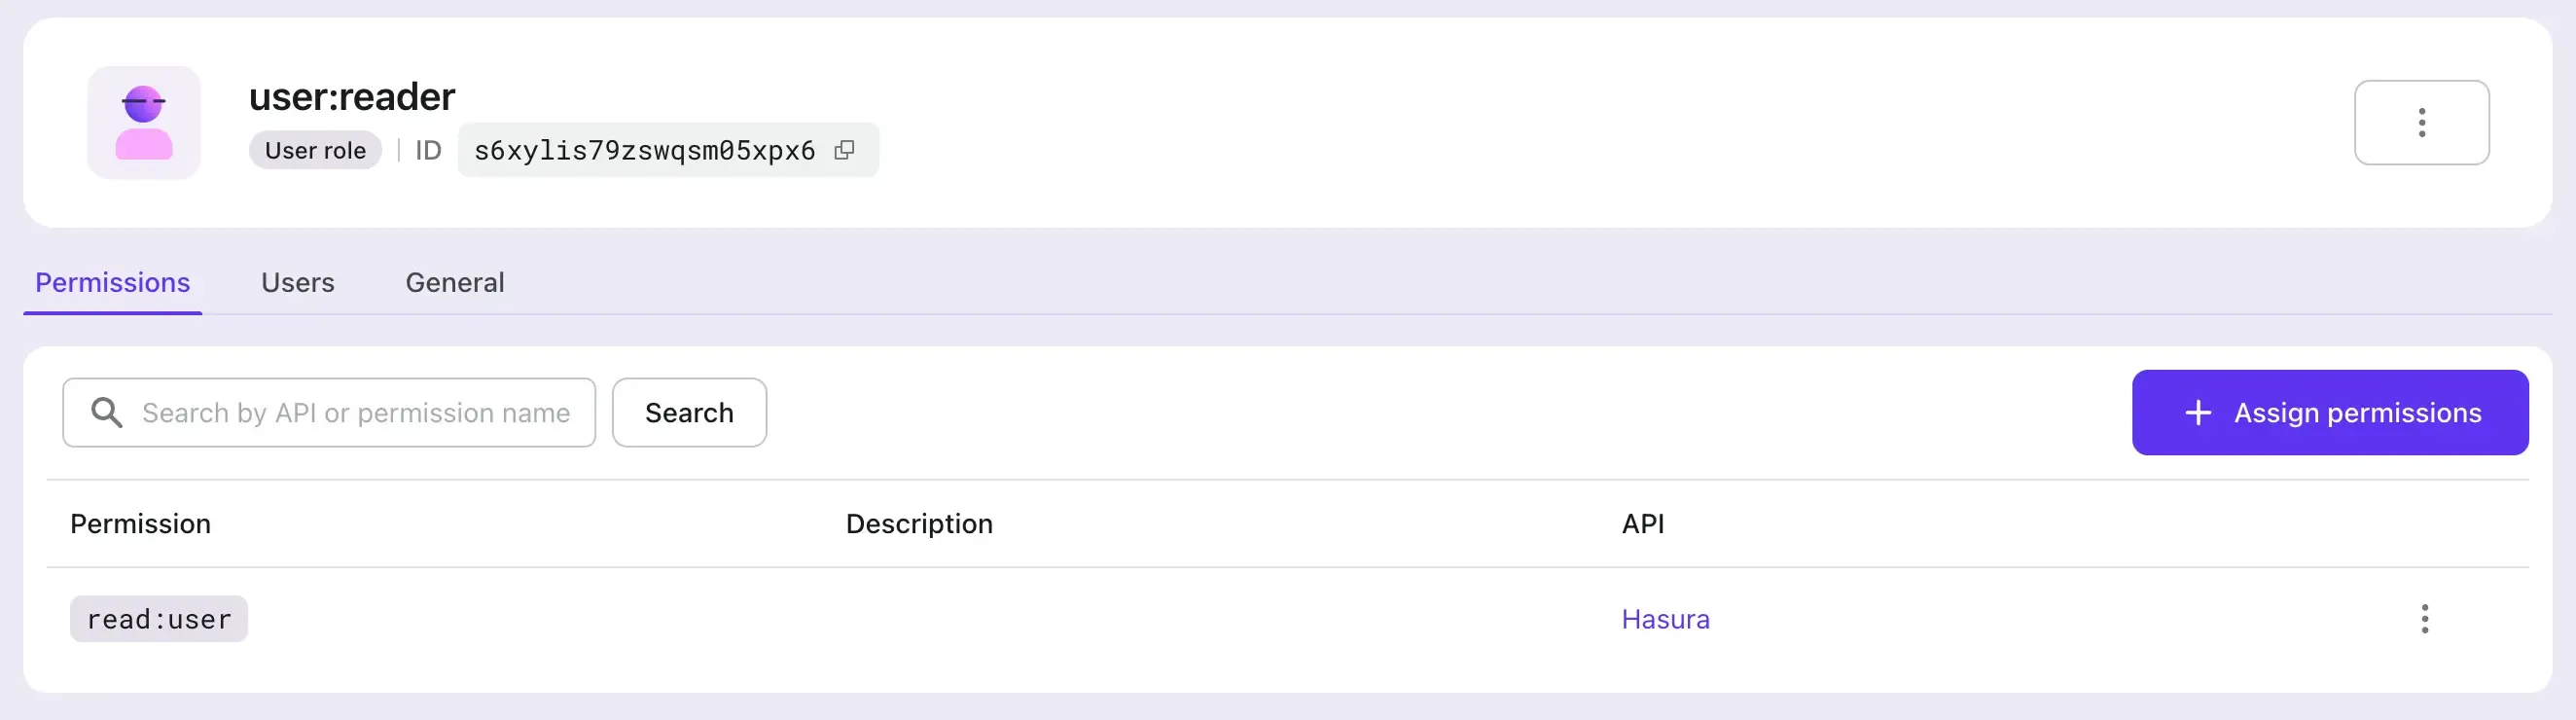
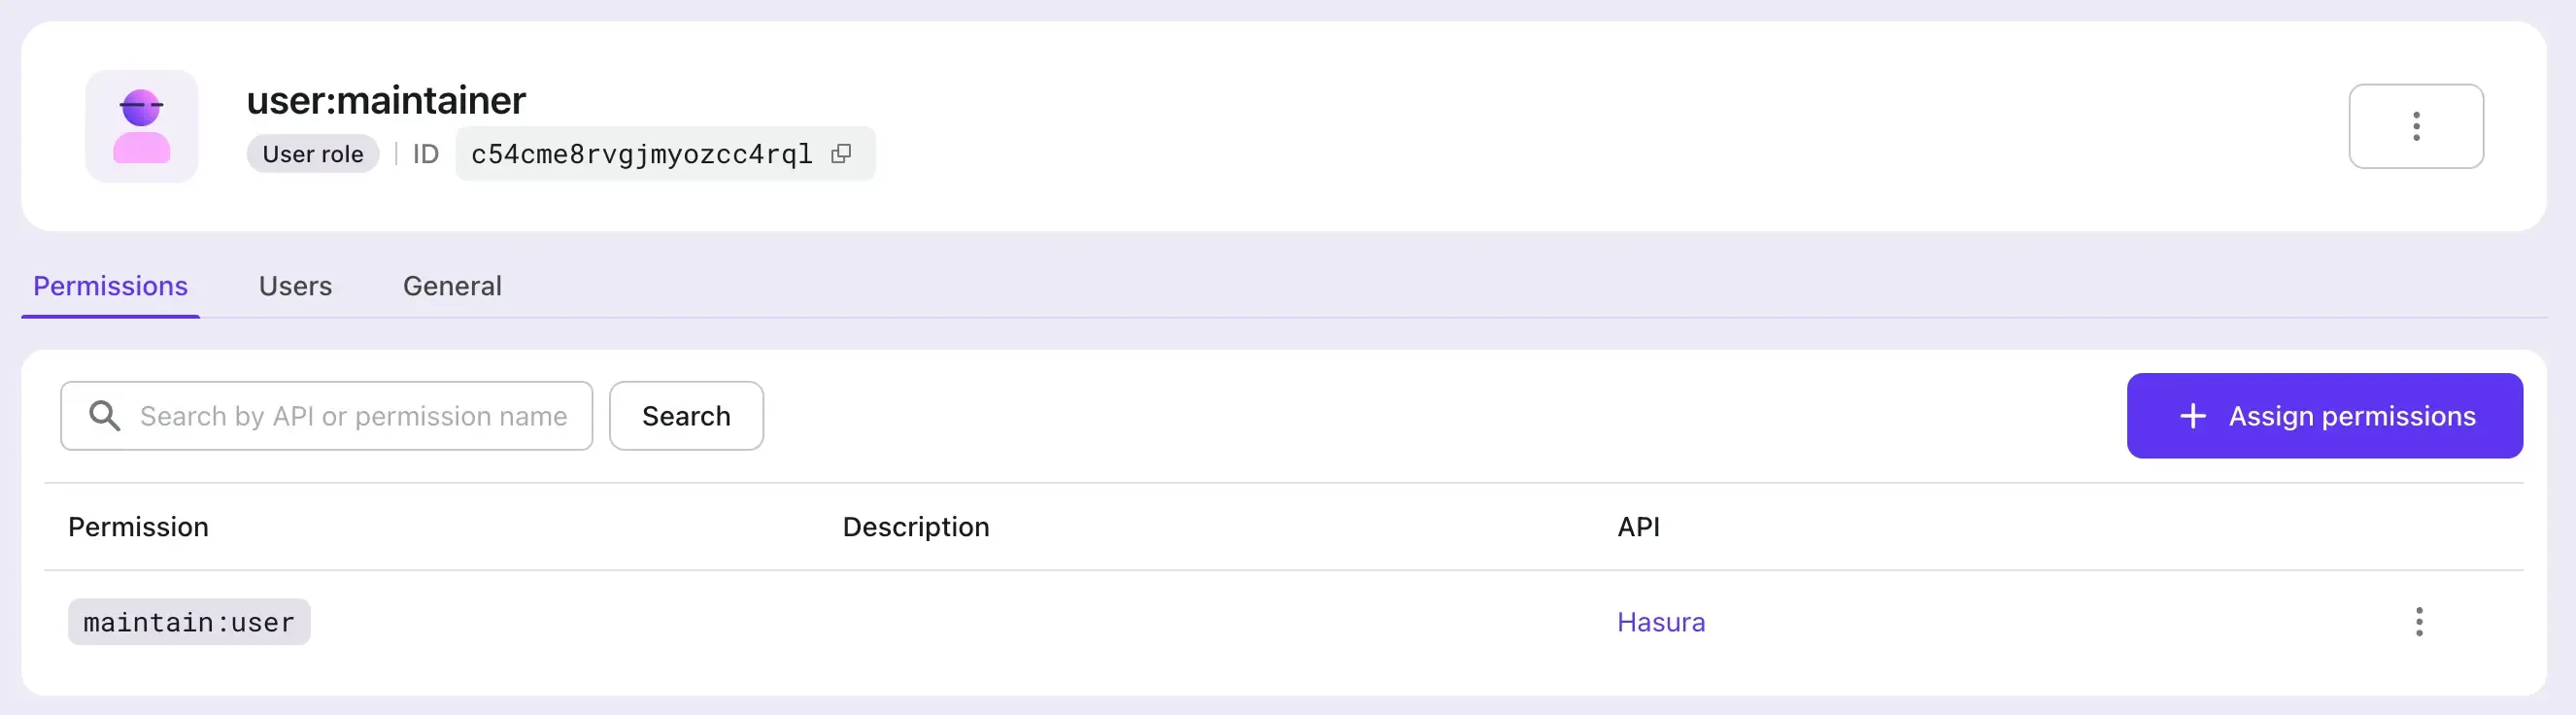
Let's start with a simple example. Suppose a user already has two APIs in Hasura, GET /user and PATCH /user, corresponding to two roles: user:reader and user:maintainer, respectively.
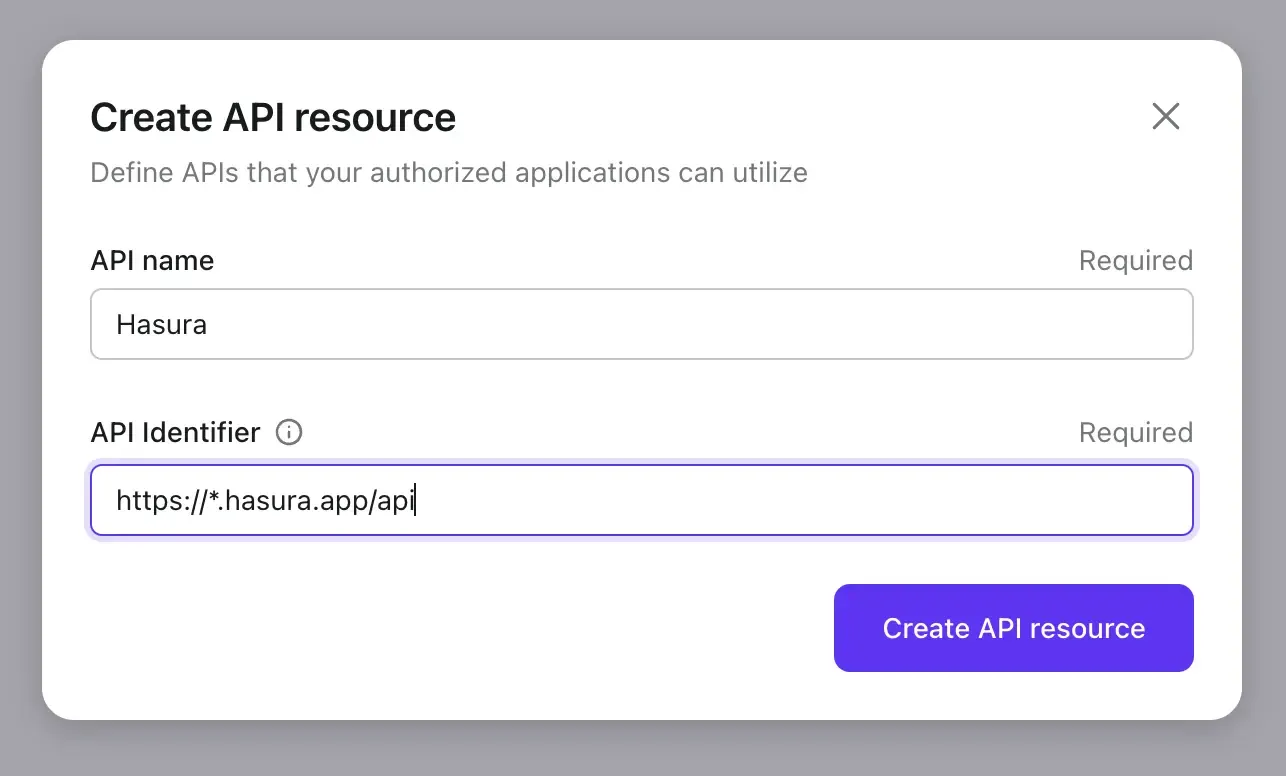
1. Create Hasura API resource in Logto
Create a Hasura API resource in Logto.
2. Create roles according to Hasura setup in Logto
We need to create two scopes for the Hasura API resource mentioned in step 1, namely read:user and maintain:user, and then create two roles: user:reader (containing the read:user scope) and user:maintainer (including the maintain:user scope) to correspond one-to-one with Hasura's roles. And assign these roles to Logto users as needed.

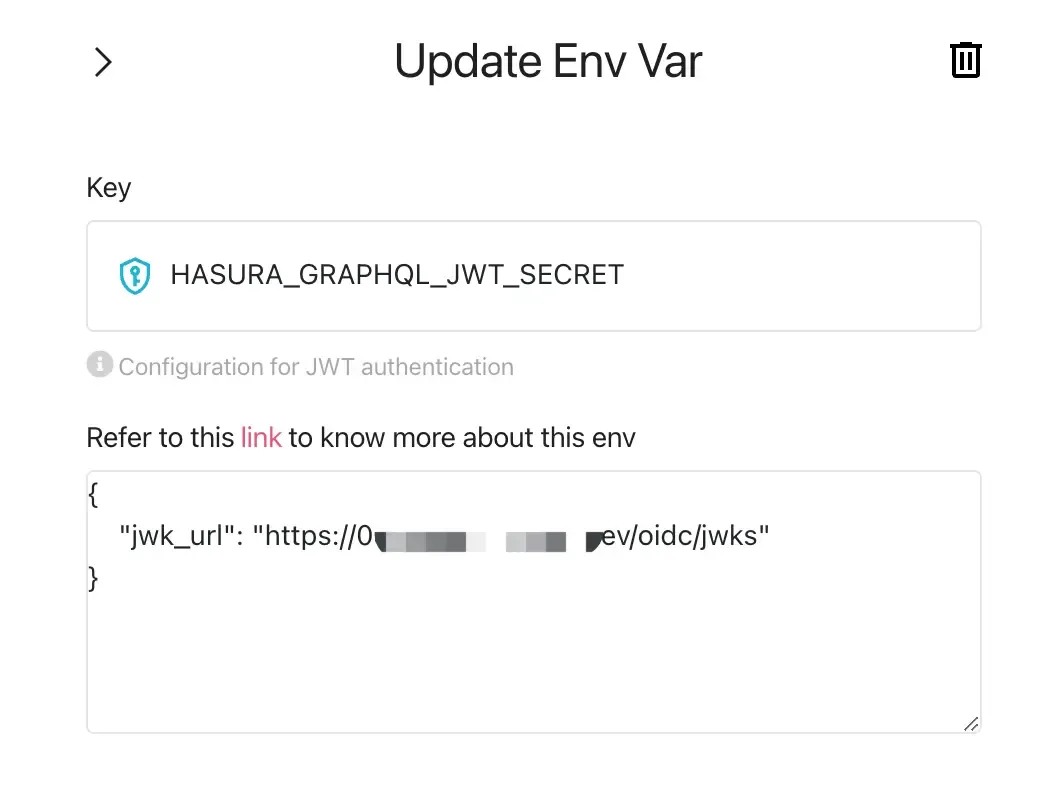
3. Configure Hasura environment variable HASURA_GRAPHQL_JWT_SECRET to enable JWT mode
By looking into Hasura JWT configuration options, we need to add and configure the environment variable HASURA_GRAPHQL_JWT_SECRET before we can use JWT for access control.
There are many different options that can be configured, but here we introduce the simplest case: only the jwk_url needs to be configured. This value can be obtained from your Logto's OpenID configuration endpoint (https://your.logto.domain/oidc/.well-known/openid-configuration).
4. Customize user access token extra claims
Using Logto's Custom JWT feature, customize the logic to add extra claims to the JWT-format user access token.
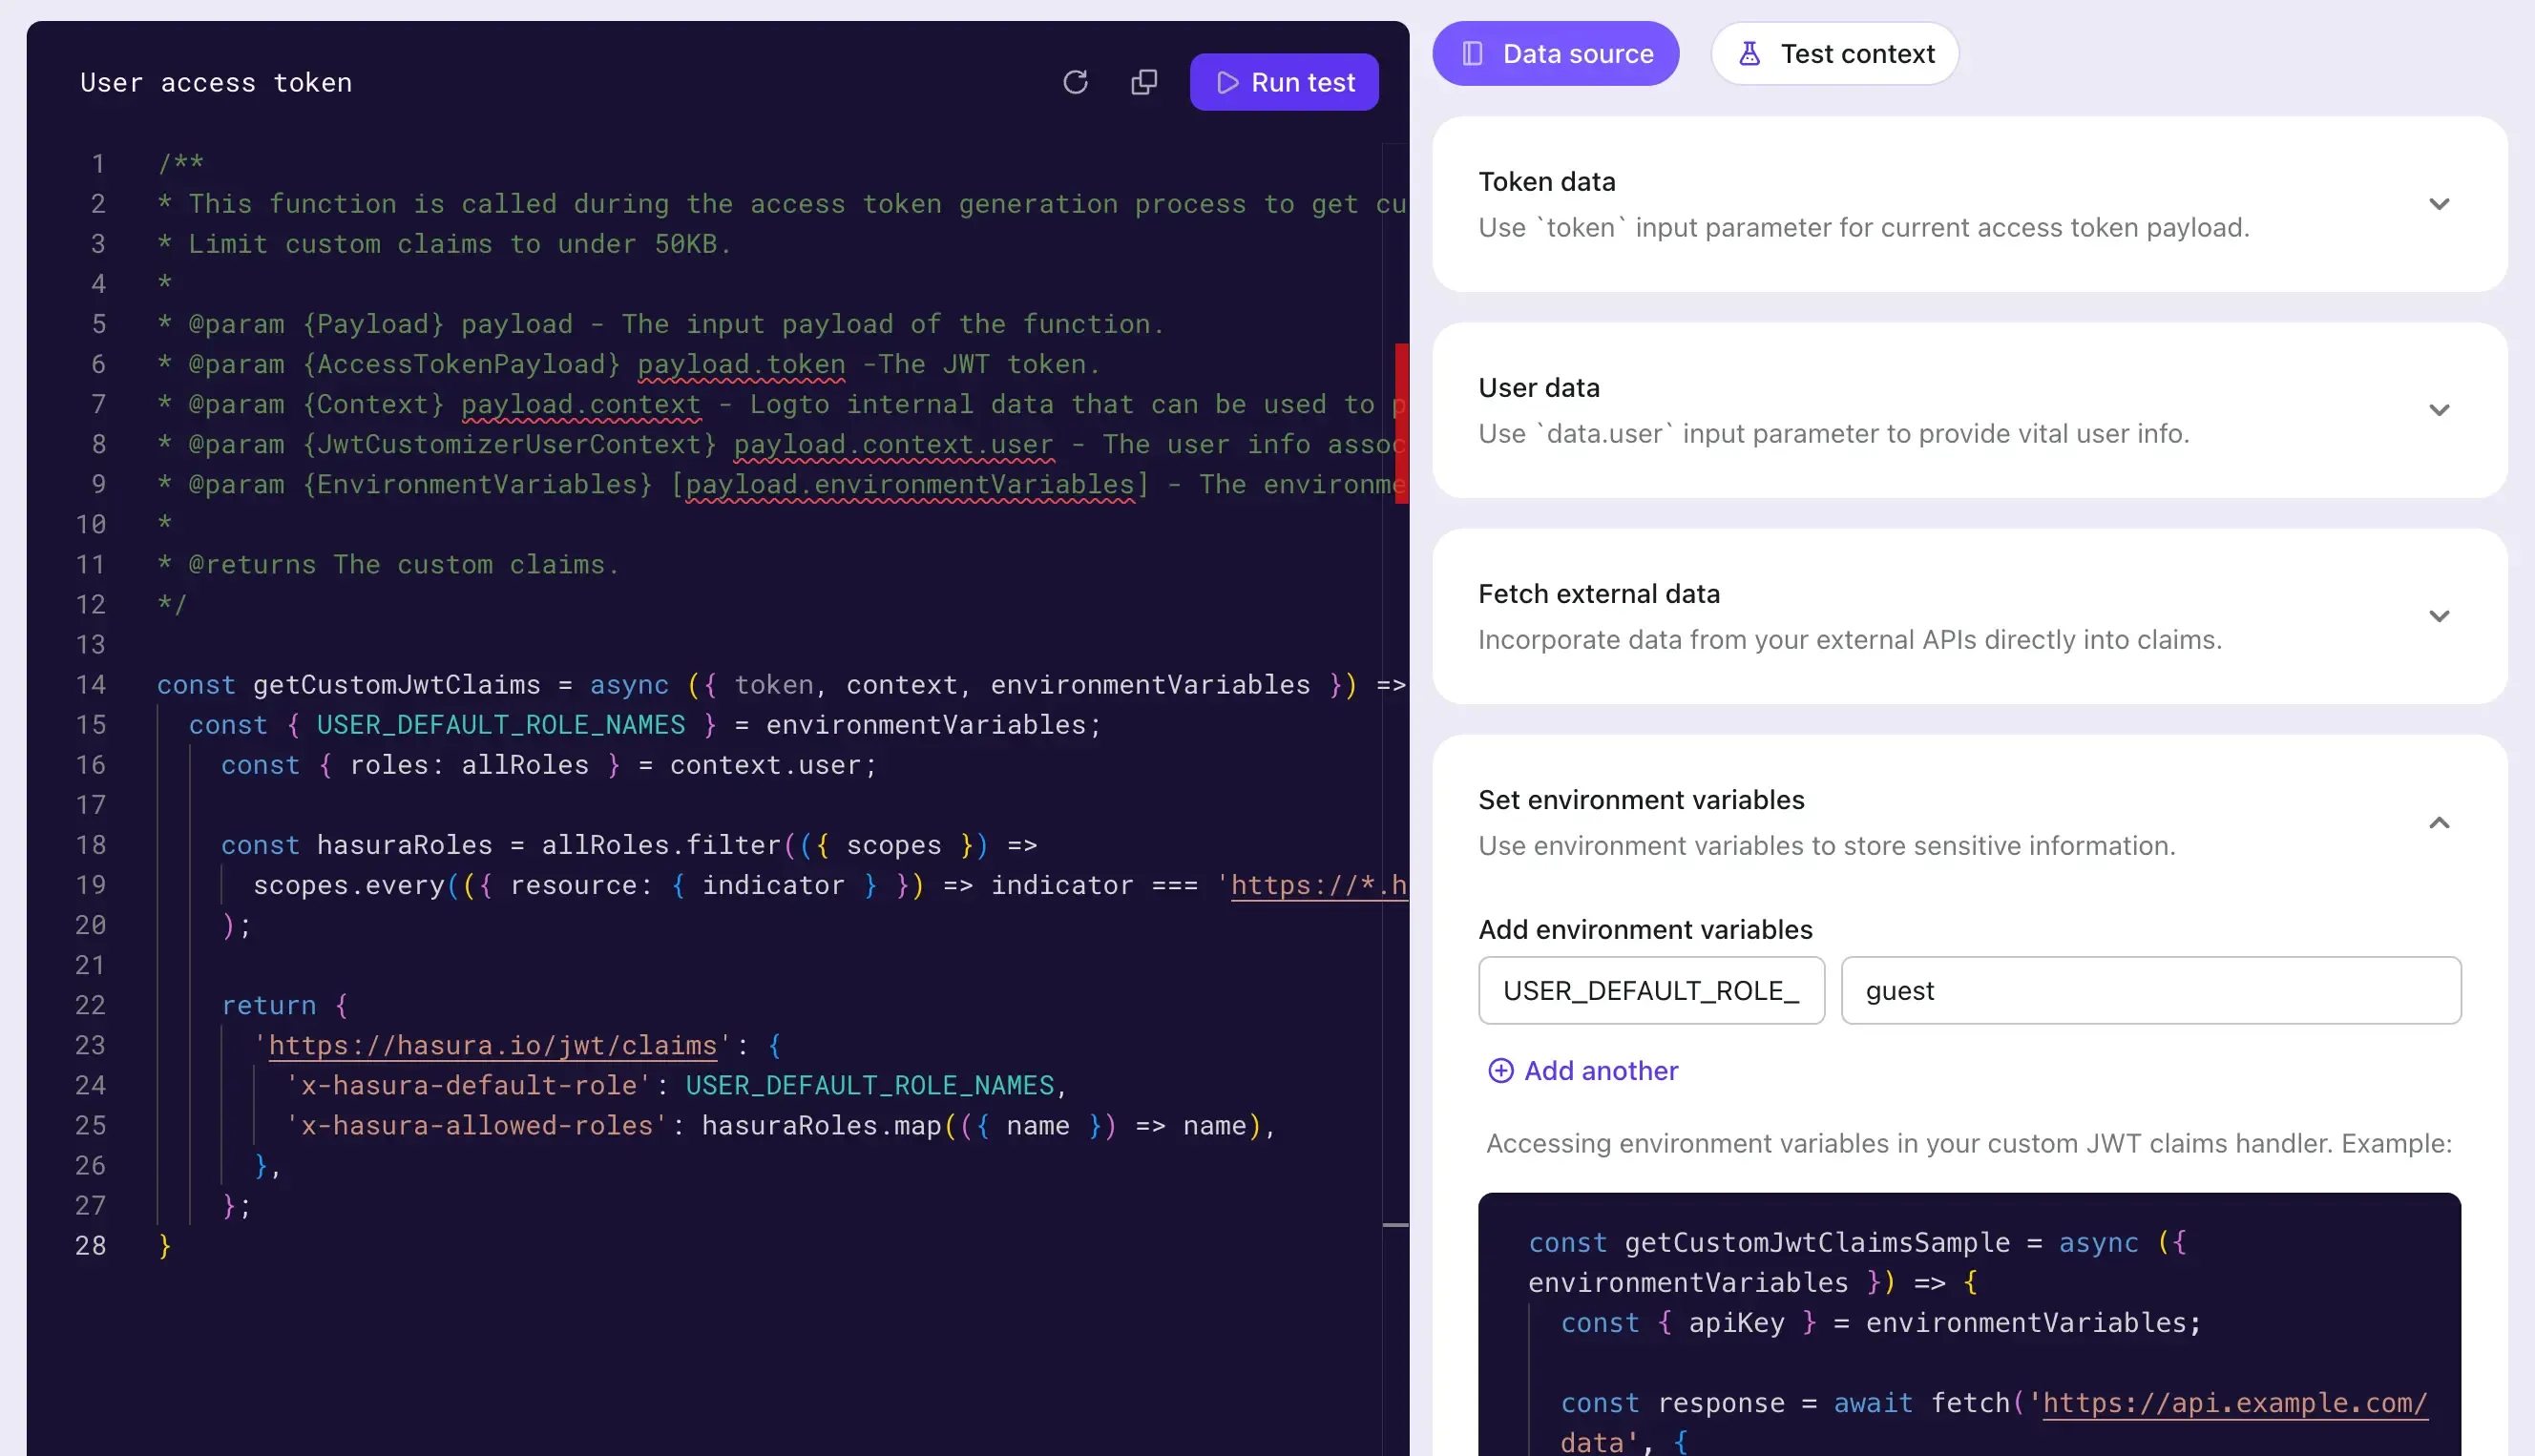
Customize the getCustomJwtClaims method to add data in the JWT that Hasura relies on for implementing access control. This can include data related to the user being authorized during that instance, including roles they possess, which can be accessed through context.
We have also defined an environment variable USER_DEFAULT_ROLE_NAMES to avoid hardcoding.
5. Integrate Logto SDK
After configuring Logto and Hasura, integrate your app with the Logto SDK. Here we use a Next example to preview the user access token issued by Logto after user sign-in.
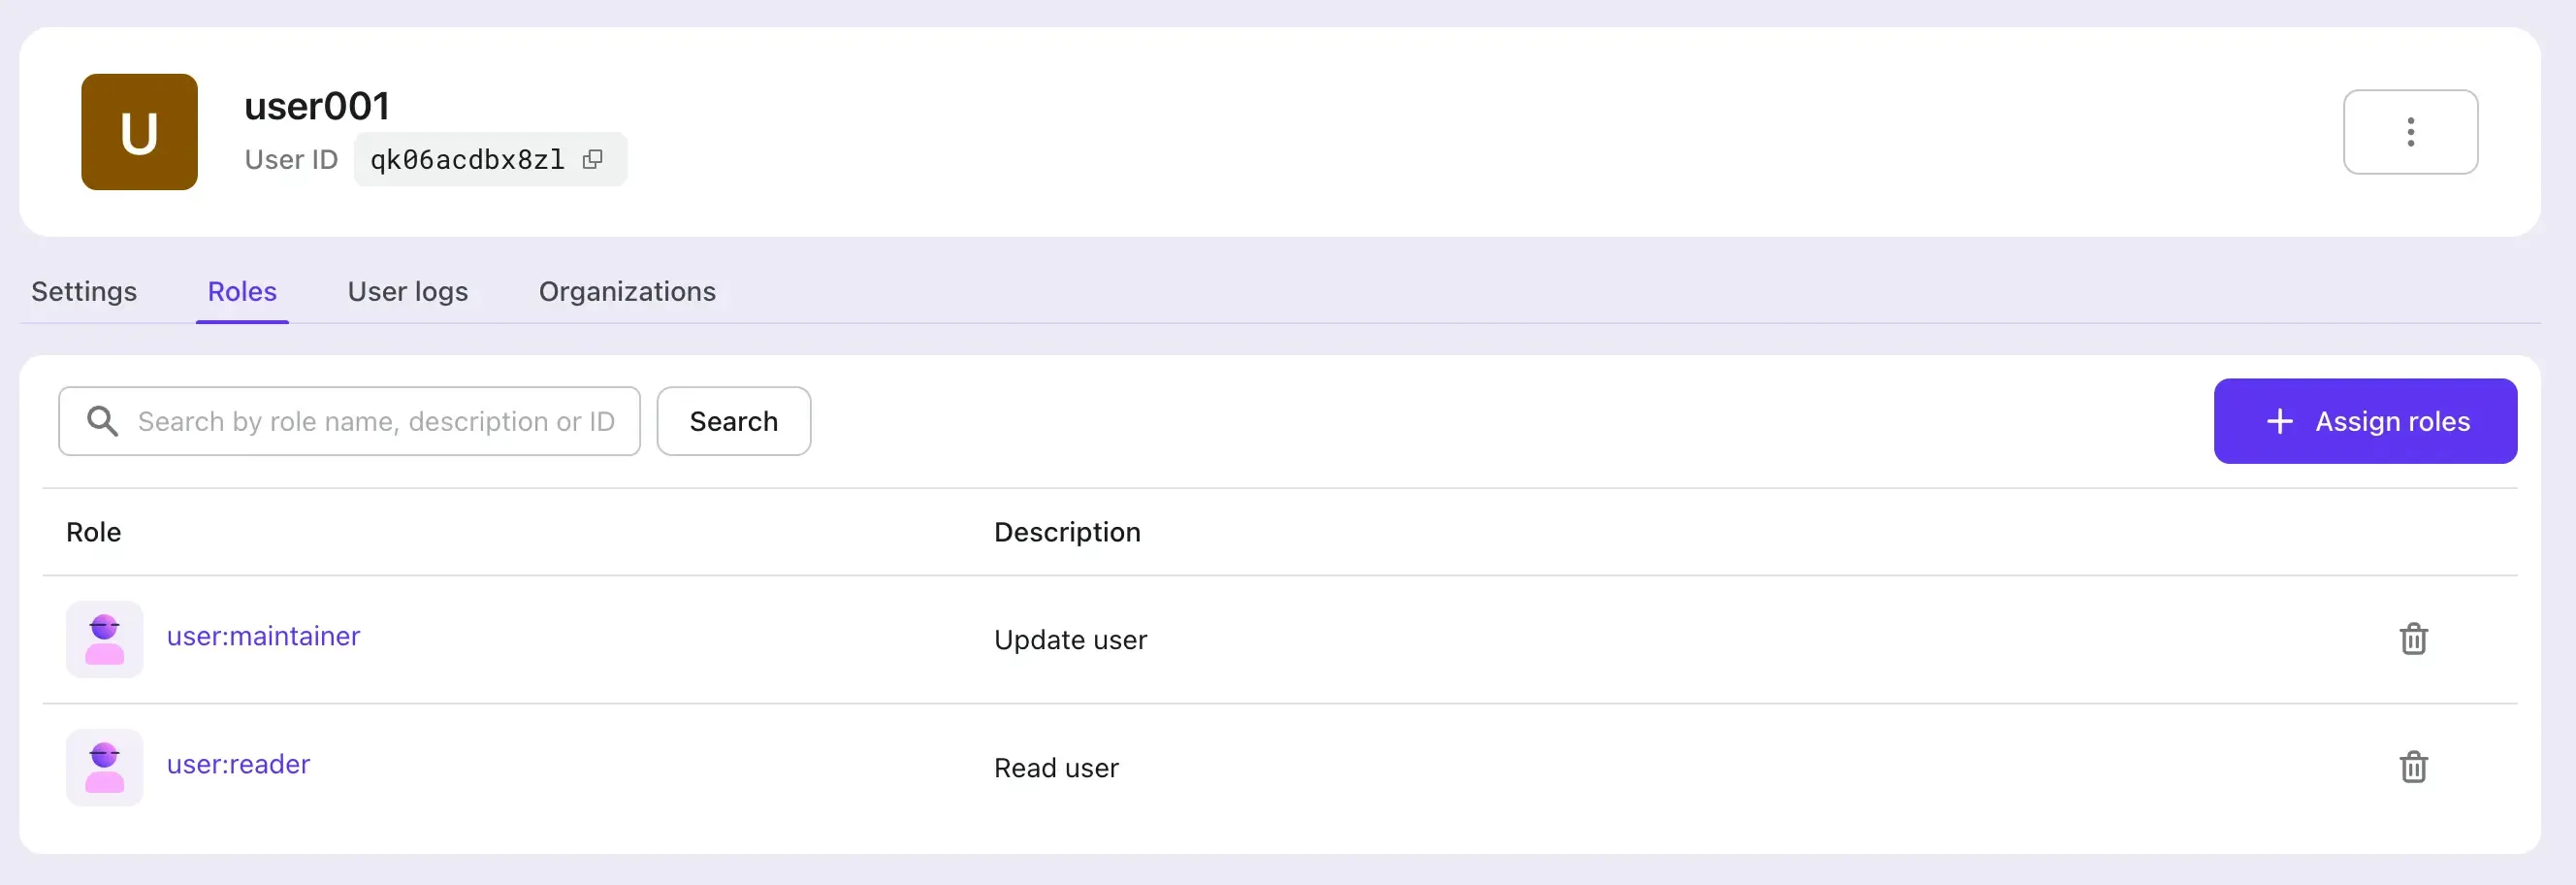
First, we assign the previously created user:reader and user:maintainer roles to the user, and then log in as that user.
Obtain the user access token and request Hasura APIs:
Conclusion
In this article, we provide another method of JWT-based access control supported by Hasura, other than Webhook.
By comparing the processes of Hasura's Webhook and JWT access control, we can see that the Webhook approach sends a Webhook to Logto and waits for a response with every Hasura request; whereas the JWT-based approach can continuously be used until the JWT expires.
The JWT approach can reduce network load and eliminate the network latency brought by Webhooks; meanwhile, the Webhook approach can synchronize changes in user permissions in real-time.
Users can choose the appropriate approach based on these conclusions, combined with their actual business needs.