As a comprehensive identity and access management solution, Microsoft Entra ID, also known as Azure Active Directory (Azure AD), supports both OpenID Connect (OIDC) and Security Assertion Markup Language (SAML) protocols for single sign-on (SSO) integration. In the previous tutorial, we showed you how to integrate your Logto application with Microsoft Entra ID (SAML) SSO. In this tutorial, we will show you how to integrate your Logto application with Microsoft Entra ID (OIDC) SSO.
As usual, before we start, make sure you have an active Microsoft Entra or Azure account. If you don't have one, you can sign up for a free Microsoft account here.
A Logto cloud account. If you don't have one, you are very welcome to sign up for a Logto account. Logto is free for personal use. All the features are available for dev tenants, including the SSO feature.
A well-integrated Logto application is also needed. If you don't have one, please follow the integration guide to create a Logto application.
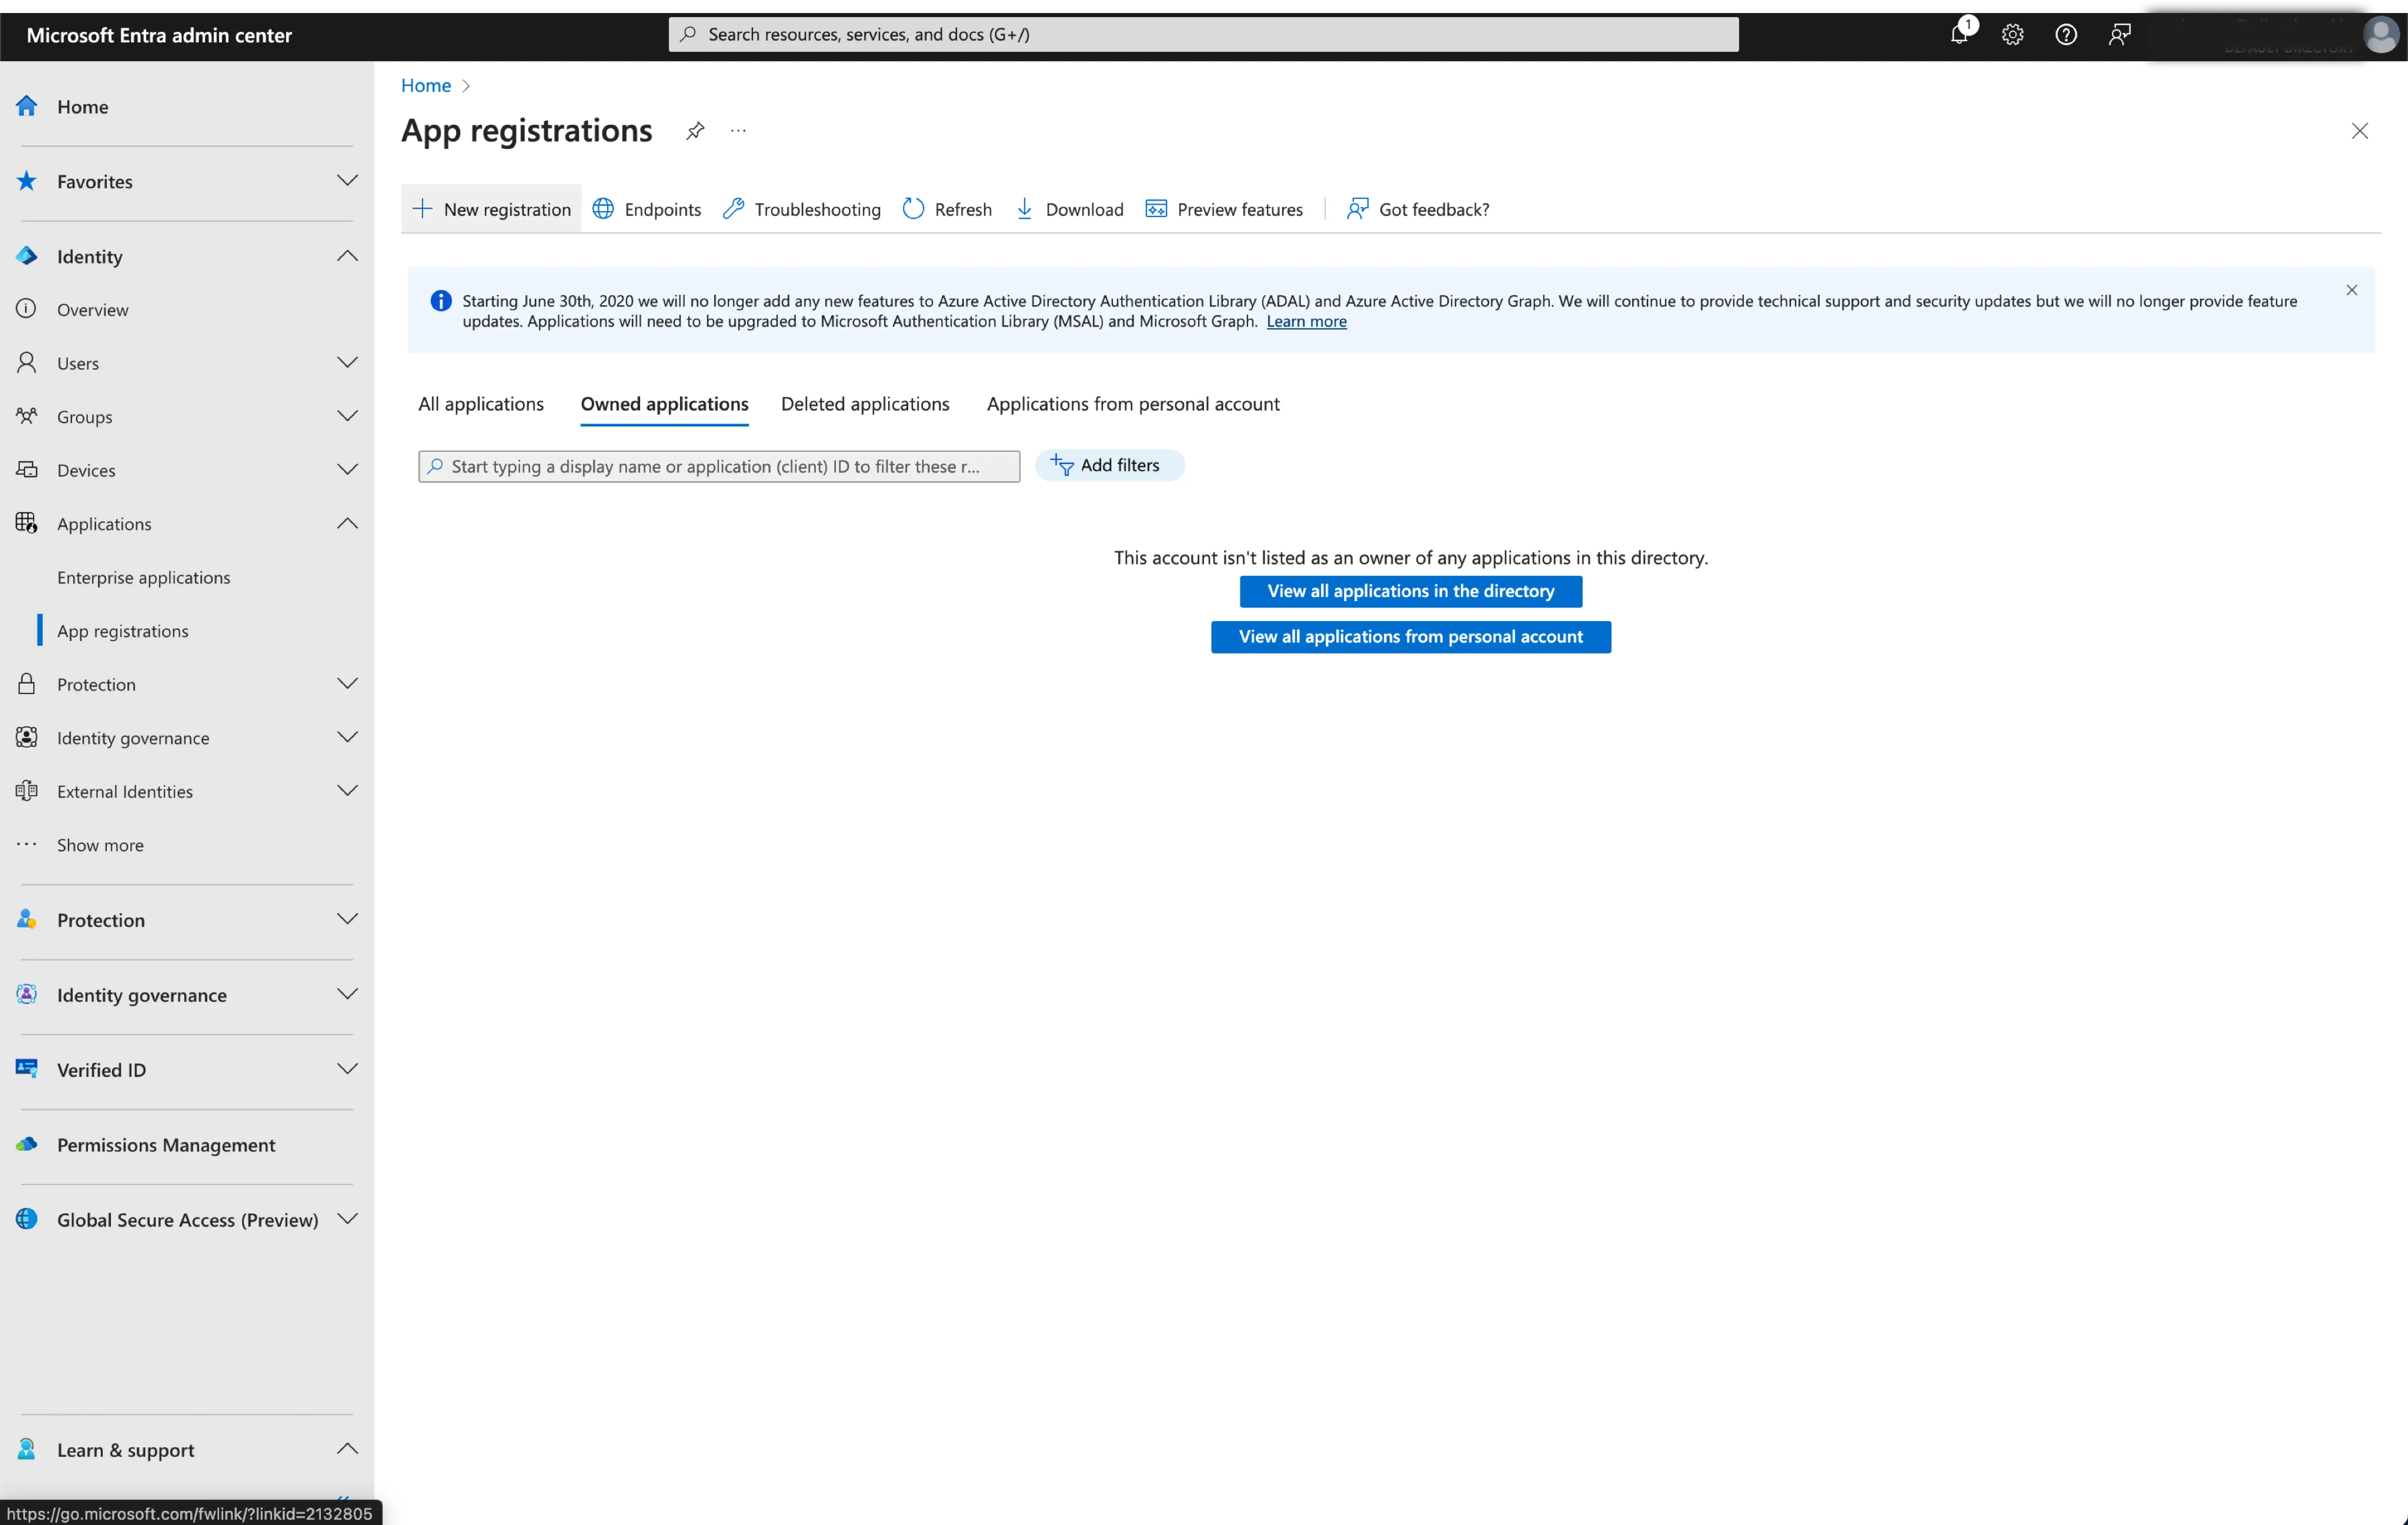
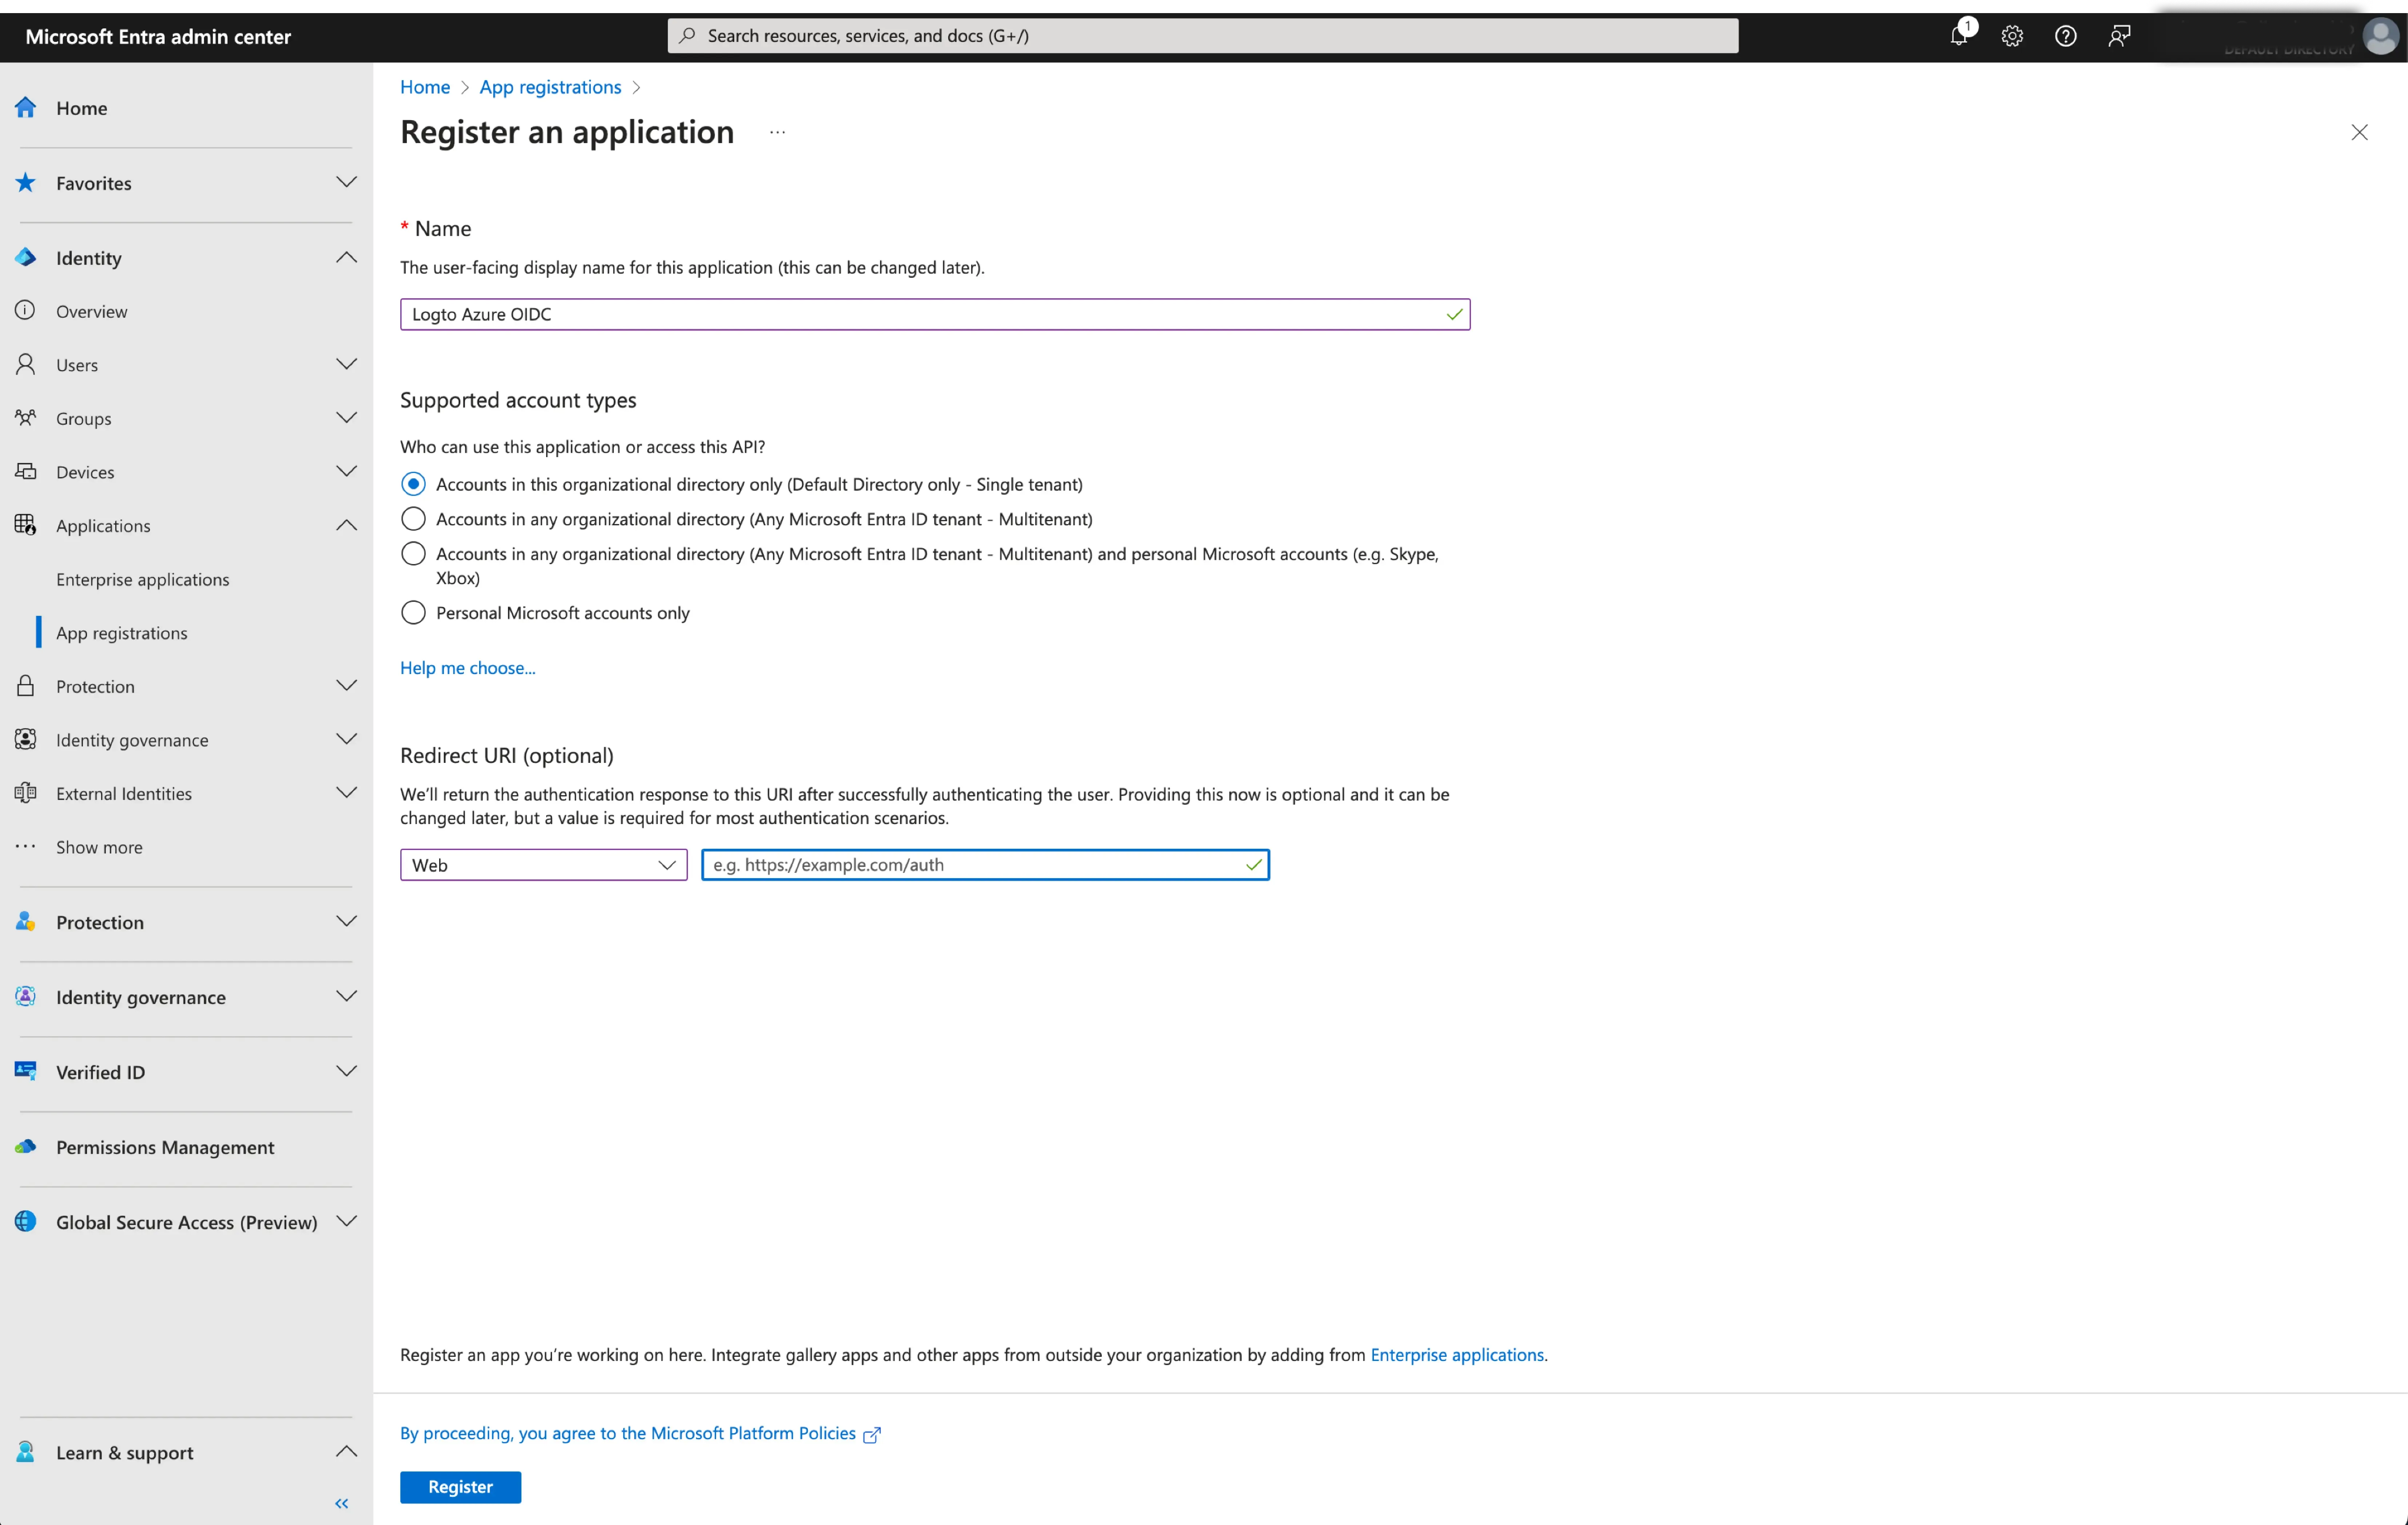
Browse to Identity > Applications > App registrations.
Select New registration.
Enter the application name and select the appropriate account access type for your application.
Select Web as the application platform. Enter the redirect URI for the application. The redirect URI is the URL where the user is redirected after they have authenticated with Microsoft Entra ID.
Copy the Redirect URI (Callback URL) from the Logto connector details page and paste it into the Redirect URI field.
After successfully creating an Microsoft Entra OIDC application, you will need to provide the IdP configurations back to Logto. Navigate to the Connection tab at Logto console, and fill in the following configurations:
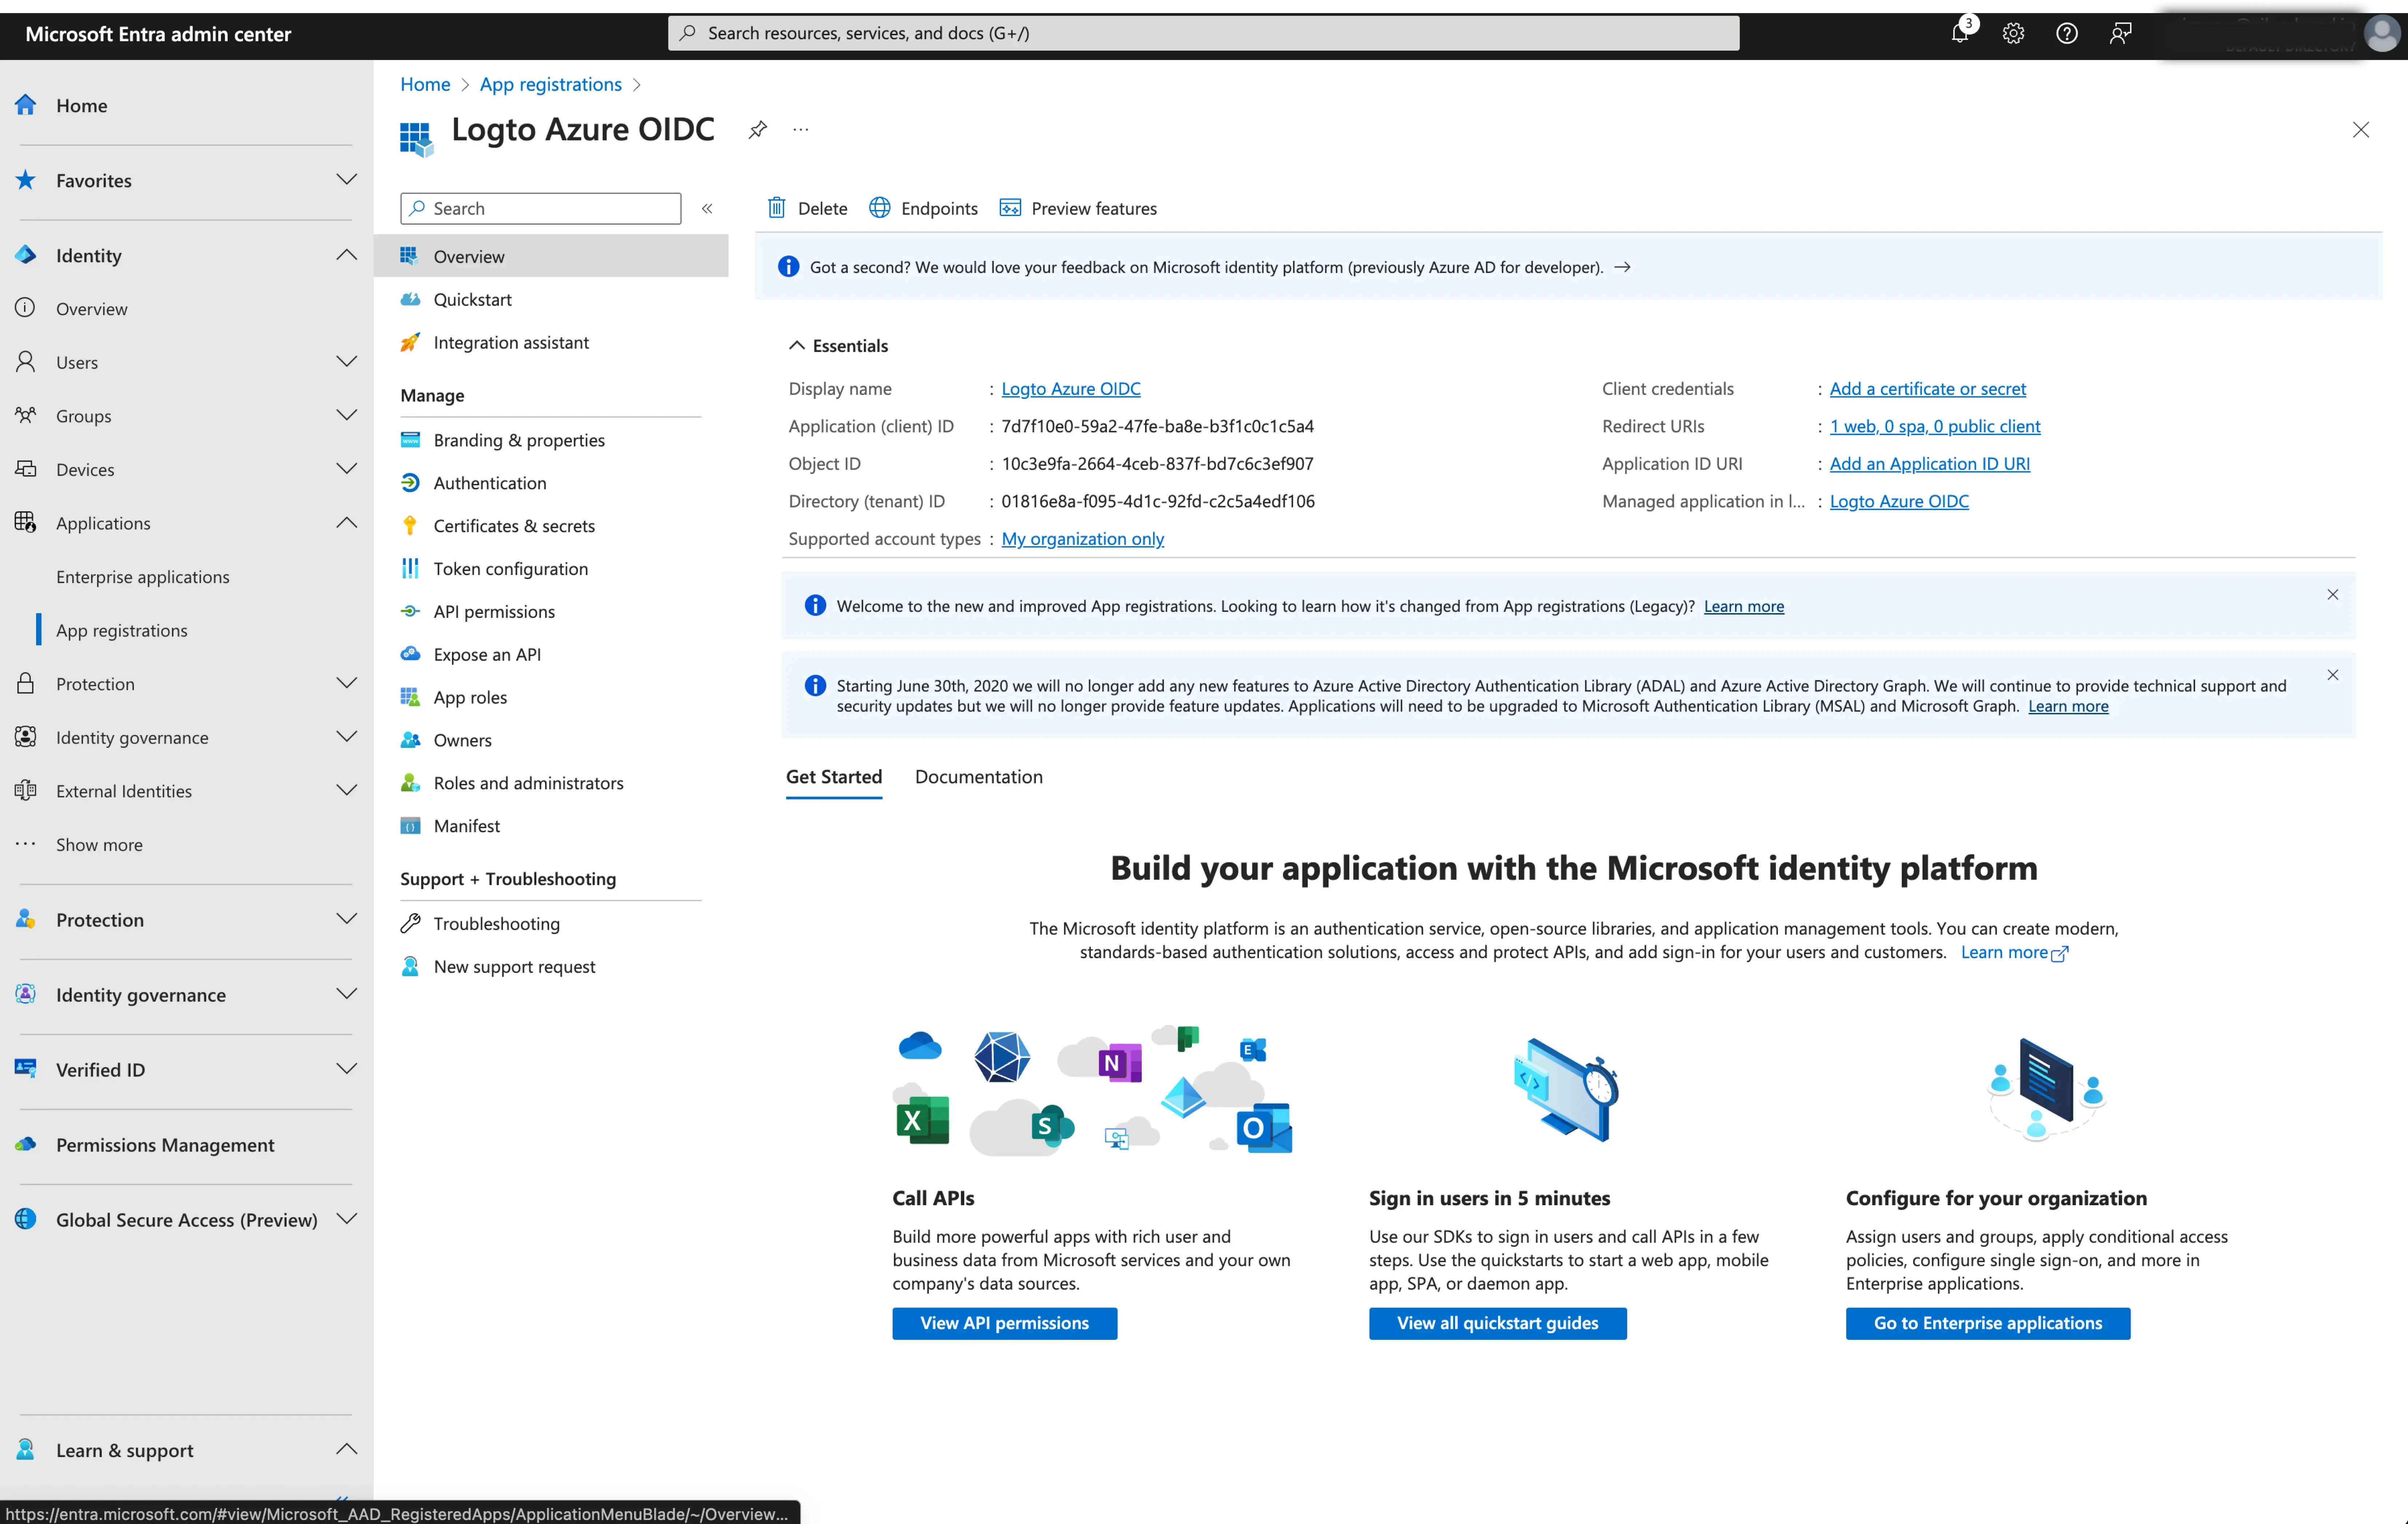
Client ID: A unique identifier assigned to your OIDC application by the Microsoft Entra. This identifier is used by Logto to identify and authenticate the application during the OIDC flow. You can find it in the application overview page as Application (client) ID.
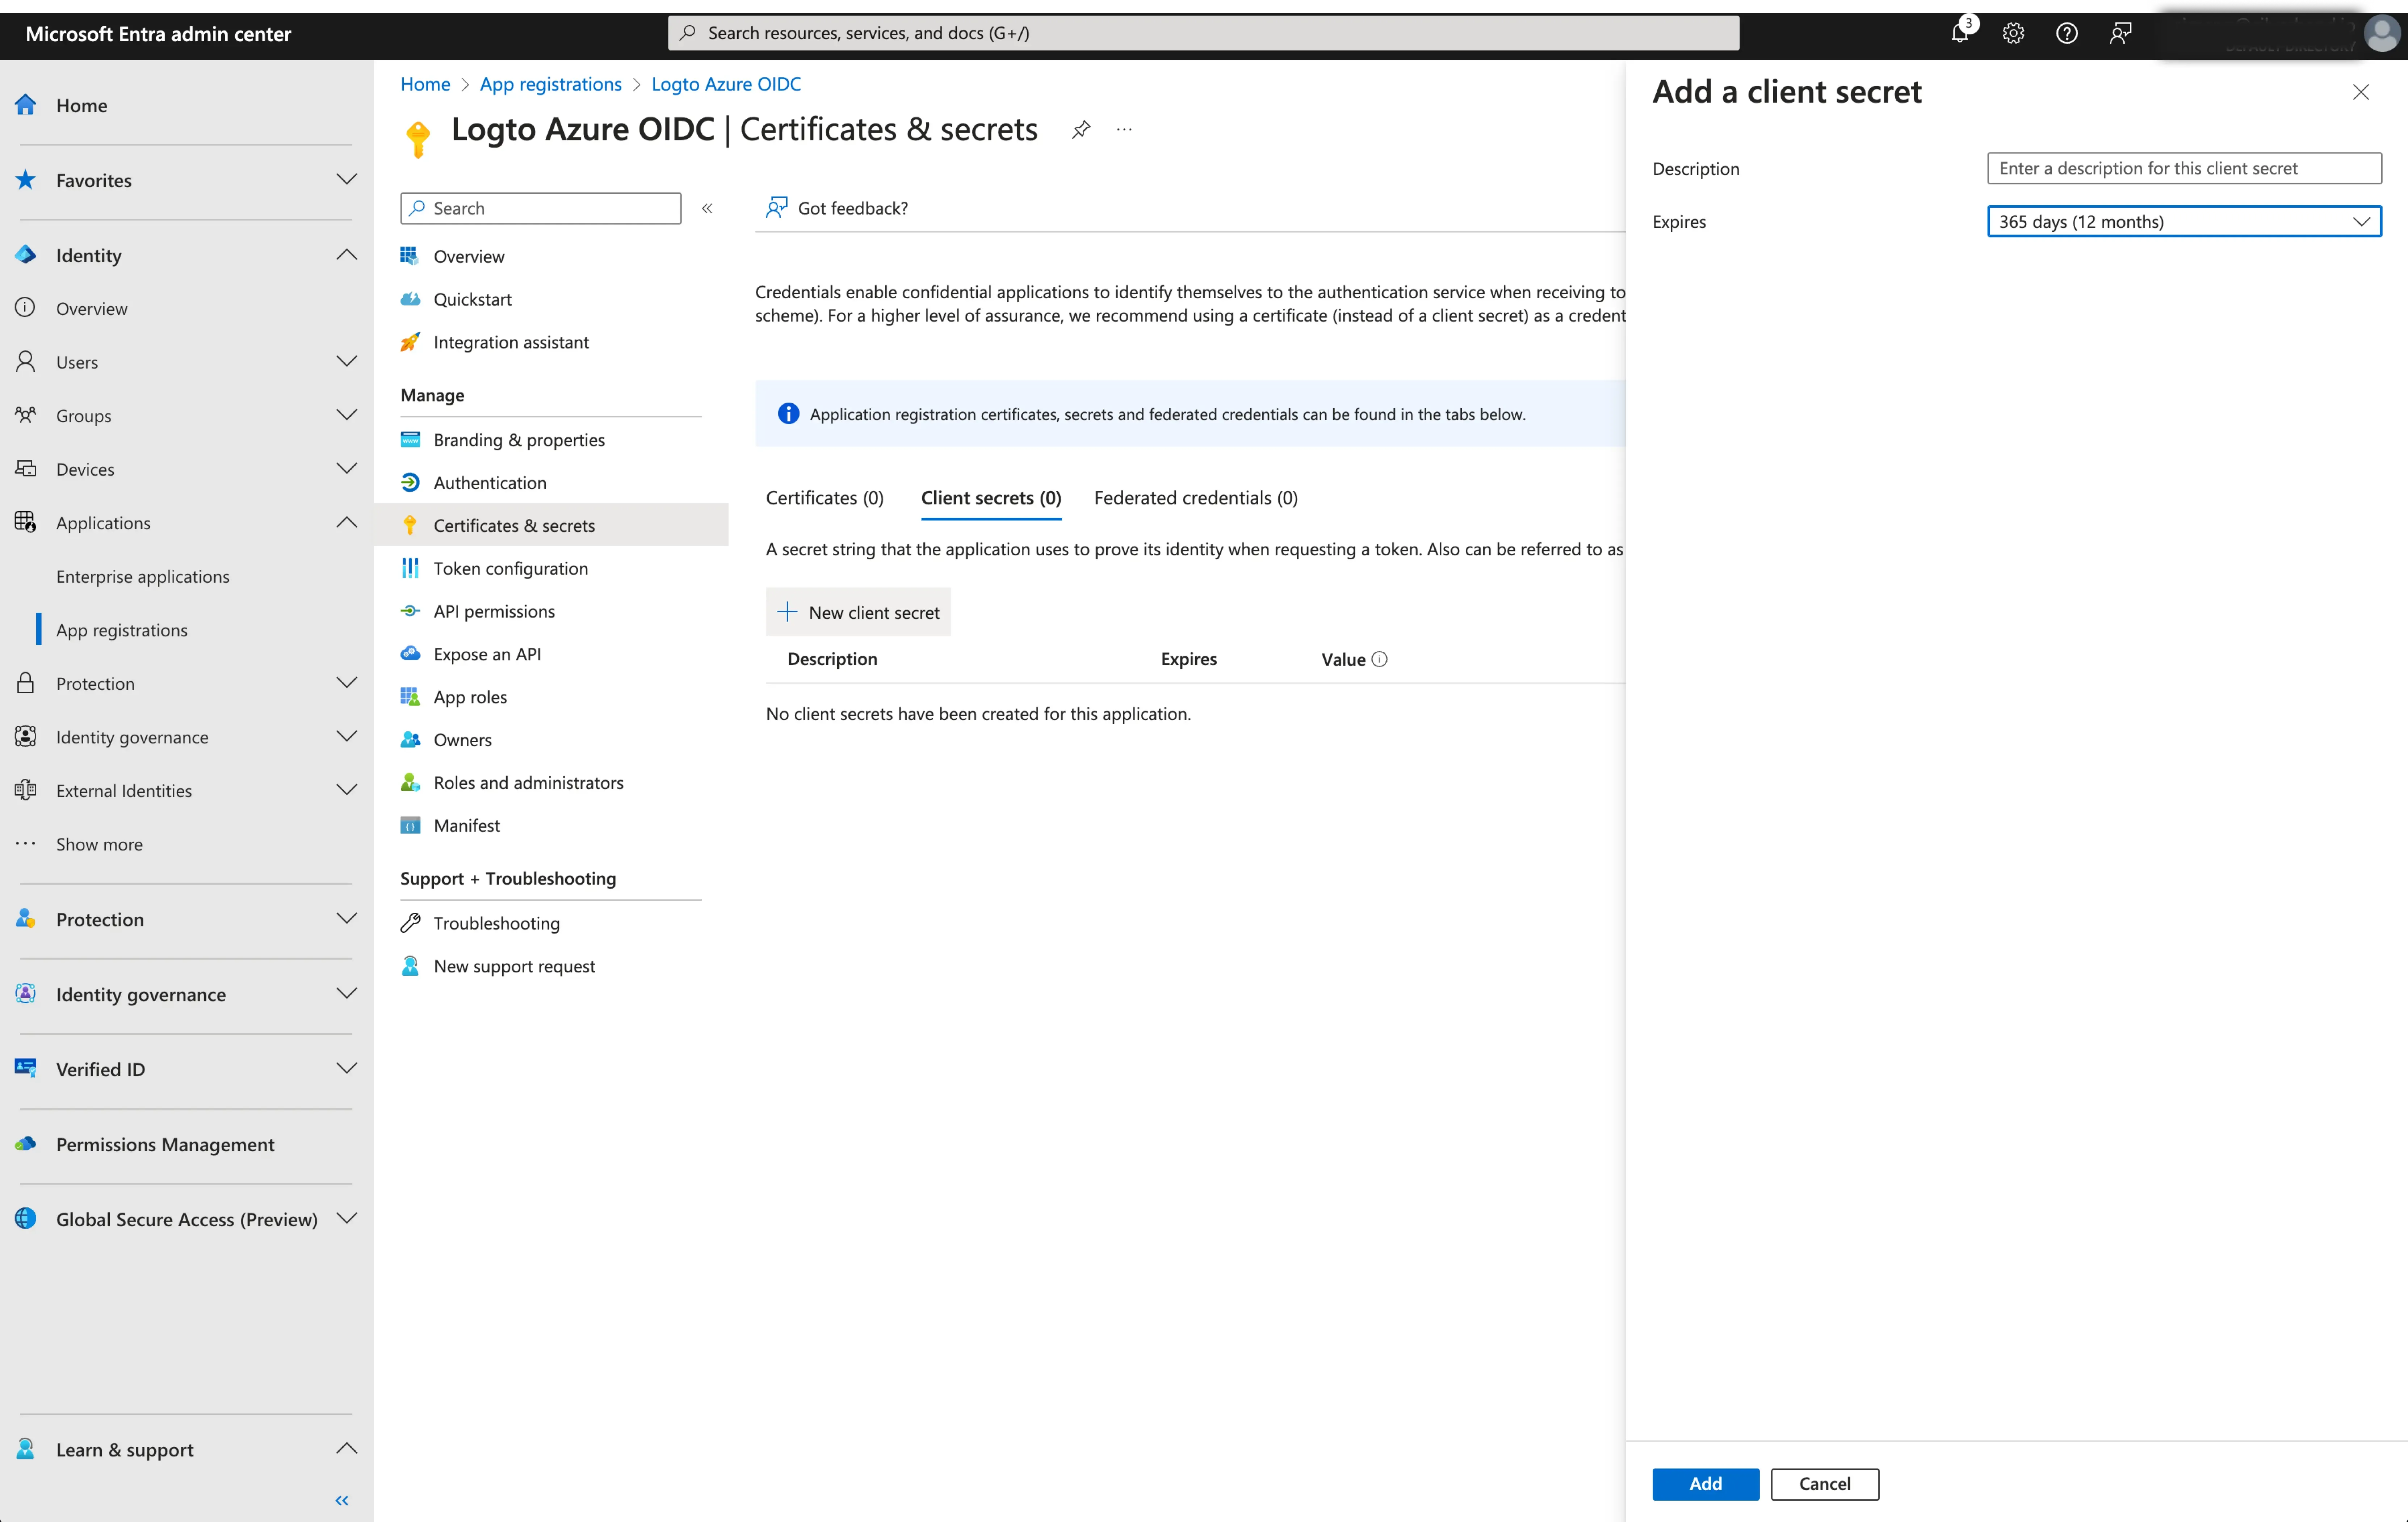
Client Secret: Create a new client secret and copy the value to Logto. This secret is used to authenticate the OIDC application and secure the communication between Logto and the IdP.
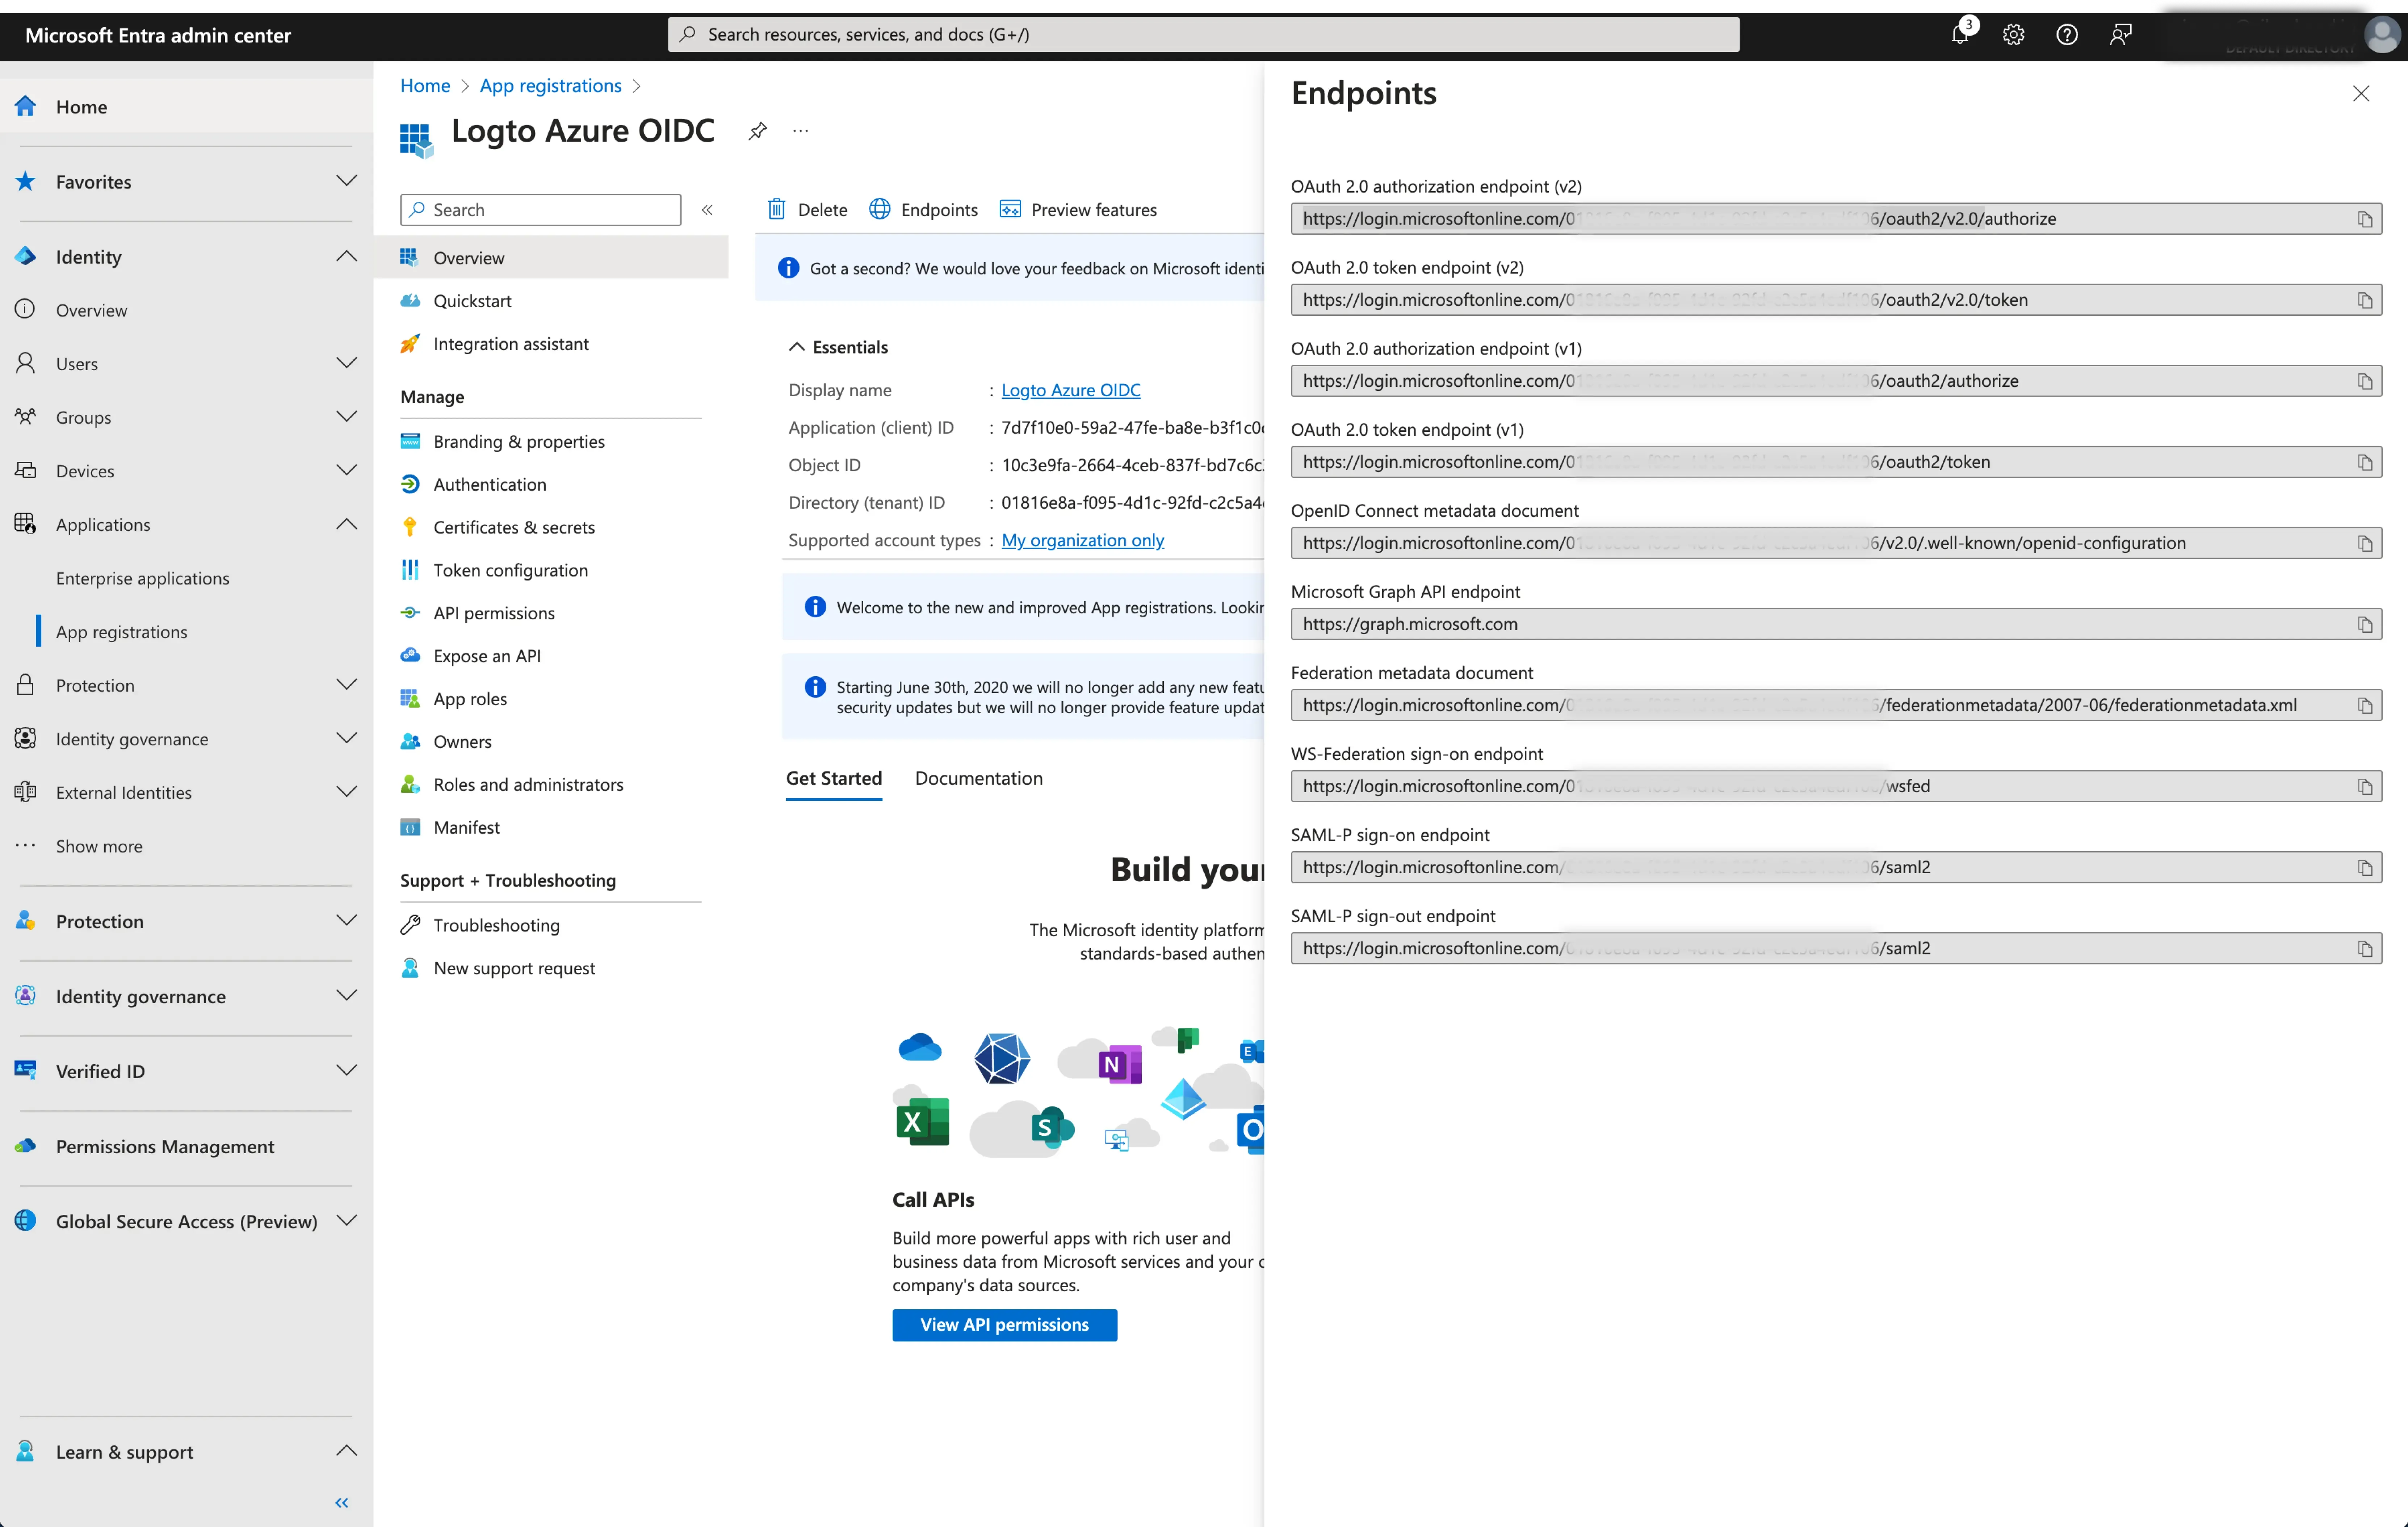
Issuer: The issuer URL, a unique identifier for the IdP, specifying the location where the OIDC identity provider can be found. It is a crucial part of the OIDC configuration as it helps Logto discover the necessary endpoints.
Instead of manually provide all these OIDC endpoints, Logto fetch all the required configurations and IdP endpoints automatically. This is done by utilizing the issuer url you provided and making a call to the IdP's discover endpoint.
To get the issuer URL, you can find it in the Endpoints section of the application overview page.
Locate the OpenID Connect metadata document endpoint and copy the URL WITHOUT the trailing path .well-known/openid-configuration. This is because Logto will automatically append the .well-known/openid-configuration to the issuer URL when fetching the OIDC configurations.
Scope: A space-separated list of strings defining the desired permissions or access levels requested by Logto during the OIDC authentication process. The scope parameter allows you to specify what information and access Logto is requesting from the IdP.
The scope parameter is optional. Regardless of the custom scope settings, Logto will always send the openid, profile and email scopes to the IdP.
Click Save to finish the configuration process
Enable the Microsoft Entra ID (OIDC) connector in Logto#
Set email domain and enabled the Microsoft Entra ID (OIDC) connector in Logto#
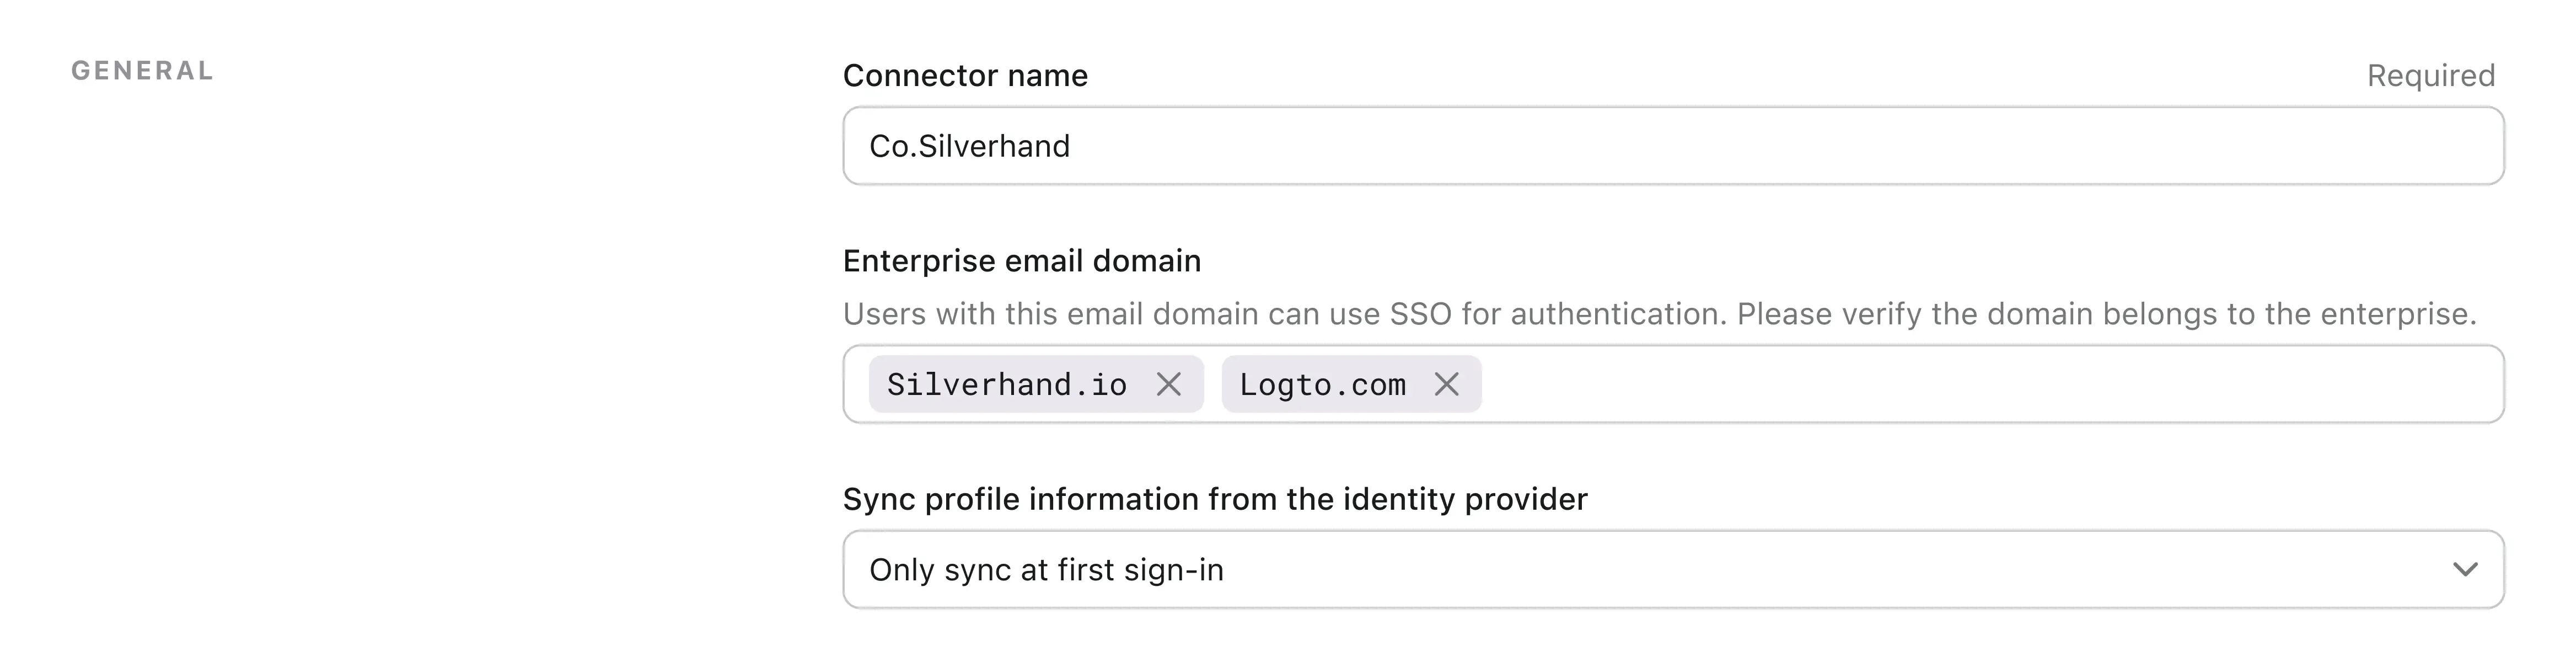
Provide the email domains of your organization at the Logto's SAML SSO connector experience tab. This will enable the SSO connector as an authentication method for those users.
Users with email addresses in the specified domains will be exclusively limited to use SAML SSO connector as their only authentication method
Enable the Microsoft Entra ID (OIDC) connector in Logto's sign-in experience#
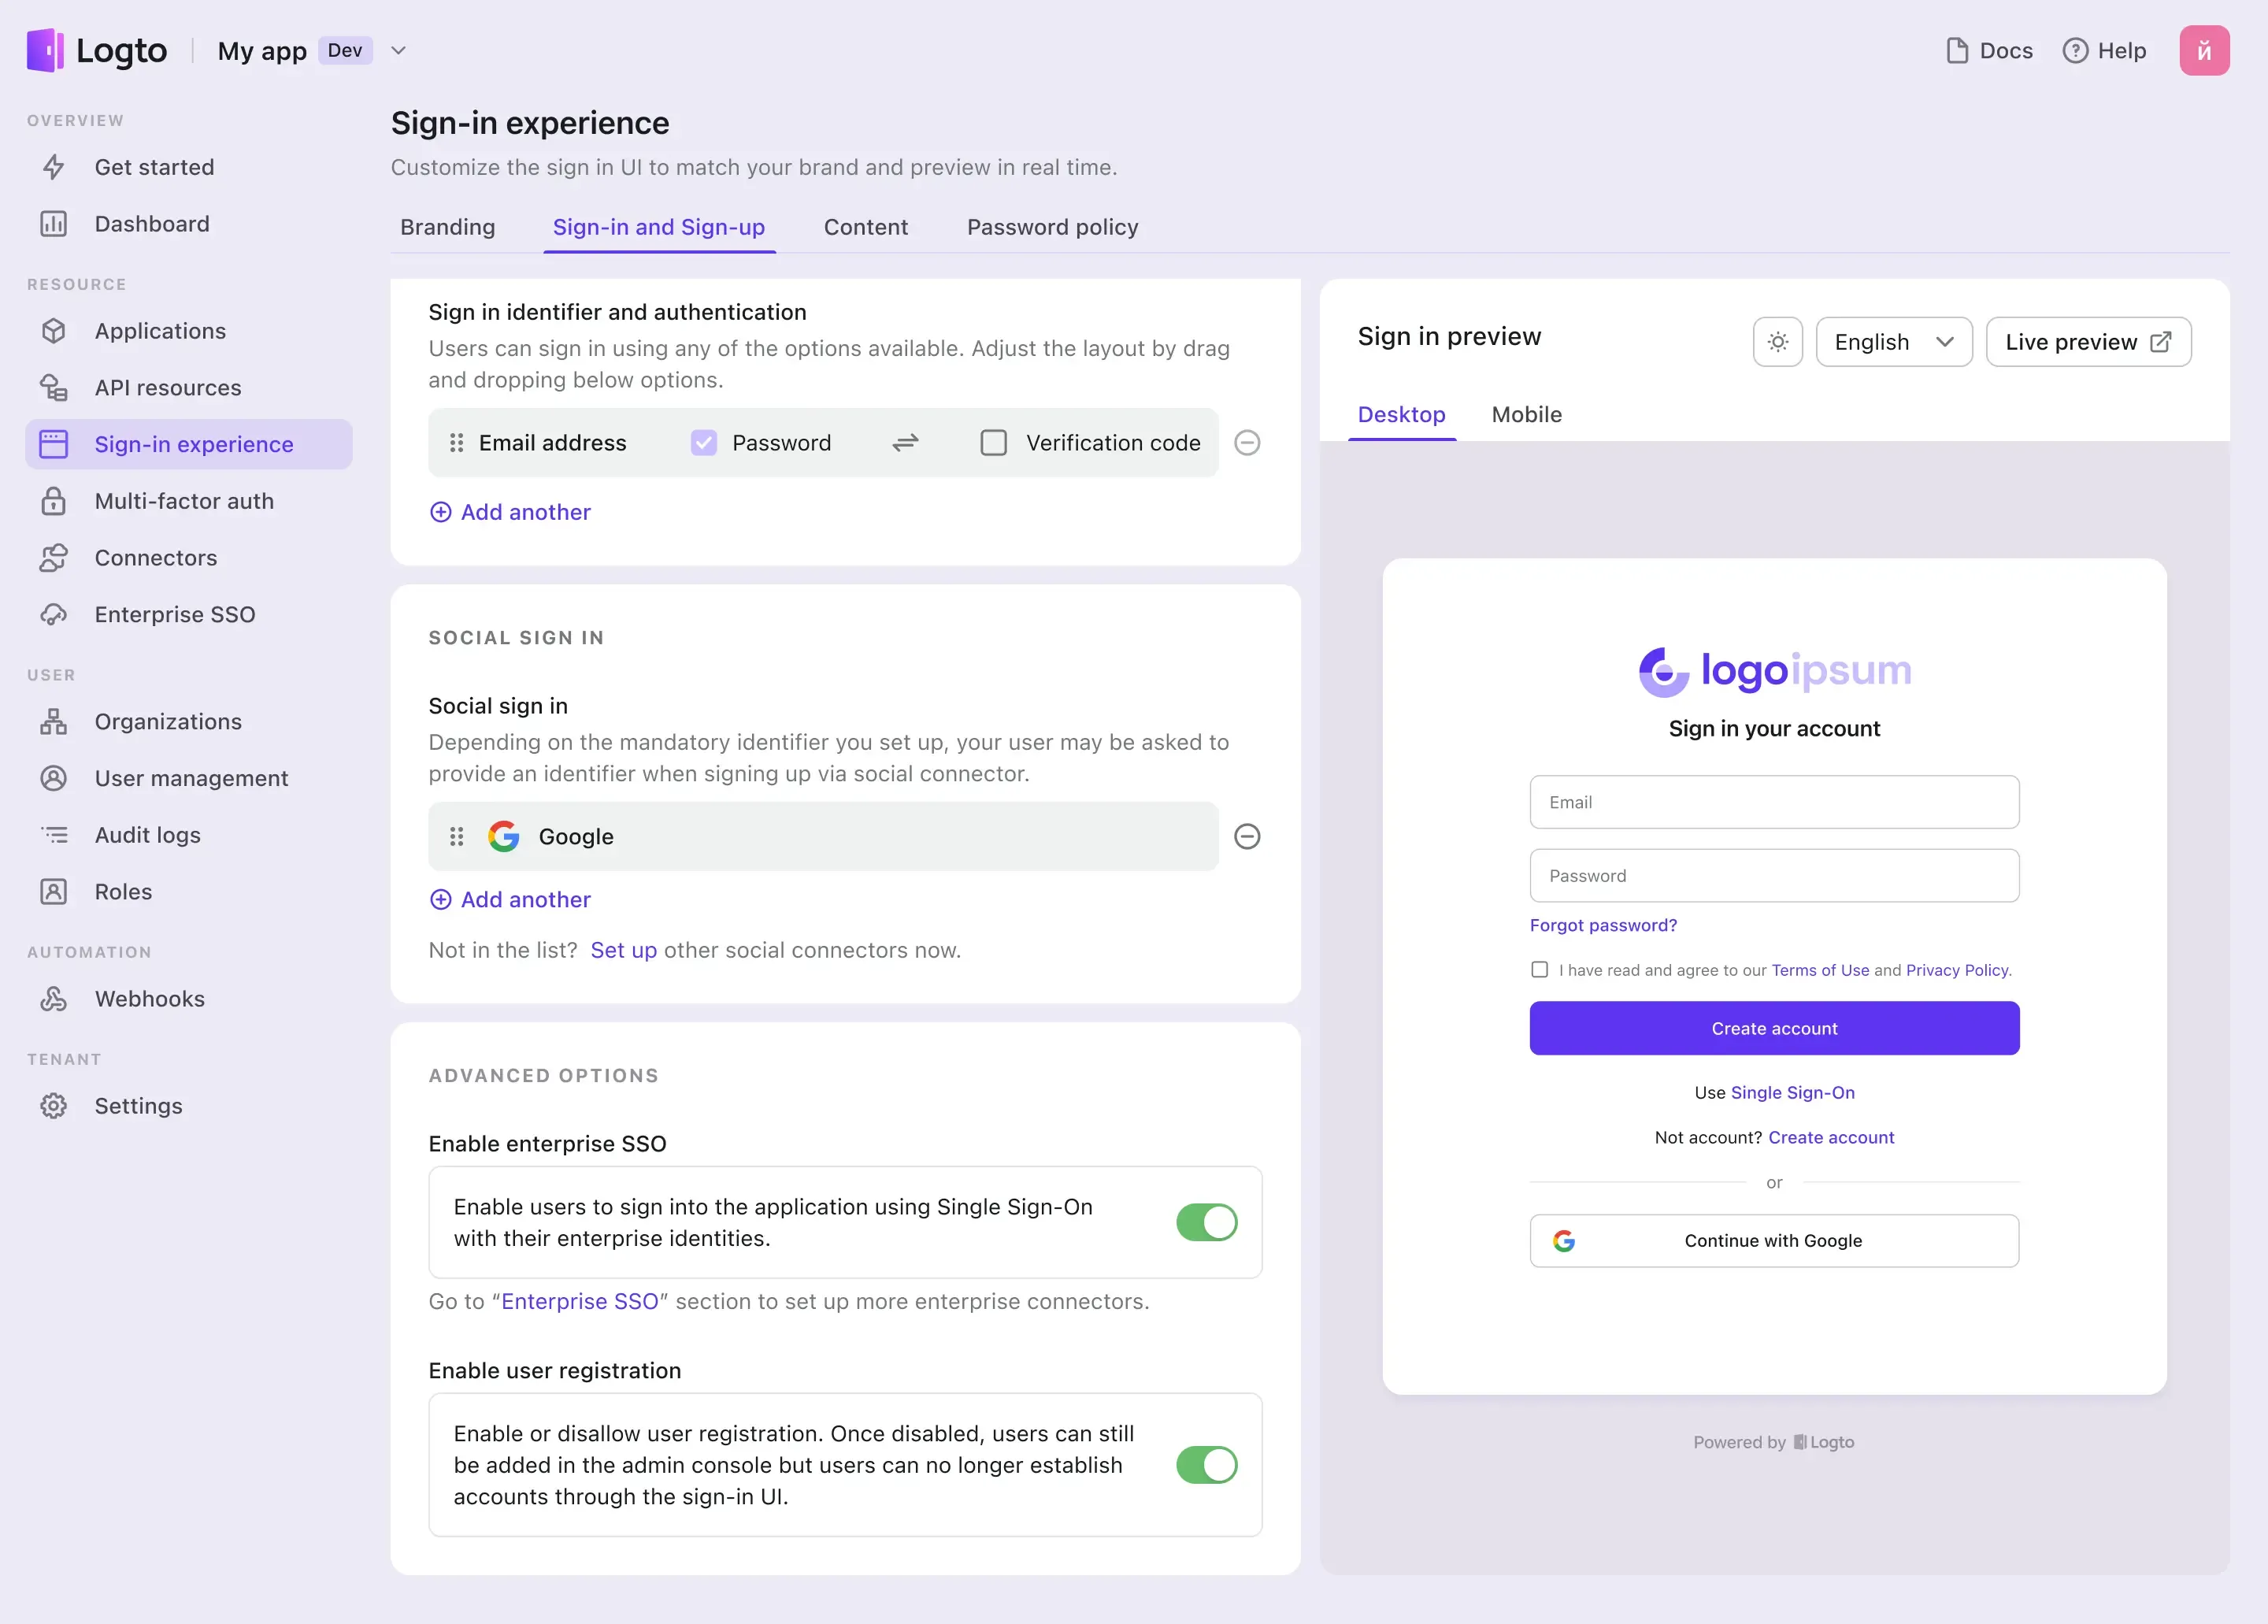
Go the Sign-in Experience tab and enable the enterprise SSO.
Now, you may test the SSO integration by using the live preview button at the top right corner of the Sign-in Experience preview section.