Integrate Okta SSO with your application
Learn how to integrate Okta SSO with your application in minutes.

Developer

Last month we have officially released the single sign-on (SSO) feature on Logto. This feature allows you to integrate your application with any SSO provider that supports the OpenID Connect (OIDC) and SAML protocol through Logto. Apart from the generic OIDC and SAML SSO connectors, we have provided a few built-in enterprise SSO connectors, including Okta, Azure AD, and Google Workspace. In this tutorial, we will show you how to integrate your Logto application with Okta SSO in minutes.
Prerequisites
Before we start, you need to have an Okta account. If you don't have one, you can sign up for a free Okta developer account here.
Of course, you also need to have a Logto account. If you don't have one, you are very welcome to sign up for a Logto account. Logto is free for personal use. All the features are available for free dev tenants, including the SSO feature.
A well integrated Logto application is also needed. If you don't have one, please follow the integration guide to create a Logto application.
Create a new Okta SSO connector in Logto
- Visit your Logto Cloud Console and navigate to the Enterprise SSO page.
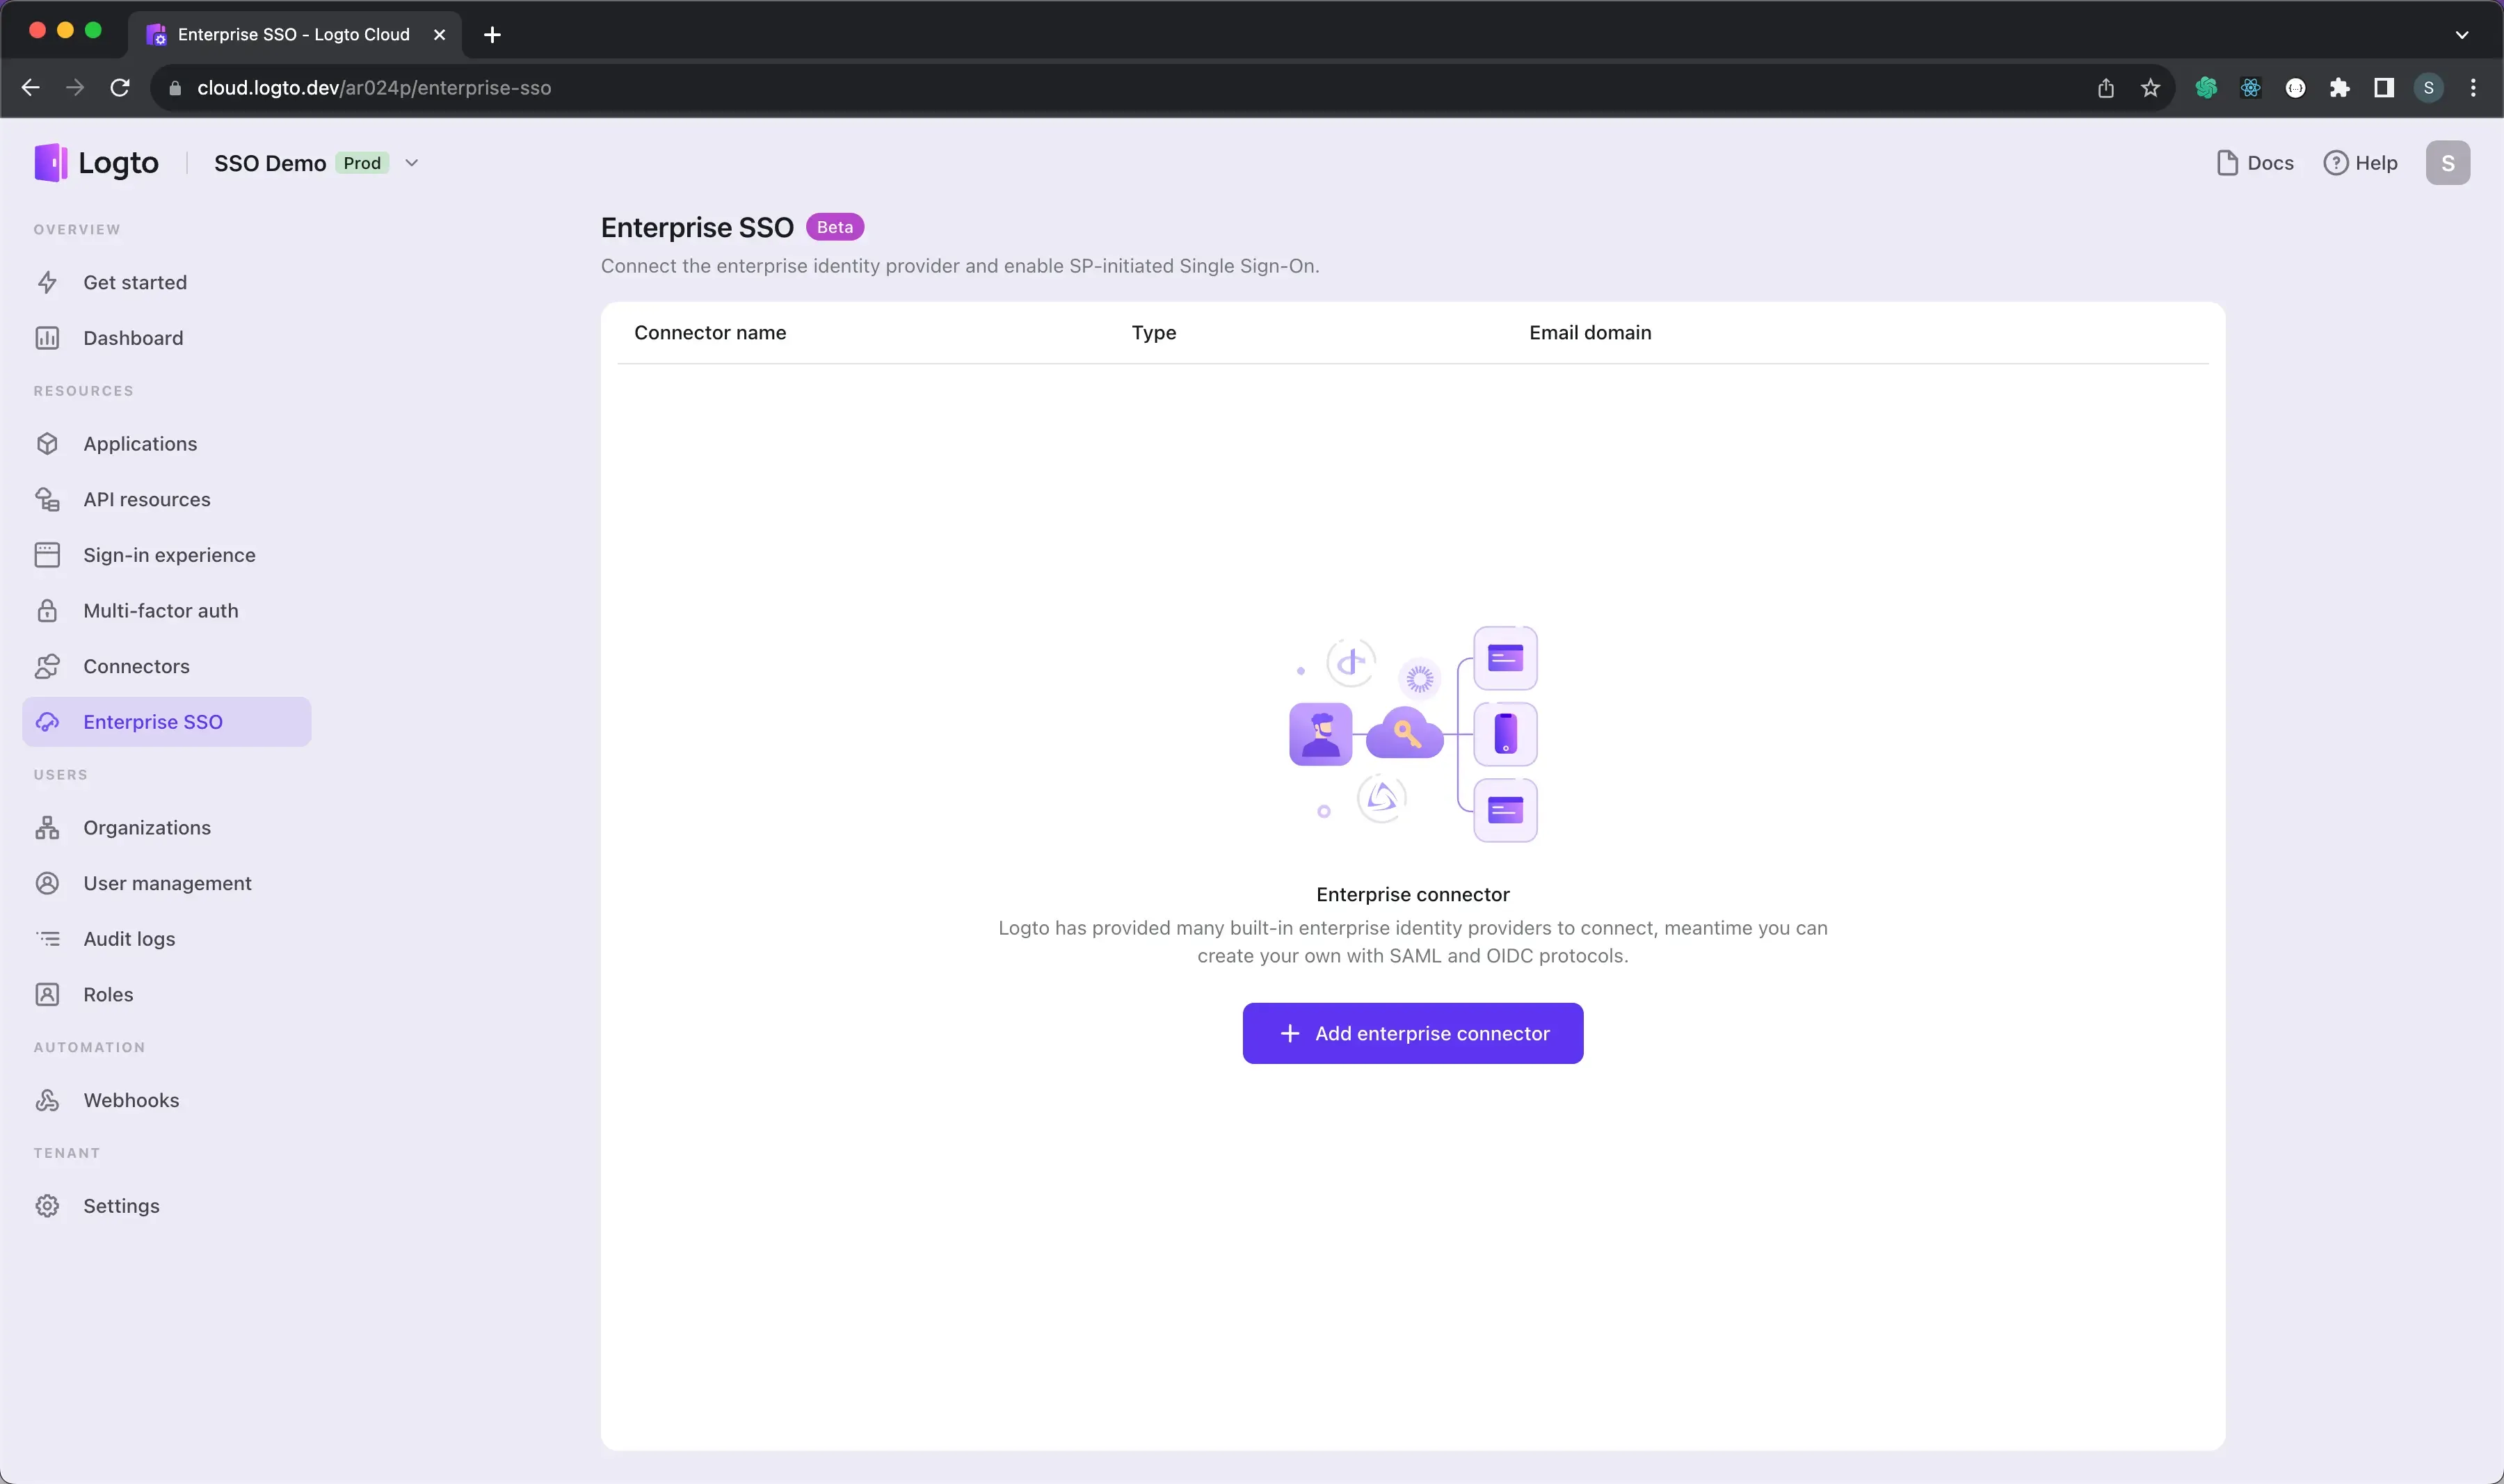
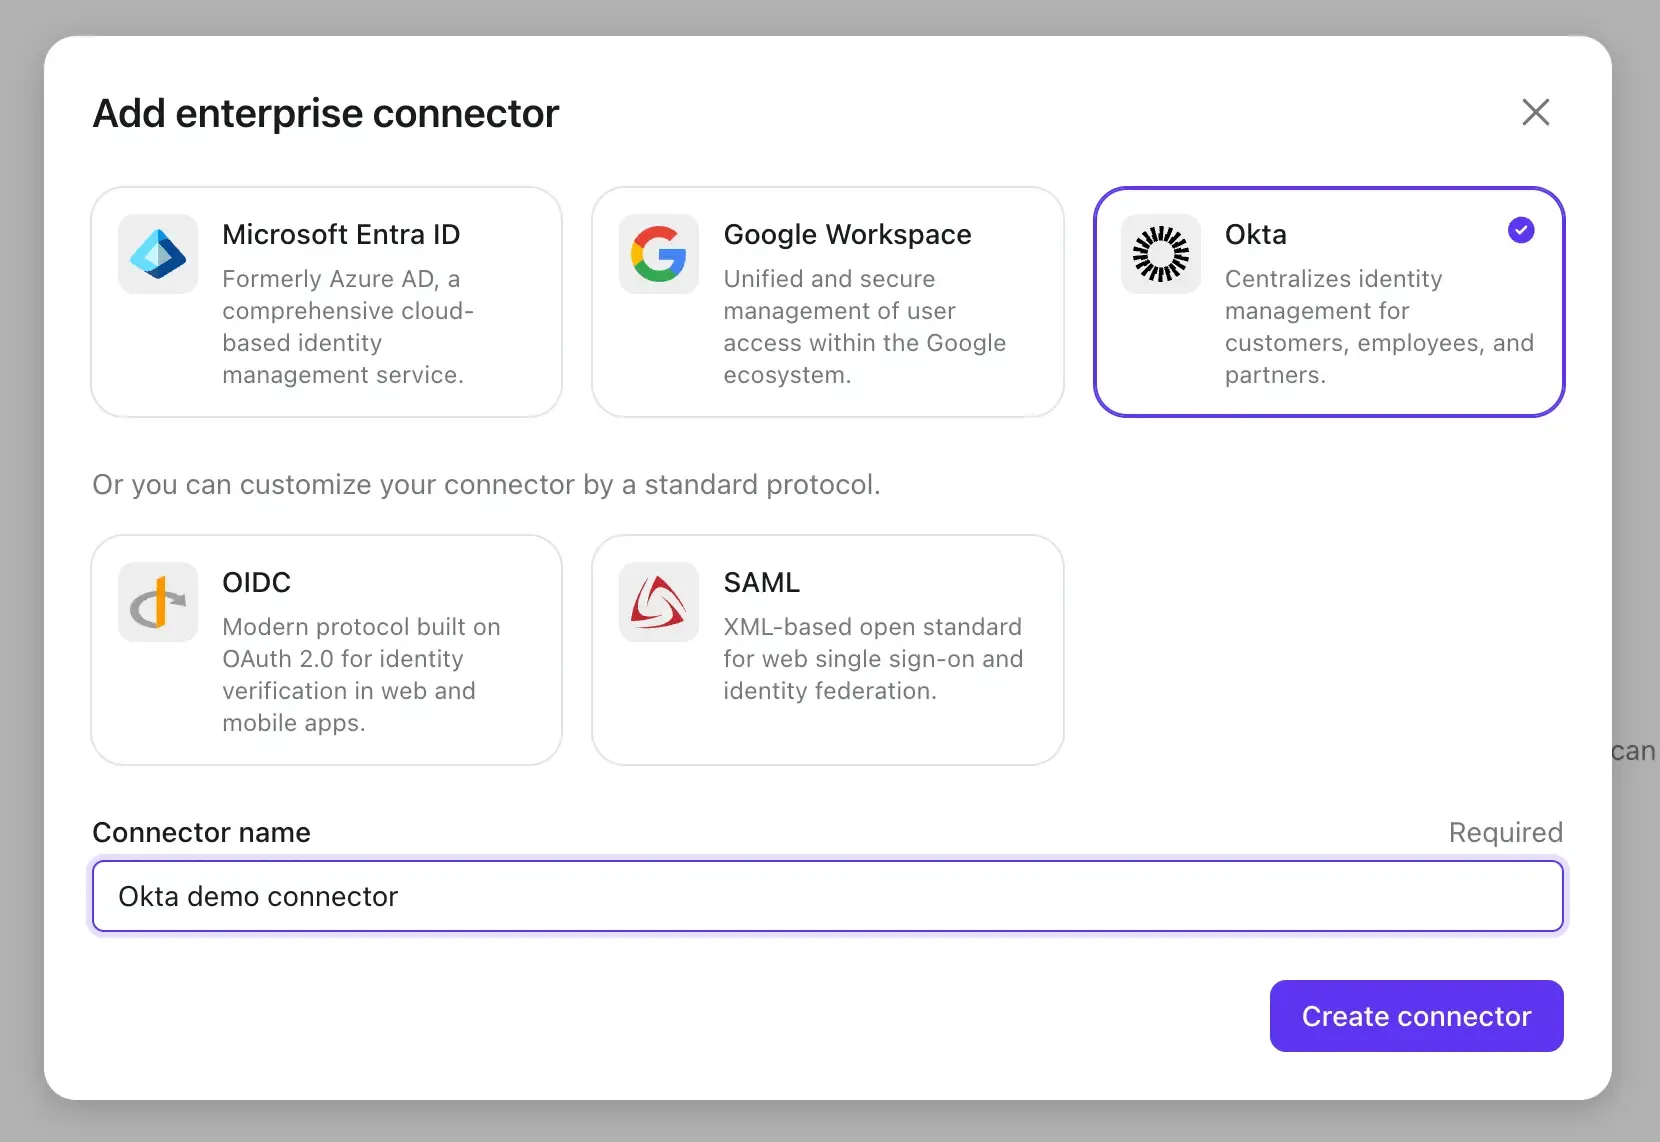
- Click the Add Enterprise SSO button and select Okta as the SSO provider.
Before we proceed to the next step, we need to collect some information from the Okta side.
Create an Okta application
- Visit the Okta admin portal and sign-in to an admin account.
- Navigate to the Applications tab, all the applications will be listed here.
- Click the Add Application button on the top left to initiate a new application creation session.
- Select OIDC - OpenID Connect as the sign-in method, and Web Application as the application type.
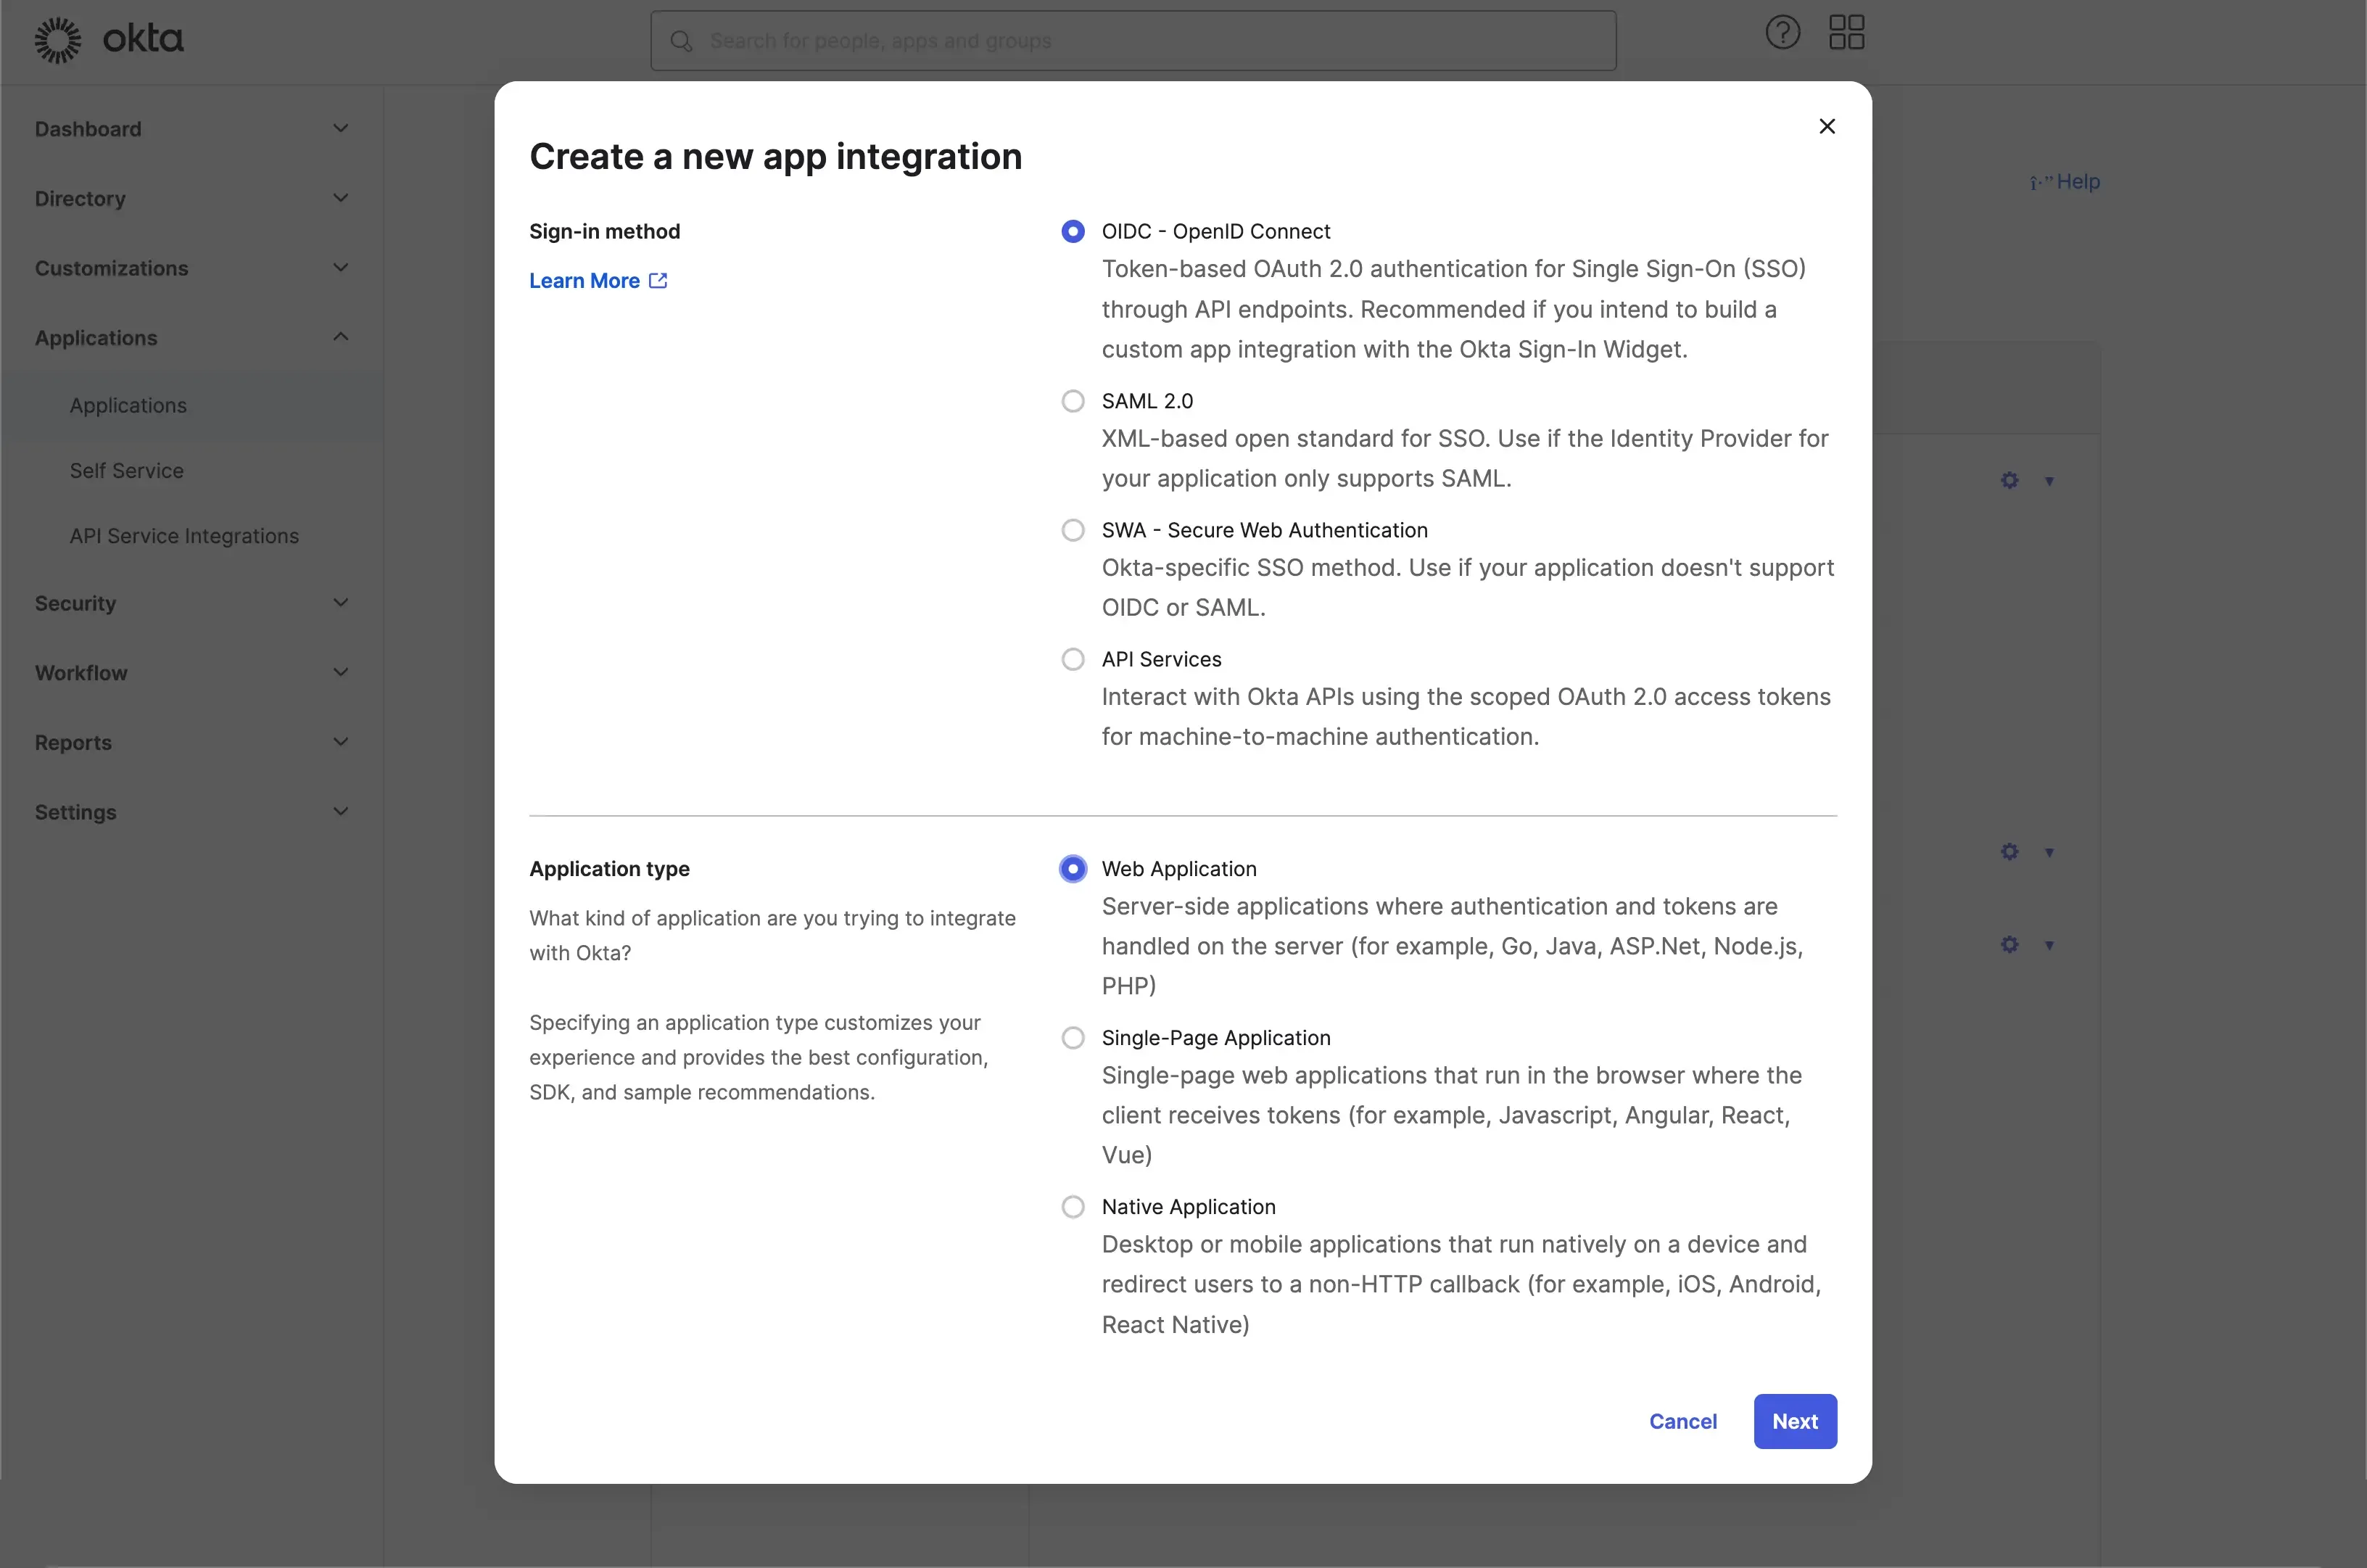
- Click the Next button to proceed to the next step.
Configure the Okta application
-
Fill in the application general information.
Field Name Description Name The name of the application. Logo The logo of the application. Grant Type The grant type of the application. Logto client will trigger a SSO flow on behave of a user, use the default Authorization Code grant type.
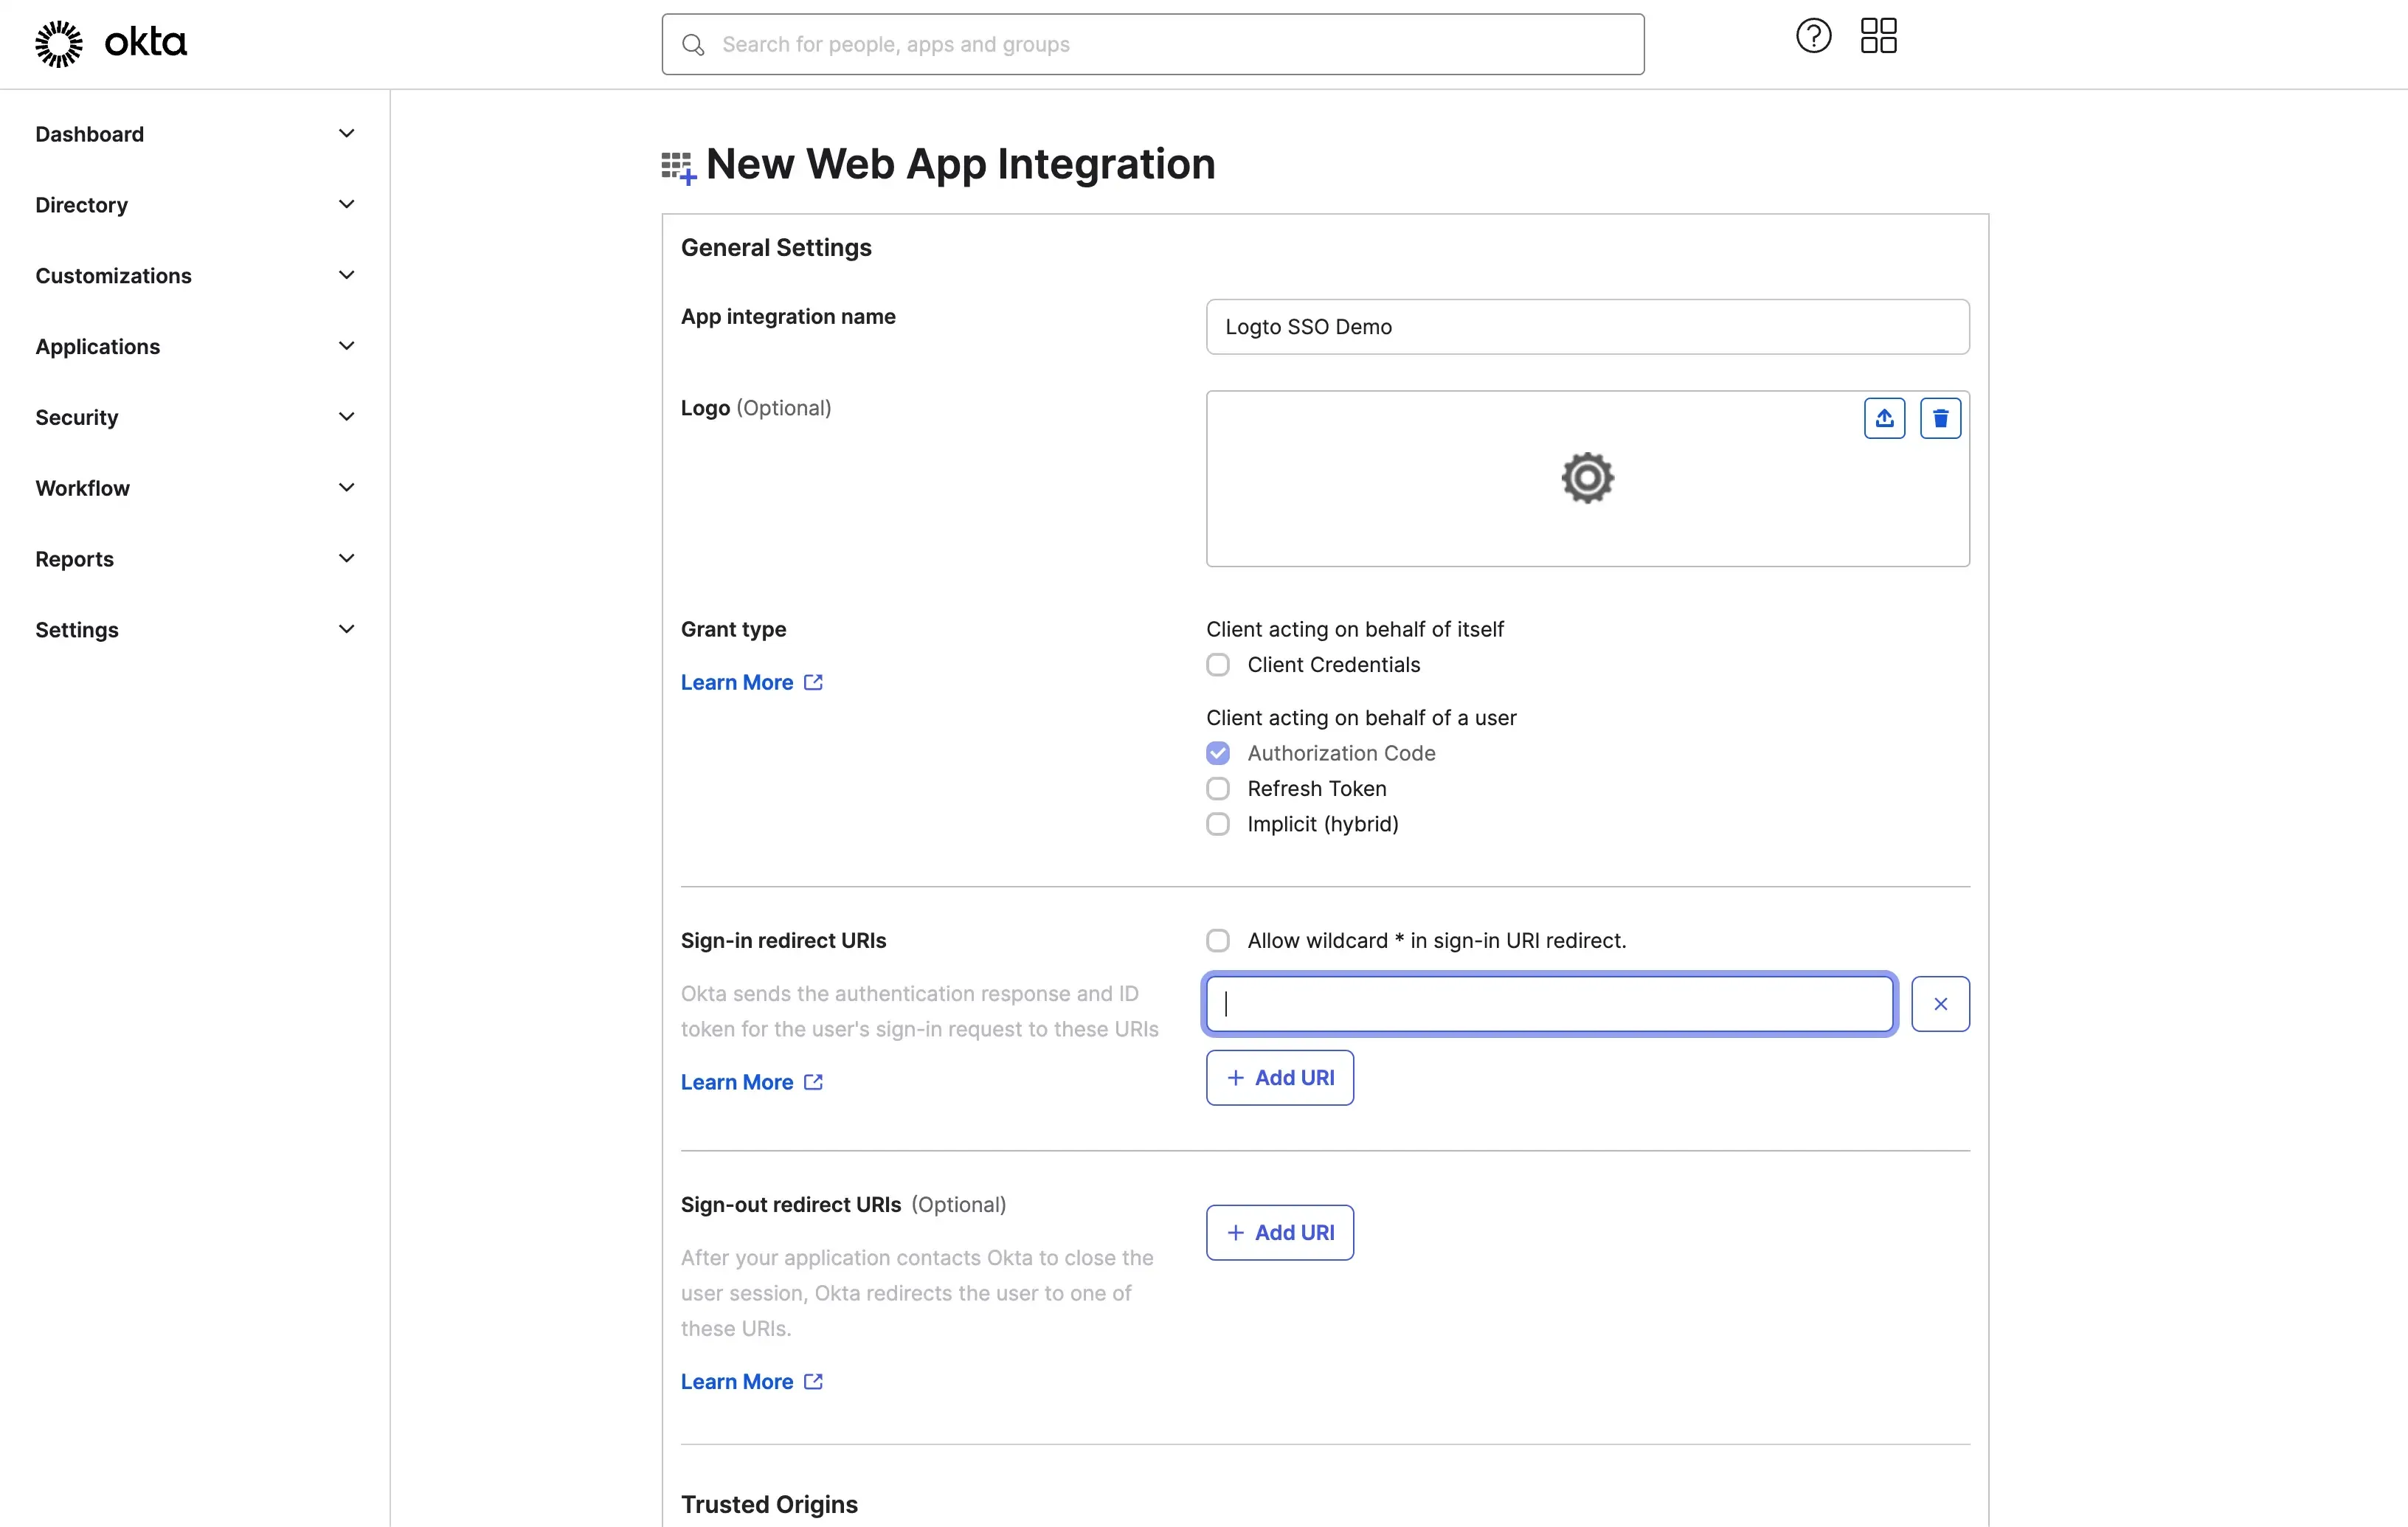
- Fill in the application's Sign-in redirect URIs . These URIs are used to redirect the user to the Logto application after the SSO flow is completed. You may find the redirect URI value at the bottom of the Logto's Okta SSO connector page.

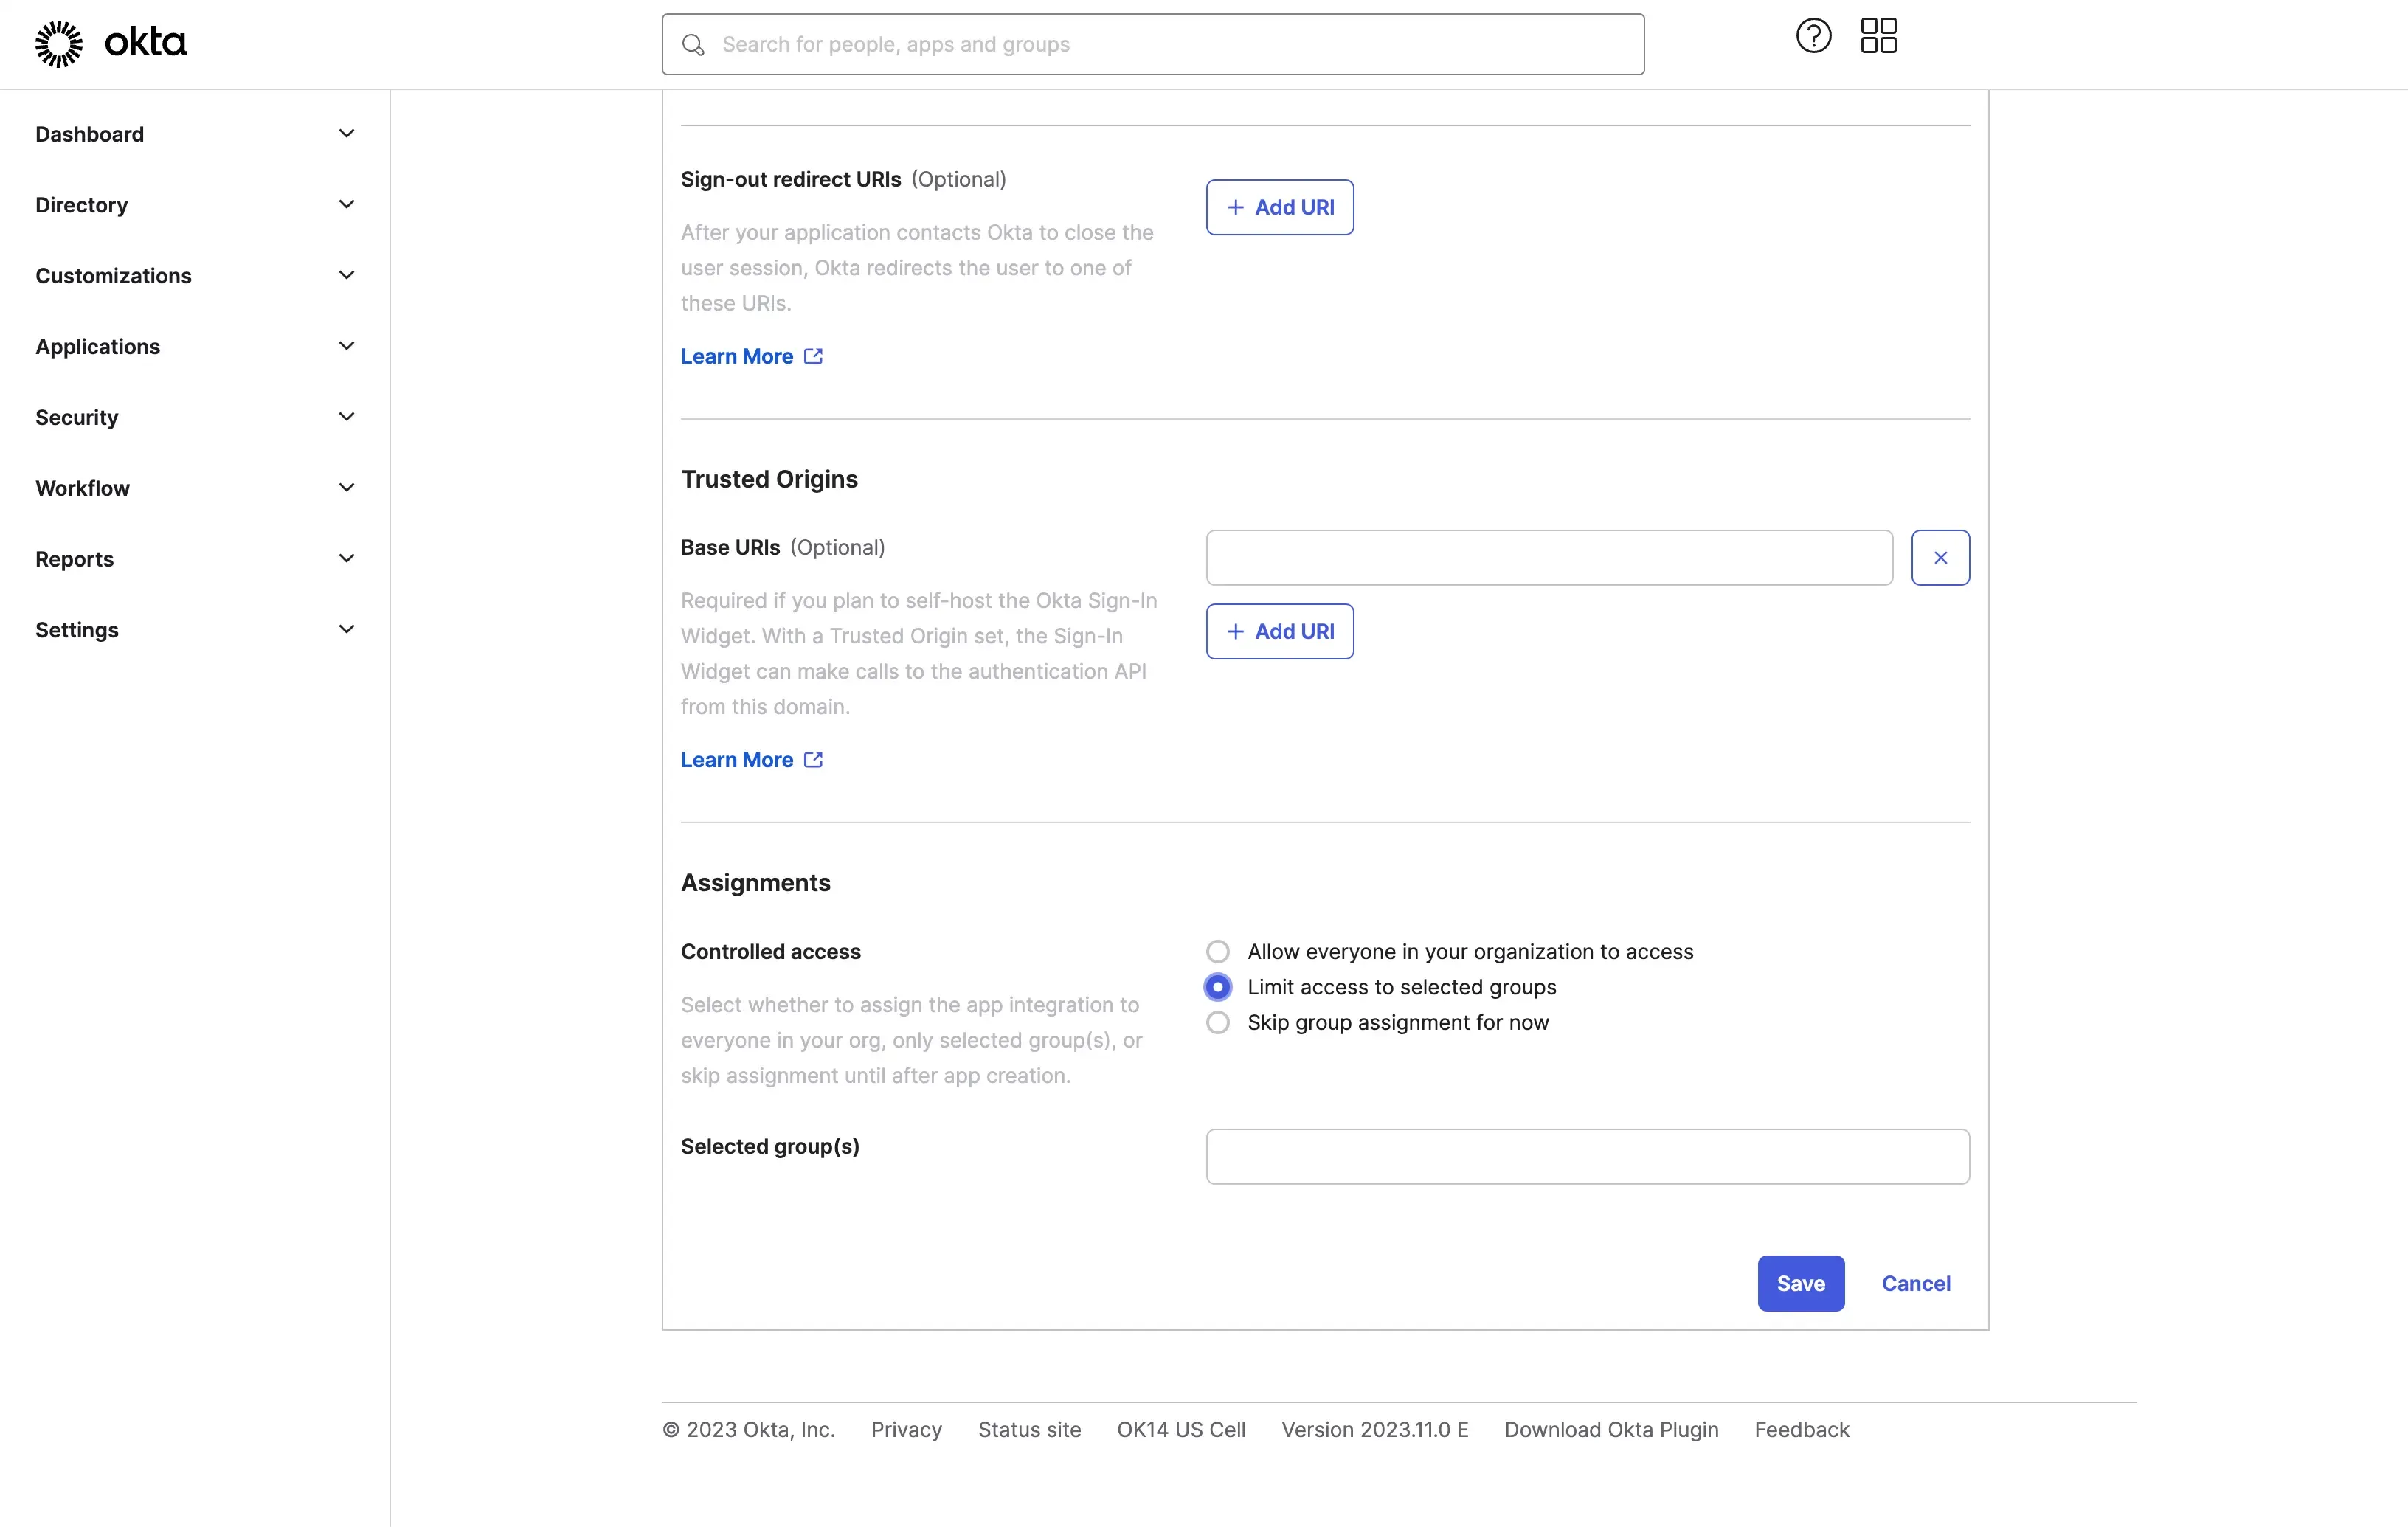
- Assign users to the application. Okta provides a few ways to control the application access. You can assign all the users in the Okta organization to the application, or you can assign the application to a specific group.
- Click the Save button to finish the application creation.
Configure the Okta SSO connector in Logto
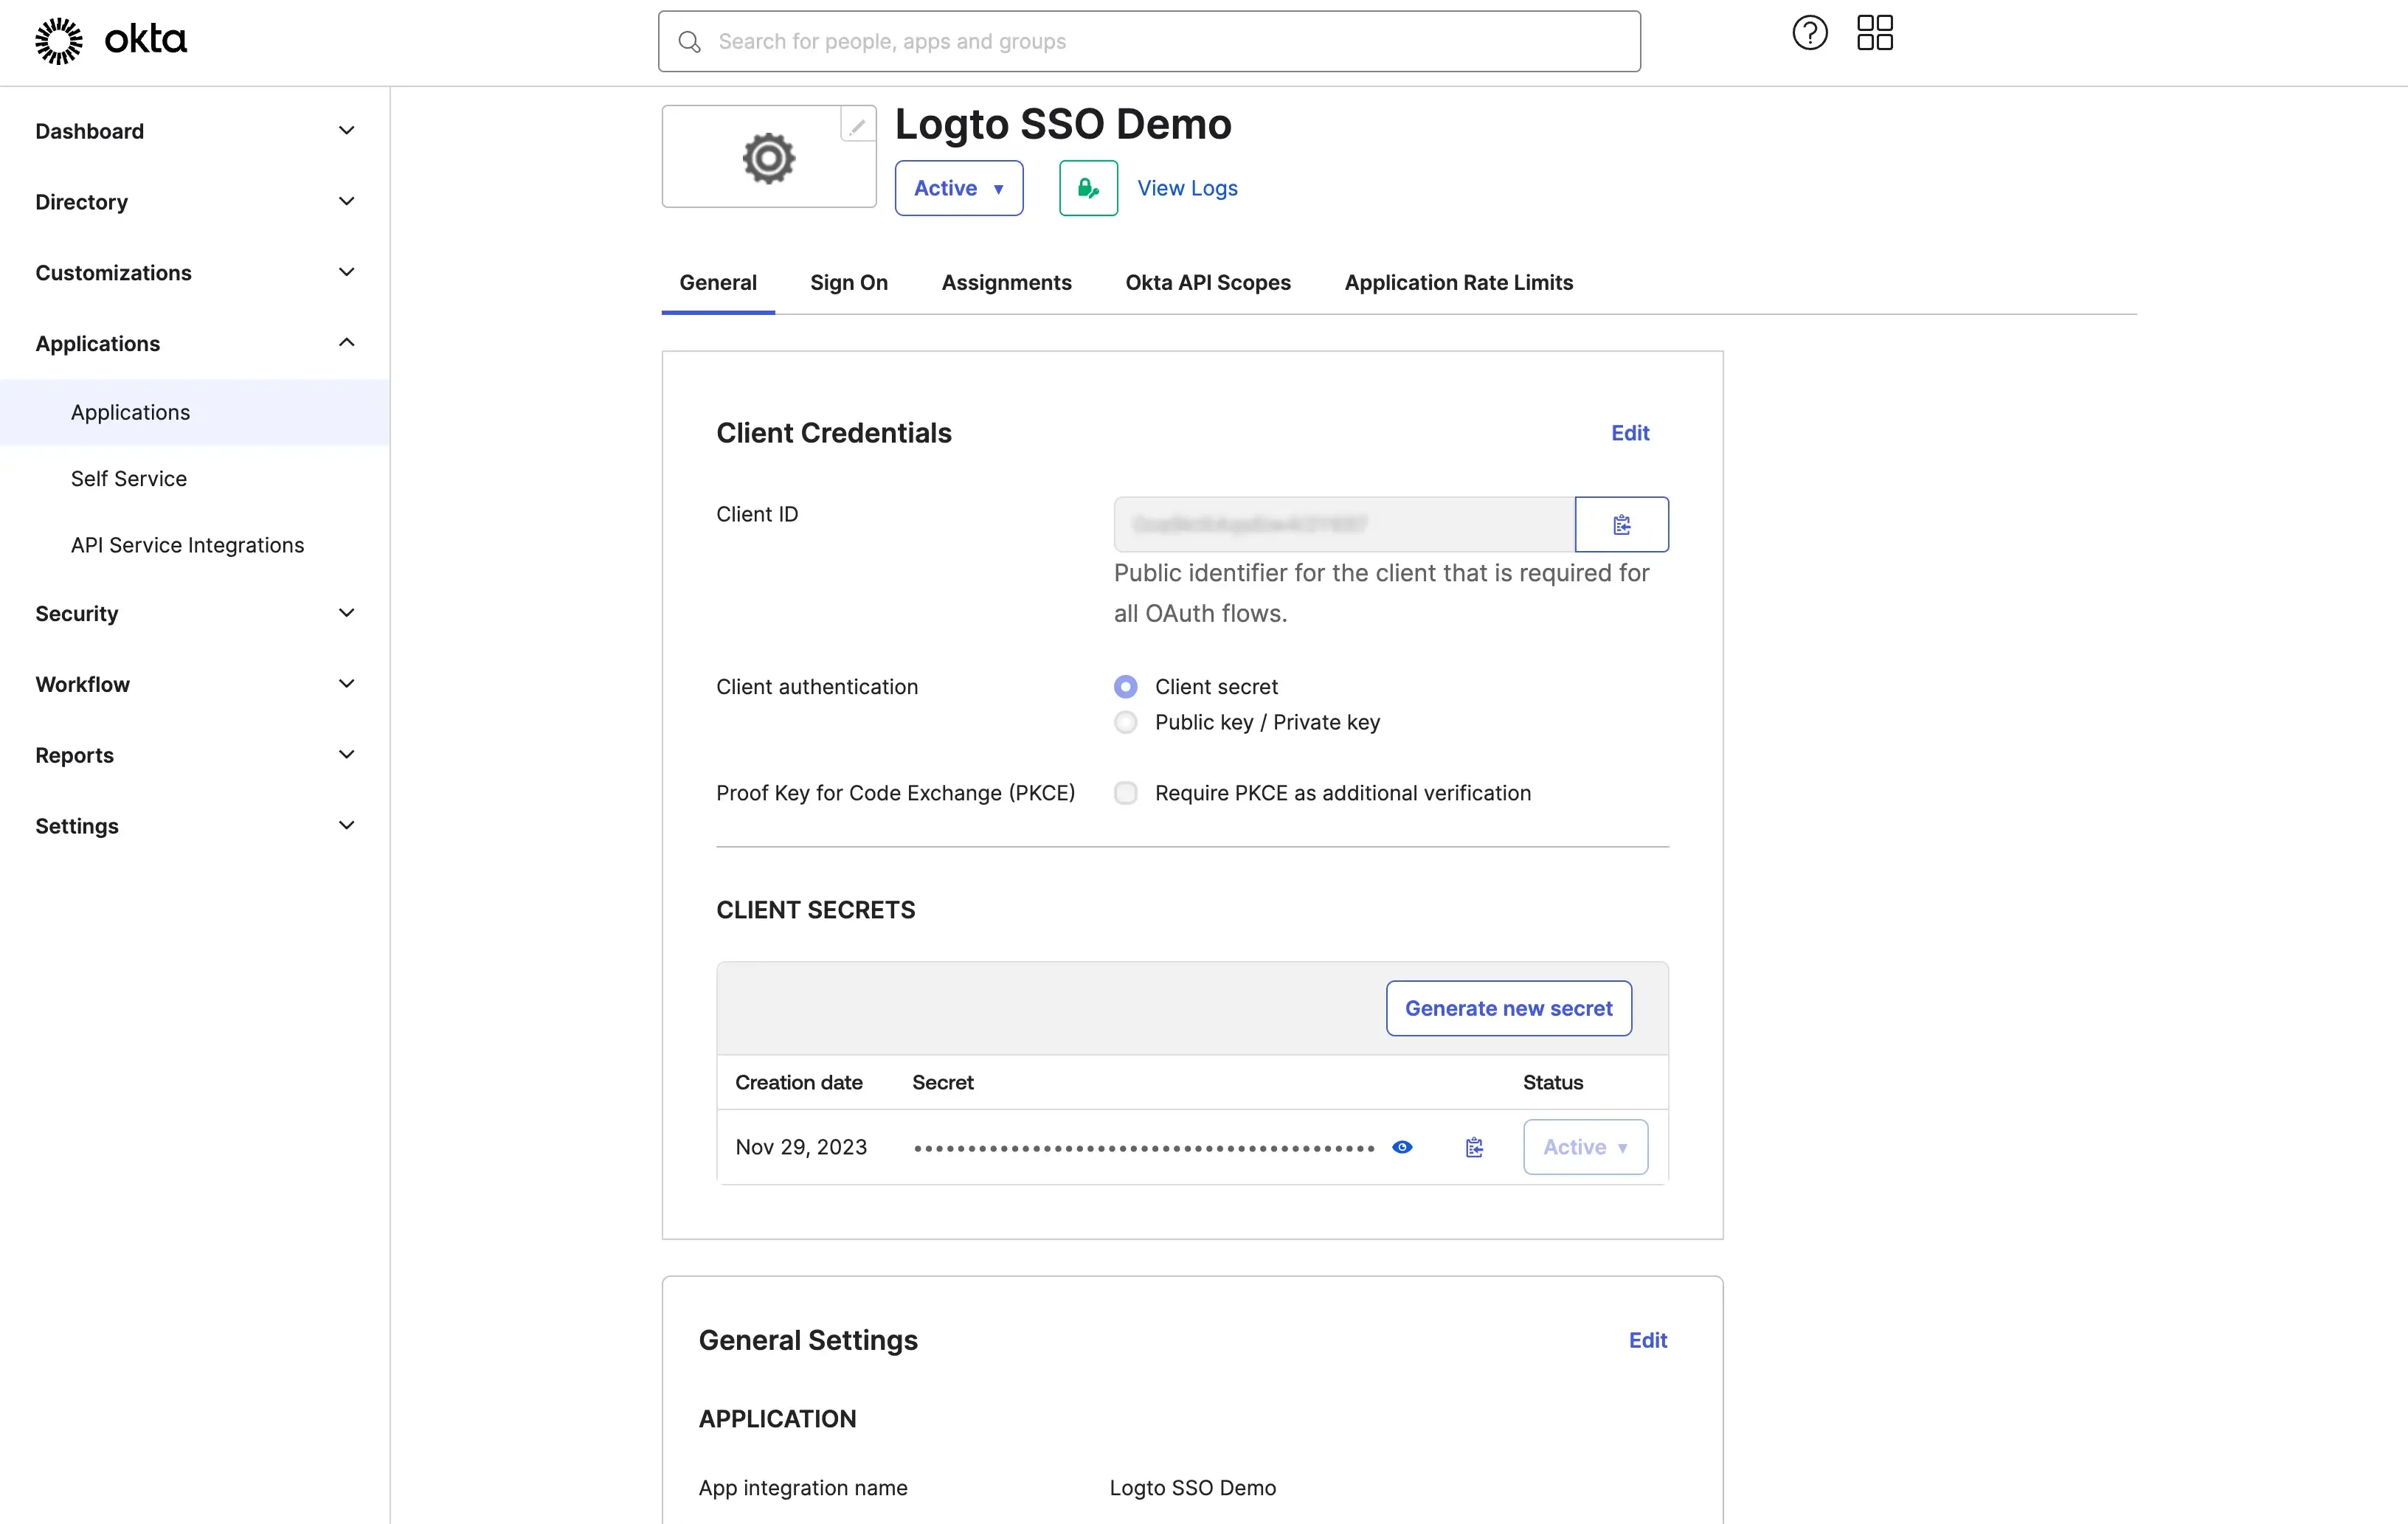
- Copy the Client ID and Client Secret from the Okta application page and paste them into the Logto Okta SSO connector page.
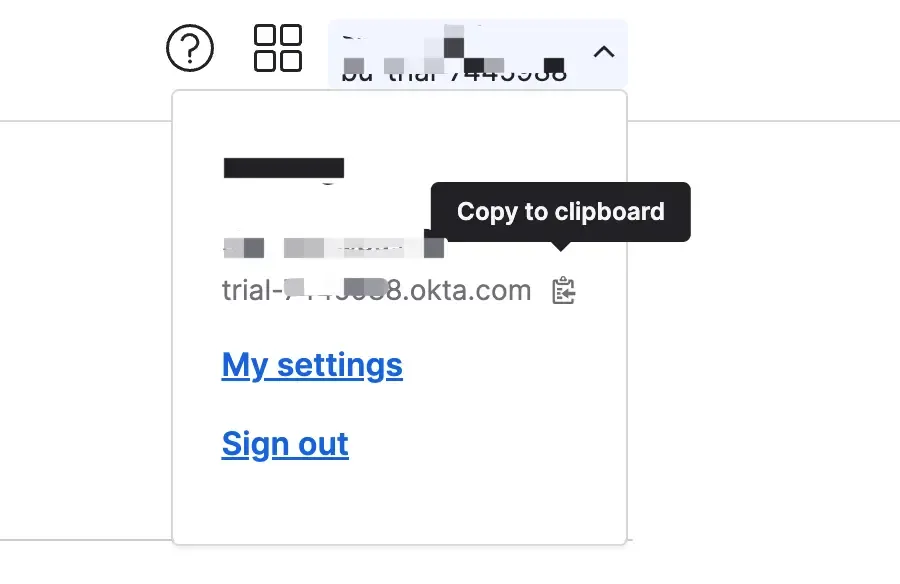
- Copy your Okta organization URL and paste it into the Logto Okta SSO connector page as the Issuer URL. You may find the organization URL at the right top corner of the Okta admin portal.
- OPTIONAL: You may use the
Scopefield to add additional scopes to your OAuth request. This will allow you to request for more information from the Okta OAuth server. Please refer to the Okta documentation for more details about the available scopes.
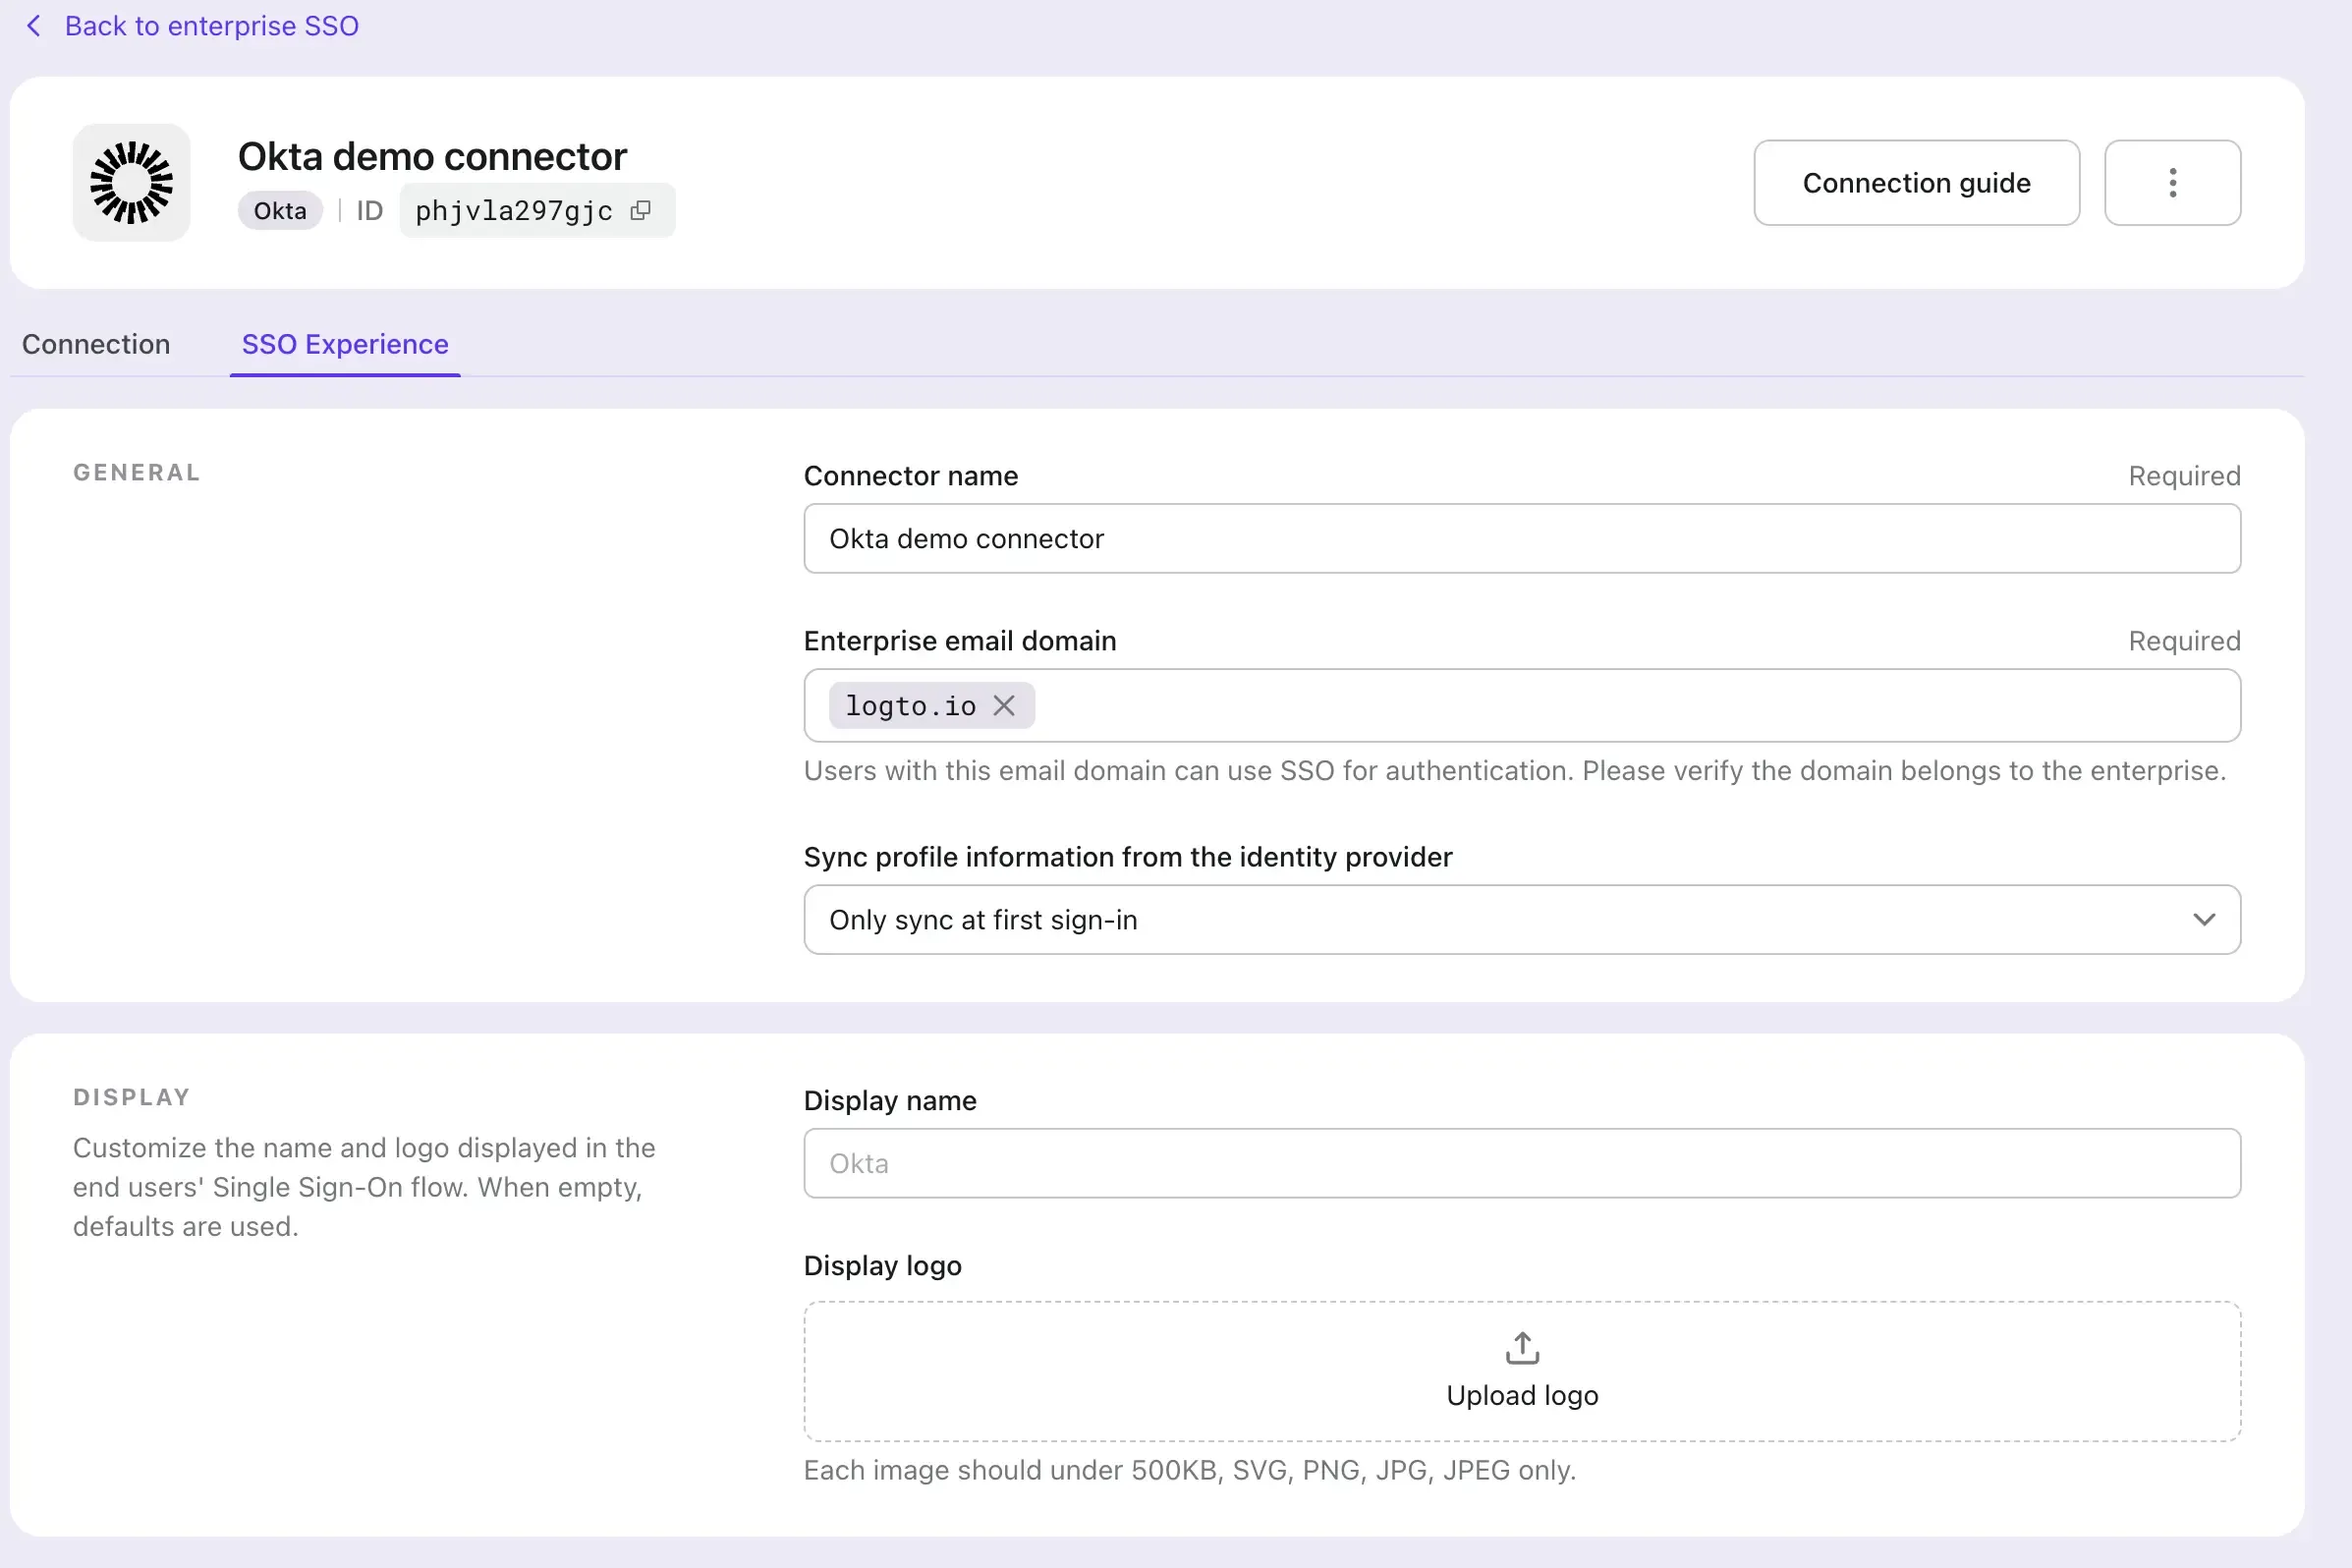
- Navigate to the SSO Experience tab and fill in the Enterprise email domain field. This will enabled the SSO connector as an authentication method for those users. For example, if you fill in
logto.ioas the enterprise email domain, all the users with an email address ends with@logto.iowill be restricted to use the Okta SSO connector to sign-in to the Logto application.
Enable the SSO in Logto's sign-in experience
- Navigate to the Sign-in Experience page.
- Click on the Sign-up and sign-in tab.
- Scroll down to the ADVANCED OPTIONS section and enable the Enterprise SSO toggle.
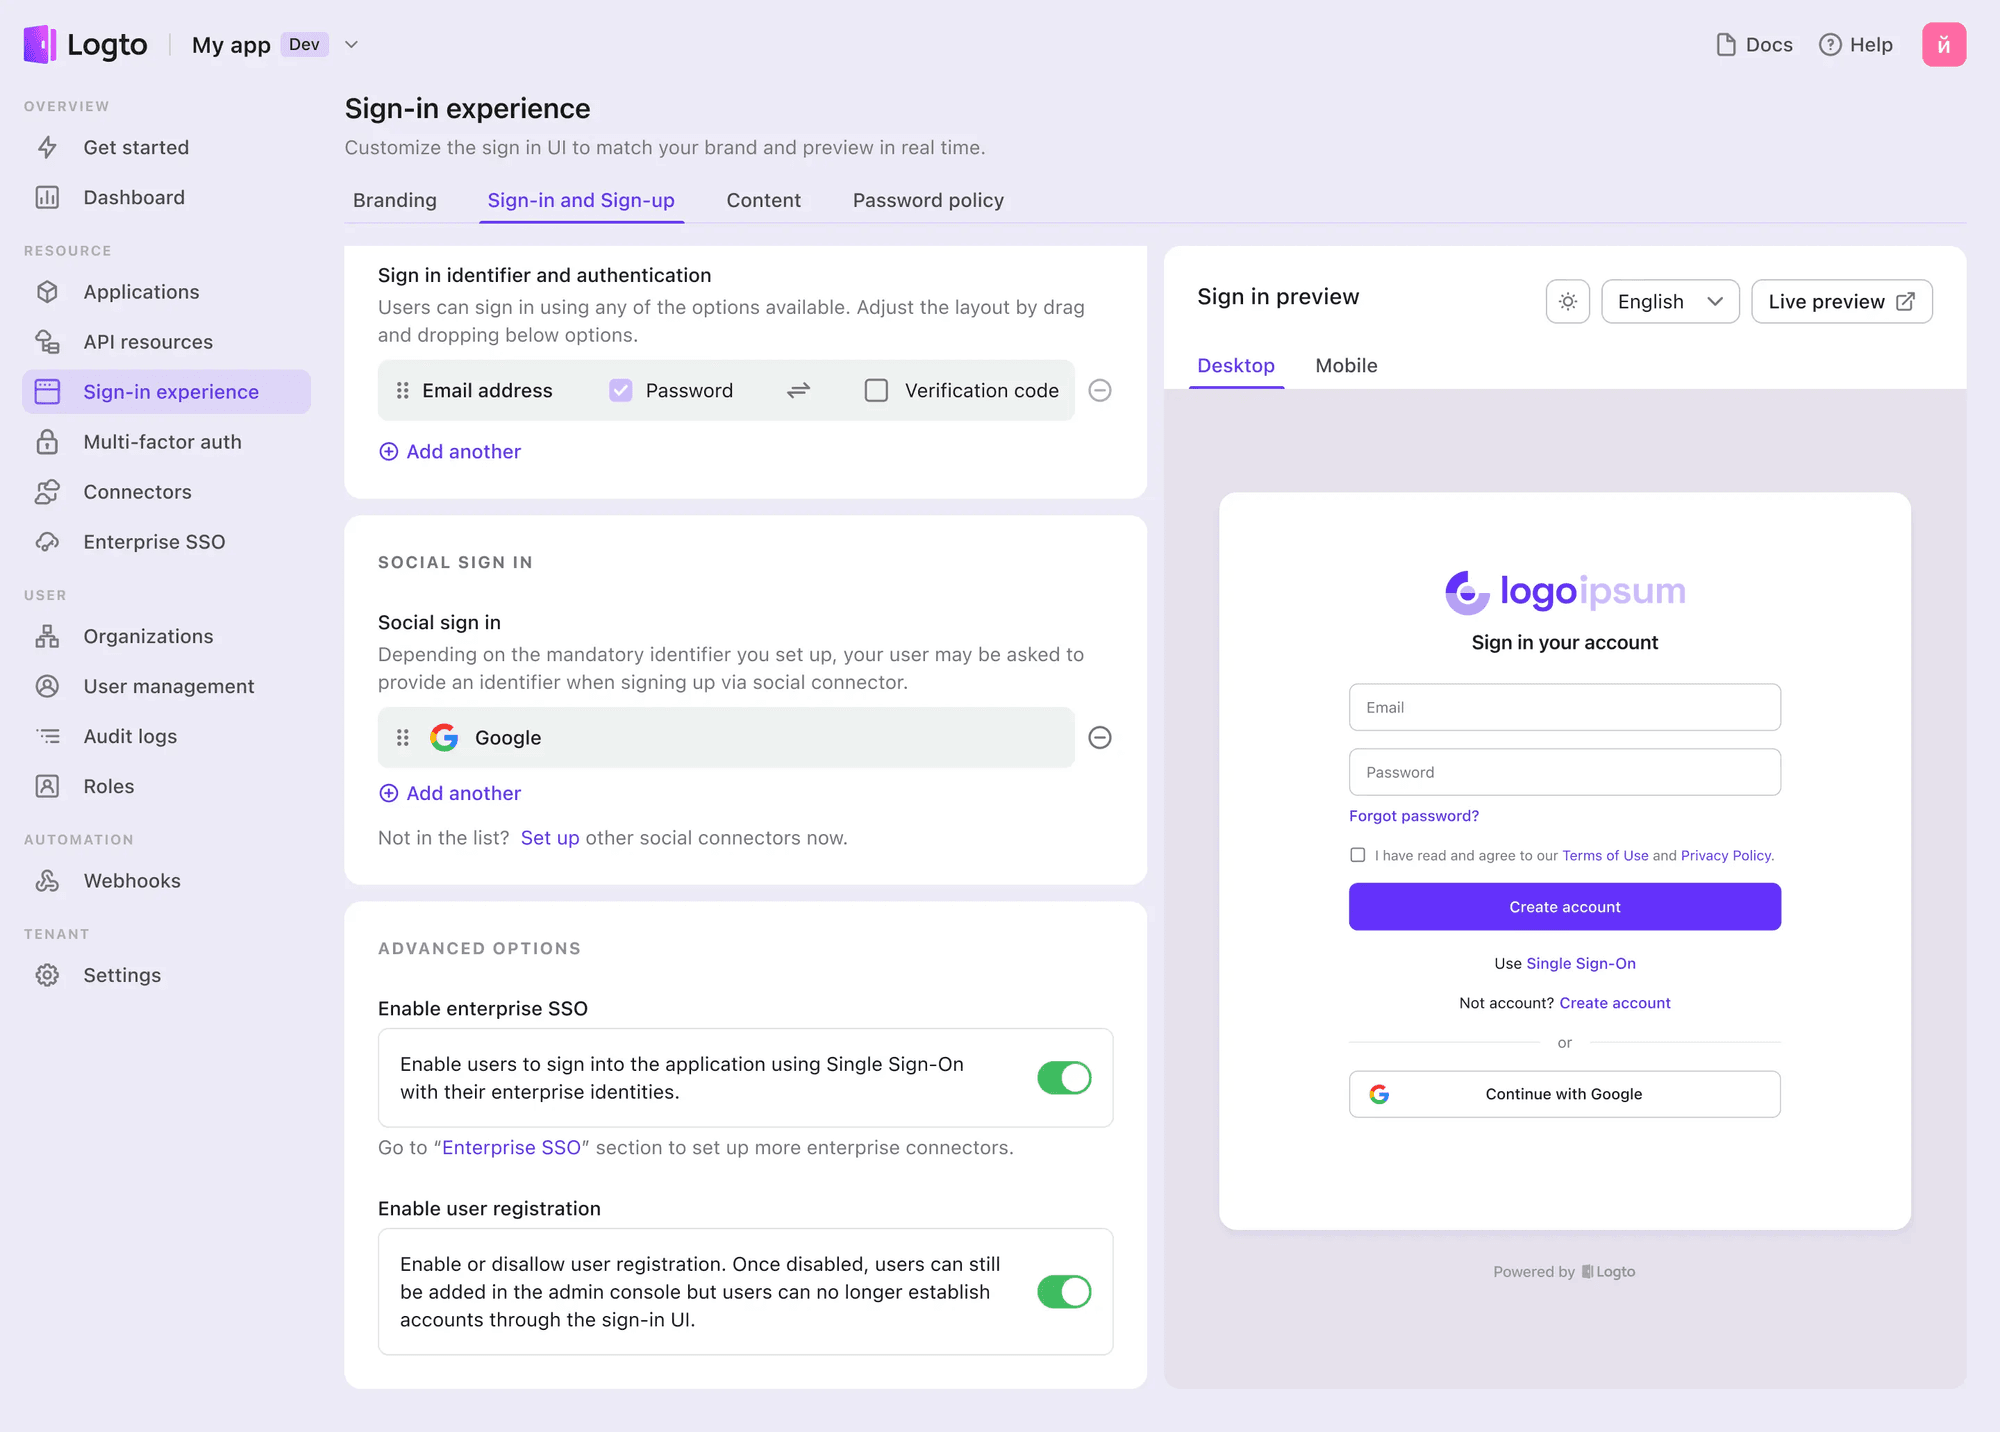
Test the SSO integration
Use the sign-in experience live preview to test the SSO integration. You can find the live preview button at the top right corner of the Sign-in Experience preview section.
A successful SSO integration will redirect the user to the Okta sign-in page. After the user successfully signed in, the user will be redirected back to the Logto's demo App.