Painless local debugging: achieving HTTPS and custom hostname with Cloudflare Tunnel
This article introduces how to use Cloudflare Tunnel to achieve HTTPS and custom hostname for painless local debugging.

Developer

In our daily development, we often use http://localhost to access and debug our applications, which is sufficient in most cases. However, in situations such as the following, we may need to use HTTPS and a custom hostname to debug our applications:
- When your application uses an API that requires HTTPS (such as the Web Crypto API or other third-party libraries that require HTTPS)
- When a third-party service you want to integrate requires you to provide a globally accessible HTTPS-based API interface, and you need to debug this interface
There are many solutions to these problems on the market, but most of them are complex and prone to errors. Here, I would like to introduce how to use Cloudflare Tunnel to quickly use HTTPS and custom hostname for local development.
What is Cloudflare Tunnel
Cloudflare Tunnel is a service provided by Cloudflare that allows you to securely connect your infrastructure to the Cloudflare network. It essentially creates a secure and efficient connection between your servers and Cloudflare's global network, ensuring that your web traffic is protected and optimized.
By using Cloudflare Tunnel, you can easily connect your local development machine to Cloudflared's global network. After that, you can host your domain on Cloudflare and forward requests for the domain to your local machine through the Cloudflare Tunnel.
%3bfill:%23ECECFF%3b%7d%23mermaid-0 text.actor%26gt%3btspan%7bfill:black%3bstroke:none%3b%7d%23mermaid-0 .actor-line%7bstroke:hsl(259.6261682243%2c 59.7765363128%25%2c 87.9019607843%25)%3b%7d%23mermaid-0 .messageLine0%7bstroke-width:1.5%3bstroke-dasharray:none%3bstroke:%23333%3b%7d%23mermaid-0 .messageLine1%7bstroke-width:1.5%3bstroke-dasharray:2%2c2%3bstroke:%23333%3b%7d%23mermaid-0 %23arrowhead path%7bfill:%23333%3bstroke:%23333%3b%7d%23mermaid-0 .sequenceNumber%7bfill:white%3b%7d%23mermaid-0 %23sequencenumber%7bfill:%23333%3b%7d%23mermaid-0 %23crosshead path%7bfill:%23333%3bstroke:%23333%3b%7d%23mermaid-0 .messageText%7bfill:%23333%3bstroke:none%3b%7d%23mermaid-0 .labelBox%7bstroke:hsl(259.6261682243%2c 59.7765363128%25%2c 87.9019607843%25)%3bfill:%23ECECFF%3b%7d%23mermaid-0 .labelText%2c%23mermaid-0 .labelText%26gt%3btspan%7bfill:black%3bstroke:none%3b%7d%23mermaid-0 .loopText%2c%23mermaid-0 .loopText%26gt%3btspan%7bfill:black%3bstroke:none%3b%7d%23mermaid-0 .loopLine%7bstroke-width:2px%3bstroke-dasharray:2%2c2%3bstroke:hsl(259.6261682243%2c 59.7765363128%25%2c 87.9019607843%25)%3bfill:hsl(259.6261682243%2c 59.7765363128%25%2c 87.9019607843%25)%3b%7d%23mermaid-0 .note%7bstroke:%23aaaa33%3bfill:%23fff5ad%3b%7d%23mermaid-0 .noteText%2c%23mermaid-0 .noteText%26gt%3btspan%7bfill:black%3bstroke:none%3b%7d%23mermaid-0 .activation0%7bfill:%23f4f4f4%3bstroke:%23666%3b%7d%23mermaid-0 .activation1%7bfill:%23f4f4f4%3bstroke:%23666%3b%7d%23mermaid-0 .activation2%7bfill:%23f4f4f4%3bstroke:%23666%3b%7d%23mermaid-0 .actorPopupMenu%7bposition:absolute%3b%7d%23mermaid-0 .actorPopupMenuPanel%7bposition:absolute%3bfill:%23ECECFF%3bbox-shadow:0px 8px 16px 0px rgba(0%2c0%2c0%2c0.2)%3bfilter:drop-shadow(3px 5px 2px rgb(0 0 0 / 0.4))%3b%7d%23mermaid-0 .actor-man line%7bstroke:hsl(259.6261682243%2c 59.7765363128%25%2c 87.9019607843%25)%3bfill:%23ECECFF%3b%7d%23mermaid-0 .actor-man circle%2c%23mermaid-0 line%7bstroke:hsl(259.6261682243%2c 59.7765363128%25%2c 87.9019607843%25)%3bfill:%23ECECFF%3bstroke-width:2px%3b%7d%23mermaid-0 :root%7b--mermaid-font-family:arial%2csans-serif%3b%7d%3c/style%3e%3cg/%3e%3cdefs%3e%3csymbol height='24' width='24' id='computer'%3e%3cpath d='M2 2v13h20v-13h-20zm18 11h-16v-9h16v9zm-10.228 6l.466-1h3.524l.467 1h-4.457zm14.228 3h-24l2-6h2.104l-1.33 4h18.45l-1.297-4h2.073l2 6zm-5-10h-14v-7h14v7z' transform='scale(.5)'/%3e%3c/symbol%3e%3c/defs%3e%3cdefs%3e%3csymbol clip-rule='evenodd' fill-rule='evenodd' id='database'%3e%3cpath d='M12.258.001l.256.004.255.005.253.008.251.01.249.012.247.015.246.016.242.019.241.02.239.023.236.024.233.027.231.028.229.031.225.032.223.034.22.036.217.038.214.04.211.041.208.043.205.045.201.046.198.048.194.05.191.051.187.053.183.054.18.056.175.057.172.059.168.06.163.061.16.063.155.064.15.066.074.033.073.033.071.034.07.034.069.035.068.035.067.035.066.035.064.036.064.036.062.036.06.036.06.037.058.037.058.037.055.038.055.038.053.038.052.038.051.039.05.039.048.039.047.039.045.04.044.04.043.04.041.04.04.041.039.041.037.041.036.041.034.041.033.042.032.042.03.042.029.042.027.042.026.043.024.043.023.043.021.043.02.043.018.044.017.043.015.044.013.044.012.044.011.045.009.044.007.045.006.045.004.045.002.045.001.045v17l-.001.045-.002.045-.004.045-.006.045-.007.045-.009.044-.011.045-.012.044-.013.044-.015.044-.017.043-.018.044-.02.043-.021.043-.023.043-.024.043-.026.043-.027.042-.029.042-.03.042-.032.042-.033.042-.034.041-.036.041-.037.041-.039.041-.04.041-.041.04-.043.04-.044.04-.045.04-.047.039-.048.039-.05.039-.051.039-.052.038-.053.038-.055.038-.055.038-.058.037-.058.037-.06.037-.06.036-.062.036-.064.036-.064.036-.066.035-.067.035-.068.035-.069.035-.07.034-.071.034-.073.033-.074.033-.15.066-.155.064-.16.063-.163.061-.168.06-.172.059-.175.057-.18.056-.183.054-.187.053-.191.051-.194.05-.198.048-.201.046-.205.045-.208.043-.211.041-.214.04-.217.038-.22.036-.223.034-.225.032-.229.031-.231.028-.233.027-.236.024-.239.023-.241.02-.242.019-.246.016-.247.015-.249.012-.251.01-.253.008-.255.005-.256.004-.258.001-.258-.001-.256-.004-.255-.005-.253-.008-.251-.01-.249-.012-.247-.015-.245-.016-.243-.019-.241-.02-.238-.023-.236-.024-.234-.027-.231-.028-.228-.031-.226-.032-.223-.034-.22-.036-.217-.038-.214-.04-.211-.041-.208-.043-.204-.045-.201-.046-.198-.048-.195-.05-.19-.051-.187-.053-.184-.054-.179-.056-.176-.057-.172-.059-.167-.06-.164-.061-.159-.063-.155-.064-.151-.066-.074-.033-.072-.033-.072-.034-.07-.034-.069-.035-.068-.035-.067-.035-.066-.035-.064-.036-.063-.036-.062-.036-.061-.036-.06-.037-.058-.037-.057-.037-.056-.038-.055-.038-.053-.038-.052-.038-.051-.039-.049-.039-.049-.039-.046-.039-.046-.04-.044-.04-.043-.04-.041-.04-.04-.041-.039-.041-.037-.041-.036-.041-.034-.041-.033-.042-.032-.042-.03-.042-.029-.042-.027-.042-.026-.043-.024-.043-.023-.043-.021-.043-.02-.043-.018-.044-.017-.043-.015-.044-.013-.044-.012-.044-.011-.045-.009-.044-.007-.045-.006-.045-.004-.045-.002-.045-.001-.045v-17l.001-.045.002-.045.004-.045.006-.045.007-.045.009-.044.011-.045.012-.044.013-.044.015-.044.017-.043.018-.044.02-.043.021-.043.023-.043.024-.043.026-.043.027-.042.029-.042.03-.042.032-.042.033-.042.034-.041.036-.041.037-.041.039-.041.04-.041.041-.04.043-.04.044-.04.046-.04.046-.039.049-.039.049-.039.051-.039.052-.038.053-.038.055-.038.056-.038.057-.037.058-.037.06-.037.061-.036.062-.036.063-.036.064-.036.066-.035.067-.035.068-.035.069-.035.07-.034.072-.034.072-.033.074-.033.151-.066.155-.064.159-.063.164-.061.167-.06.172-.059.176-.057.179-.056.184-.054.187-.053.19-.051.195-.05.198-.048.201-.046.204-.045.208-.043.211-.041.214-.04.217-.038.22-.036.223-.034.226-.032.228-.031.231-.028.234-.027.236-.024.238-.023.241-.02.243-.019.245-.016.247-.015.249-.012.251-.01.253-.008.255-.005.256-.004.258-.001.258.001zm-9.258 20.499v.01l.001.021.003.021.004.022.005.021.006.022.007.022.009.023.01.022.011.023.012.023.013.023.015.023.016.024.017.023.018.024.019.024.021.024.022.025.023.024.024.025.052.049.056.05.061.051.066.051.07.051.075.051.079.052.084.052.088.052.092.052.097.052.102.051.105.052.11.052.114.051.119.051.123.051.127.05.131.05.135.05.139.048.144.049.147.047.152.047.155.047.16.045.163.045.167.043.171.043.176.041.178.041.183.039.187.039.19.037.194.035.197.035.202.033.204.031.209.03.212.029.216.027.219.025.222.024.226.021.23.02.233.018.236.016.24.015.243.012.246.01.249.008.253.005.256.004.259.001.26-.001.257-.004.254-.005.25-.008.247-.011.244-.012.241-.014.237-.016.233-.018.231-.021.226-.021.224-.024.22-.026.216-.027.212-.028.21-.031.205-.031.202-.034.198-.034.194-.036.191-.037.187-.039.183-.04.179-.04.175-.042.172-.043.168-.044.163-.045.16-.046.155-.046.152-.047.148-.048.143-.049.139-.049.136-.05.131-.05.126-.05.123-.051.118-.052.114-.051.11-.052.106-.052.101-.052.096-.052.092-.052.088-.053.083-.051.079-.052.074-.052.07-.051.065-.051.06-.051.056-.05.051-.05.023-.024.023-.025.021-.024.02-.024.019-.024.018-.024.017-.024.015-.023.014-.024.013-.023.012-.023.01-.023.01-.022.008-.022.006-.022.006-.022.004-.022.004-.021.001-.021.001-.021v-4.127l-.077.055-.08.053-.083.054-.085.053-.087.052-.09.052-.093.051-.095.05-.097.05-.1.049-.102.049-.105.048-.106.047-.109.047-.111.046-.114.045-.115.045-.118.044-.12.043-.122.042-.124.042-.126.041-.128.04-.13.04-.132.038-.134.038-.135.037-.138.037-.139.035-.142.035-.143.034-.144.033-.147.032-.148.031-.15.03-.151.03-.153.029-.154.027-.156.027-.158.026-.159.025-.161.024-.162.023-.163.022-.165.021-.166.02-.167.019-.169.018-.169.017-.171.016-.173.015-.173.014-.175.013-.175.012-.177.011-.178.01-.179.008-.179.008-.181.006-.182.005-.182.004-.184.003-.184.002h-.37l-.184-.002-.184-.003-.182-.004-.182-.005-.181-.006-.179-.008-.179-.008-.178-.01-.176-.011-.176-.012-.175-.013-.173-.014-.172-.015-.171-.016-.17-.017-.169-.018-.167-.019-.166-.02-.165-.021-.163-.022-.162-.023-.161-.024-.159-.025-.157-.026-.156-.027-.155-.027-.153-.029-.151-.03-.15-.03-.148-.031-.146-.032-.145-.033-.143-.034-.141-.035-.14-.035-.137-.037-.136-.037-.134-.038-.132-.038-.13-.04-.128-.04-.126-.041-.124-.042-.122-.042-.12-.044-.117-.043-.116-.045-.113-.045-.112-.046-.109-.047-.106-.047-.105-.048-.102-.049-.1-.049-.097-.05-.095-.05-.093-.052-.09-.051-.087-.052-.085-.053-.083-.054-.08-.054-.077-.054v4.127zm0-5.654v.011l.001.021.003.021.004.021.005.022.006.022.007.022.009.022.01.022.011.023.012.023.013.023.015.024.016.023.017.024.018.024.019.024.021.024.022.024.023.025.024.024.052.05.056.05.061.05.066.051.07.051.075.052.079.051.084.052.088.052.092.052.097.052.102.052.105.052.11.051.114.051.119.052.123.05.127.051.131.05.135.049.139.049.144.048.147.048.152.047.155.046.16.045.163.045.167.044.171.042.176.042.178.04.183.04.187.038.19.037.194.036.197.034.202.033.204.032.209.03.212.028.216.027.219.025.222.024.226.022.23.02.233.018.236.016.24.014.243.012.246.01.249.008.253.006.256.003.259.001.26-.001.257-.003.254-.006.25-.008.247-.01.244-.012.241-.015.237-.016.233-.018.231-.02.226-.022.224-.024.22-.025.216-.027.212-.029.21-.03.205-.032.202-.033.198-.035.194-.036.191-.037.187-.039.183-.039.179-.041.175-.042.172-.043.168-.044.163-.045.16-.045.155-.047.152-.047.148-.048.143-.048.139-.05.136-.049.131-.05.126-.051.123-.051.118-.051.114-.052.11-.052.106-.052.101-.052.096-.052.092-.052.088-.052.083-.052.079-.052.074-.051.07-.052.065-.051.06-.05.056-.051.051-.049.023-.025.023-.024.021-.025.02-.024.019-.024.018-.024.017-.024.015-.023.014-.023.013-.024.012-.022.01-.023.01-.023.008-.022.006-.022.006-.022.004-.021.004-.022.001-.021.001-.021v-4.139l-.077.054-.08.054-.083.054-.085.052-.087.053-.09.051-.093.051-.095.051-.097.05-.1.049-.102.049-.105.048-.106.047-.109.047-.111.046-.114.045-.115.044-.118.044-.12.044-.122.042-.124.042-.126.041-.128.04-.13.039-.132.039-.134.038-.135.037-.138.036-.139.036-.142.035-.143.033-.144.033-.147.033-.148.031-.15.03-.151.03-.153.028-.154.028-.156.027-.158.026-.159.025-.161.024-.162.023-.163.022-.165.021-.166.02-.167.019-.169.018-.169.017-.171.016-.173.015-.173.014-.175.013-.175.012-.177.011-.178.009-.179.009-.179.007-.181.007-.182.005-.182.004-.184.003-.184.002h-.37l-.184-.002-.184-.003-.182-.004-.182-.005-.181-.007-.179-.007-.179-.009-.178-.009-.176-.011-.176-.012-.175-.013-.173-.014-.172-.015-.171-.016-.17-.017-.169-.018-.167-.019-.166-.02-.165-.021-.163-.022-.162-.023-.161-.024-.159-.025-.157-.026-.156-.027-.155-.028-.153-.028-.151-.03-.15-.03-.148-.031-.146-.033-.145-.033-.143-.033-.141-.035-.14-.036-.137-.036-.136-.037-.134-.038-.132-.039-.13-.039-.128-.04-.126-.041-.124-.042-.122-.043-.12-.043-.117-.044-.116-.044-.113-.046-.112-.046-.109-.046-.106-.047-.105-.048-.102-.049-.1-.049-.097-.05-.095-.051-.093-.051-.09-.051-.087-.053-.085-.052-.083-.054-.08-.054-.077-.054v4.139zm0-5.666v.011l.001.02.003.022.004.021.005.022.006.021.007.022.009.023.01.022.011.023.012.023.013.023.015.023.016.024.017.024.018.023.019.024.021.025.022.024.023.024.024.025.052.05.056.05.061.05.066.051.07.051.075.052.079.051.084.052.088.052.092.052.097.052.102.052.105.051.11.052.114.051.119.051.123.051.127.05.131.05.135.05.139.049.144.048.147.048.152.047.155.046.16.045.163.045.167.043.171.043.176.042.178.04.183.04.187.038.19.037.194.036.197.034.202.033.204.032.209.03.212.028.216.027.219.025.222.024.226.021.23.02.233.018.236.017.24.014.243.012.246.01.249.008.253.006.256.003.259.001.26-.001.257-.003.254-.006.25-.008.247-.01.244-.013.241-.014.237-.016.233-.018.231-.02.226-.022.224-.024.22-.025.216-.027.212-.029.21-.03.205-.032.202-.033.198-.035.194-.036.191-.037.187-.039.183-.039.179-.041.175-.042.172-.043.168-.044.163-.045.16-.045.155-.047.152-.047.148-.048.143-.049.139-.049.136-.049.131-.051.126-.05.123-.051.118-.052.114-.051.11-.052.106-.052.101-.052.096-.052.092-.052.088-.052.083-.052.079-.052.074-.052.07-.051.065-.051.06-.051.056-.05.051-.049.023-.025.023-.025.021-.024.02-.024.019-.024.018-.024.017-.024.015-.023.014-.024.013-.023.012-.023.01-.022.01-.023.008-.022.006-.022.006-.022.004-.022.004-.021.001-.021.001-.021v-4.153l-.077.054-.08.054-.083.053-.085.053-.087.053-.09.051-.093.051-.095.051-.097.05-.1.049-.102.048-.105.048-.106.048-.109.046-.111.046-.114.046-.115.044-.118.044-.12.043-.122.043-.124.042-.126.041-.128.04-.13.039-.132.039-.134.038-.135.037-.138.036-.139.036-.142.034-.143.034-.144.033-.147.032-.148.032-.15.03-.151.03-.153.028-.154.028-.156.027-.158.026-.159.024-.161.024-.162.023-.163.023-.165.021-.166.02-.167.019-.169.018-.169.017-.171.016-.173.015-.173.014-.175.013-.175.012-.177.01-.178.01-.179.009-.179.007-.181.006-.182.006-.182.004-.184.003-.184.001-.185.001-.185-.001-.184-.001-.184-.003-.182-.004-.182-.006-.181-.006-.179-.007-.179-.009-.178-.01-.176-.01-.176-.012-.175-.013-.173-.014-.172-.015-.171-.016-.17-.017-.169-.018-.167-.019-.166-.02-.165-.021-.163-.023-.162-.023-.161-.024-.159-.024-.157-.026-.156-.027-.155-.028-.153-.028-.151-.03-.15-.03-.148-.032-.146-.032-.145-.033-.143-.034-.141-.034-.14-.036-.137-.036-.136-.037-.134-.038-.132-.039-.13-.039-.128-.041-.126-.041-.124-.041-.122-.043-.12-.043-.117-.044-.116-.044-.113-.046-.112-.046-.109-.046-.106-.048-.105-.048-.102-.048-.1-.05-.097-.049-.095-.051-.093-.051-.09-.052-.087-.052-.085-.053-.083-.053-.08-.054-.077-.054v4.153zm8.74-8.179l-.257.004-.254.005-.25.008-.247.011-.244.012-.241.014-.237.016-.233.018-.231.021-.226.022-.224.023-.22.026-.216.027-.212.028-.21.031-.205.032-.202.033-.198.034-.194.036-.191.038-.187.038-.183.04-.179.041-.175.042-.172.043-.168.043-.163.045-.16.046-.155.046-.152.048-.148.048-.143.048-.139.049-.136.05-.131.05-.126.051-.123.051-.118.051-.114.052-.11.052-.106.052-.101.052-.096.052-.092.052-.088.052-.083.052-.079.052-.074.051-.07.052-.065.051-.06.05-.056.05-.051.05-.023.025-.023.024-.021.024-.02.025-.019.024-.018.024-.017.023-.015.024-.014.023-.013.023-.012.023-.01.023-.01.022-.008.022-.006.023-.006.021-.004.022-.004.021-.001.021-.001.021.001.021.001.021.004.021.004.022.006.021.006.023.008.022.01.022.01.023.012.023.013.023.014.023.015.024.017.023.018.024.019.024.02.025.021.024.023.024.023.025.051.05.056.05.06.05.065.051.07.052.074.051.079.052.083.052.088.052.092.052.096.052.101.052.106.052.11.052.114.052.118.051.123.051.126.051.131.05.136.05.139.049.143.048.148.048.152.048.155.046.16.046.163.045.168.043.172.043.175.042.179.041.183.04.187.038.191.038.194.036.198.034.202.033.205.032.21.031.212.028.216.027.22.026.224.023.226.022.231.021.233.018.237.016.241.014.244.012.247.011.25.008.254.005.257.004.26.001.26-.001.257-.004.254-.005.25-.008.247-.011.244-.012.241-.014.237-.016.233-.018.231-.021.226-.022.224-.023.22-.026.216-.027.212-.028.21-.031.205-.032.202-.033.198-.034.194-.036.191-.038.187-.038.183-.04.179-.041.175-.042.172-.043.168-.043.163-.045.16-.046.155-.046.152-.048.148-.048.143-.048.139-.049.136-.05.131-.05.126-.051.123-.051.118-.051.114-.052.11-.052.106-.052.101-.052.096-.052.092-.052.088-.052.083-.052.079-.052.074-.051.07-.052.065-.051.06-.05.056-.05.051-.05.023-.025.023-.024.021-.024.02-.025.019-.024.018-.024.017-.023.015-.024.014-.023.013-.023.012-.023.01-.023.01-.022.008-.022.006-.023.006-.021.004-.022.004-.021.001-.021.001-.021-.001-.021-.001-.021-.004-.021-.004-.022-.006-.021-.006-.023-.008-.022-.01-.022-.01-.023-.012-.023-.013-.023-.014-.023-.015-.024-.017-.023-.018-.024-.019-.024-.02-.025-.021-.024-.023-.024-.023-.025-.051-.05-.056-.05-.06-.05-.065-.051-.07-.052-.074-.051-.079-.052-.083-.052-.088-.052-.092-.052-.096-.052-.101-.052-.106-.052-.11-.052-.114-.052-.118-.051-.123-.051-.126-.051-.131-.05-.136-.05-.139-.049-.143-.048-.148-.048-.152-.048-.155-.046-.16-.046-.163-.045-.168-.043-.172-.043-.175-.042-.179-.041-.183-.04-.187-.038-.191-.038-.194-.036-.198-.034-.202-.033-.205-.032-.21-.031-.212-.028-.216-.027-.22-.026-.224-.023-.226-.022-.231-.021-.233-.018-.237-.016-.241-.014-.244-.012-.247-.011-.25-.008-.254-.005-.257-.004-.26-.001-.26.001z' transform='scale(.5)'/%3e%3c/symbol%3e%3c/defs%3e%3cdefs%3e%3csymbol height='24' width='24' id='clock'%3e%3cpath d='M12 2c5.514 0 10 4.486 10 10s-4.486 10-10 10-10-4.486-10-10 4.486-10 10-10zm0-2c-6.627 0-12 5.373-12 12s5.373 12 12 12 12-5.373 12-12-5.373-12-12-12zm5.848 12.459c.202.038.202.333.001.372-1.907.361-6.045 1.111-6.547 1.111-.719 0-1.301-.582-1.301-1.301 0-.512.77-5.447 1.125-7.445.034-.192.312-.181.343.014l.985 6.238 5.394 1.011z' transform='scale(.5)'/%3e%3c/symbol%3e%3c/defs%3e%3cdefs%3e%3cmarker orient='auto-start-reverse' markerHeight='12' markerWidth='12' markerUnits='userSpaceOnUse' refY='5' refX='7.9' id='arrowhead'%3e%3cpath d='M -1 0 L 10 5 L 0 10 z'/%3e%3c/marker%3e%3c/defs%3e%3cdefs%3e%3cmarker refY='4.5' refX='4' orient='auto' markerHeight='8' markerWidth='15' id='crosshead'%3e%3cpath style='stroke-dasharray: 0%2c 0%3b' d='M 1%2c2 L 6%2c7 M 6%2c2 L 1%2c7' stroke-width='1pt' stroke='black' fill='none'/%3e%3c/marker%3e%3c/defs%3e%3cdefs%3e%3cmarker orient='auto' markerHeight='28' markerWidth='20' refY='7' refX='15.5' id='filled-head'%3e%3cpath d='M 18%2c7 L9%2c13 L14%2c7 L9%2c1 Z'/%3e%3c/marker%3e%3c/defs%3e%3cdefs%3e%3cmarker orient='auto' markerHeight='40' markerWidth='60' refY='15' refX='15' id='sequencenumber'%3e%3ccircle r='6' cy='15' cx='15'/%3e%3c/marker%3e%3c/defs%3e%3ctext style='font-family: arial%2c sans-serif%3b font-size: 16px%3b font-weight: 400%3b' dy='1em' class='messageText' alignment-baseline='middle' dominant-baseline='middle' text-anchor='middle' y='80' x='202'%3eVisit https://dev.demo.com%3c/text%3e%3cline style='fill: none%3b' marker-end='url(%23arrowhead)' stroke='none' stroke-width='2' class='messageLine0' y2='109' x2='327' y1='109' x1='76'/%3e%3ctext style='font-family: arial%2c sans-serif%3b font-size: 16px%3b font-weight: 400%3b' dy='1em' class='messageText' alignment-baseline='middle' dominant-baseline='middle' text-anchor='middle' y='124' x='565'%3eTunnel (forwad to http://localhost:3000 on local machine)%3c/text%3e%3cline style='fill: none%3b' marker-end='url(%23arrowhead)' stroke='none' stroke-width='2' class='messageLine0' y2='153' x2='798' y1='153' x1='332'/%3e%3ctext style='font-family: arial%2c sans-serif%3b font-size: 16px%3b font-weight: 400%3b' dy='1em' class='messageText' alignment-baseline='middle' dominant-baseline='middle' text-anchor='middle' y='168' x='568'%3eTunnel (respond with web content)%3c/text%3e%3cline style='stroke-dasharray: 3%2c 3%3b fill: none%3b' marker-end='url(%23arrowhead)' stroke='none' stroke-width='2' class='messageLine1' y2='197' x2='335' y1='197' x1='801'/%3e%3ctext style='font-family: arial%2c sans-serif%3b font-size: 16px%3b font-weight: 400%3b' dy='1em' class='messageText' alignment-baseline='middle' dominant-baseline='middle' text-anchor='middle' y='212' x='205'%3eWeb content%3c/text%3e%3cline style='stroke-dasharray: 3%2c 3%3b fill: none%3b' marker-end='url(%23arrowhead)' stroke='none' stroke-width='2' class='messageLine1' y2='241' x2='79' y1='241' x1='330'/%3e%3c/svg%3e)
Prerequisite
Before you get started, make sure that you:
- Already own a domain name and disabled DNSSEC at your registrar (where you bought your domain name).
- Have previously created a Cloudflare account.
Note: In this tutorial, for demonstration purposes, we assume that we are using demo.com as our domain.
Add a website to Cloudflare
Firstly, you need to sign in to the Cloudflare dashboard using your Cloudflare account and select the "Website" option from the left menu. Then, click the "Get started" button on the page (if there is already a record, click "Add website"). Follow the prompts to complete the addition of the website using the domain you own. After successfully adding the website, you will see the following content:
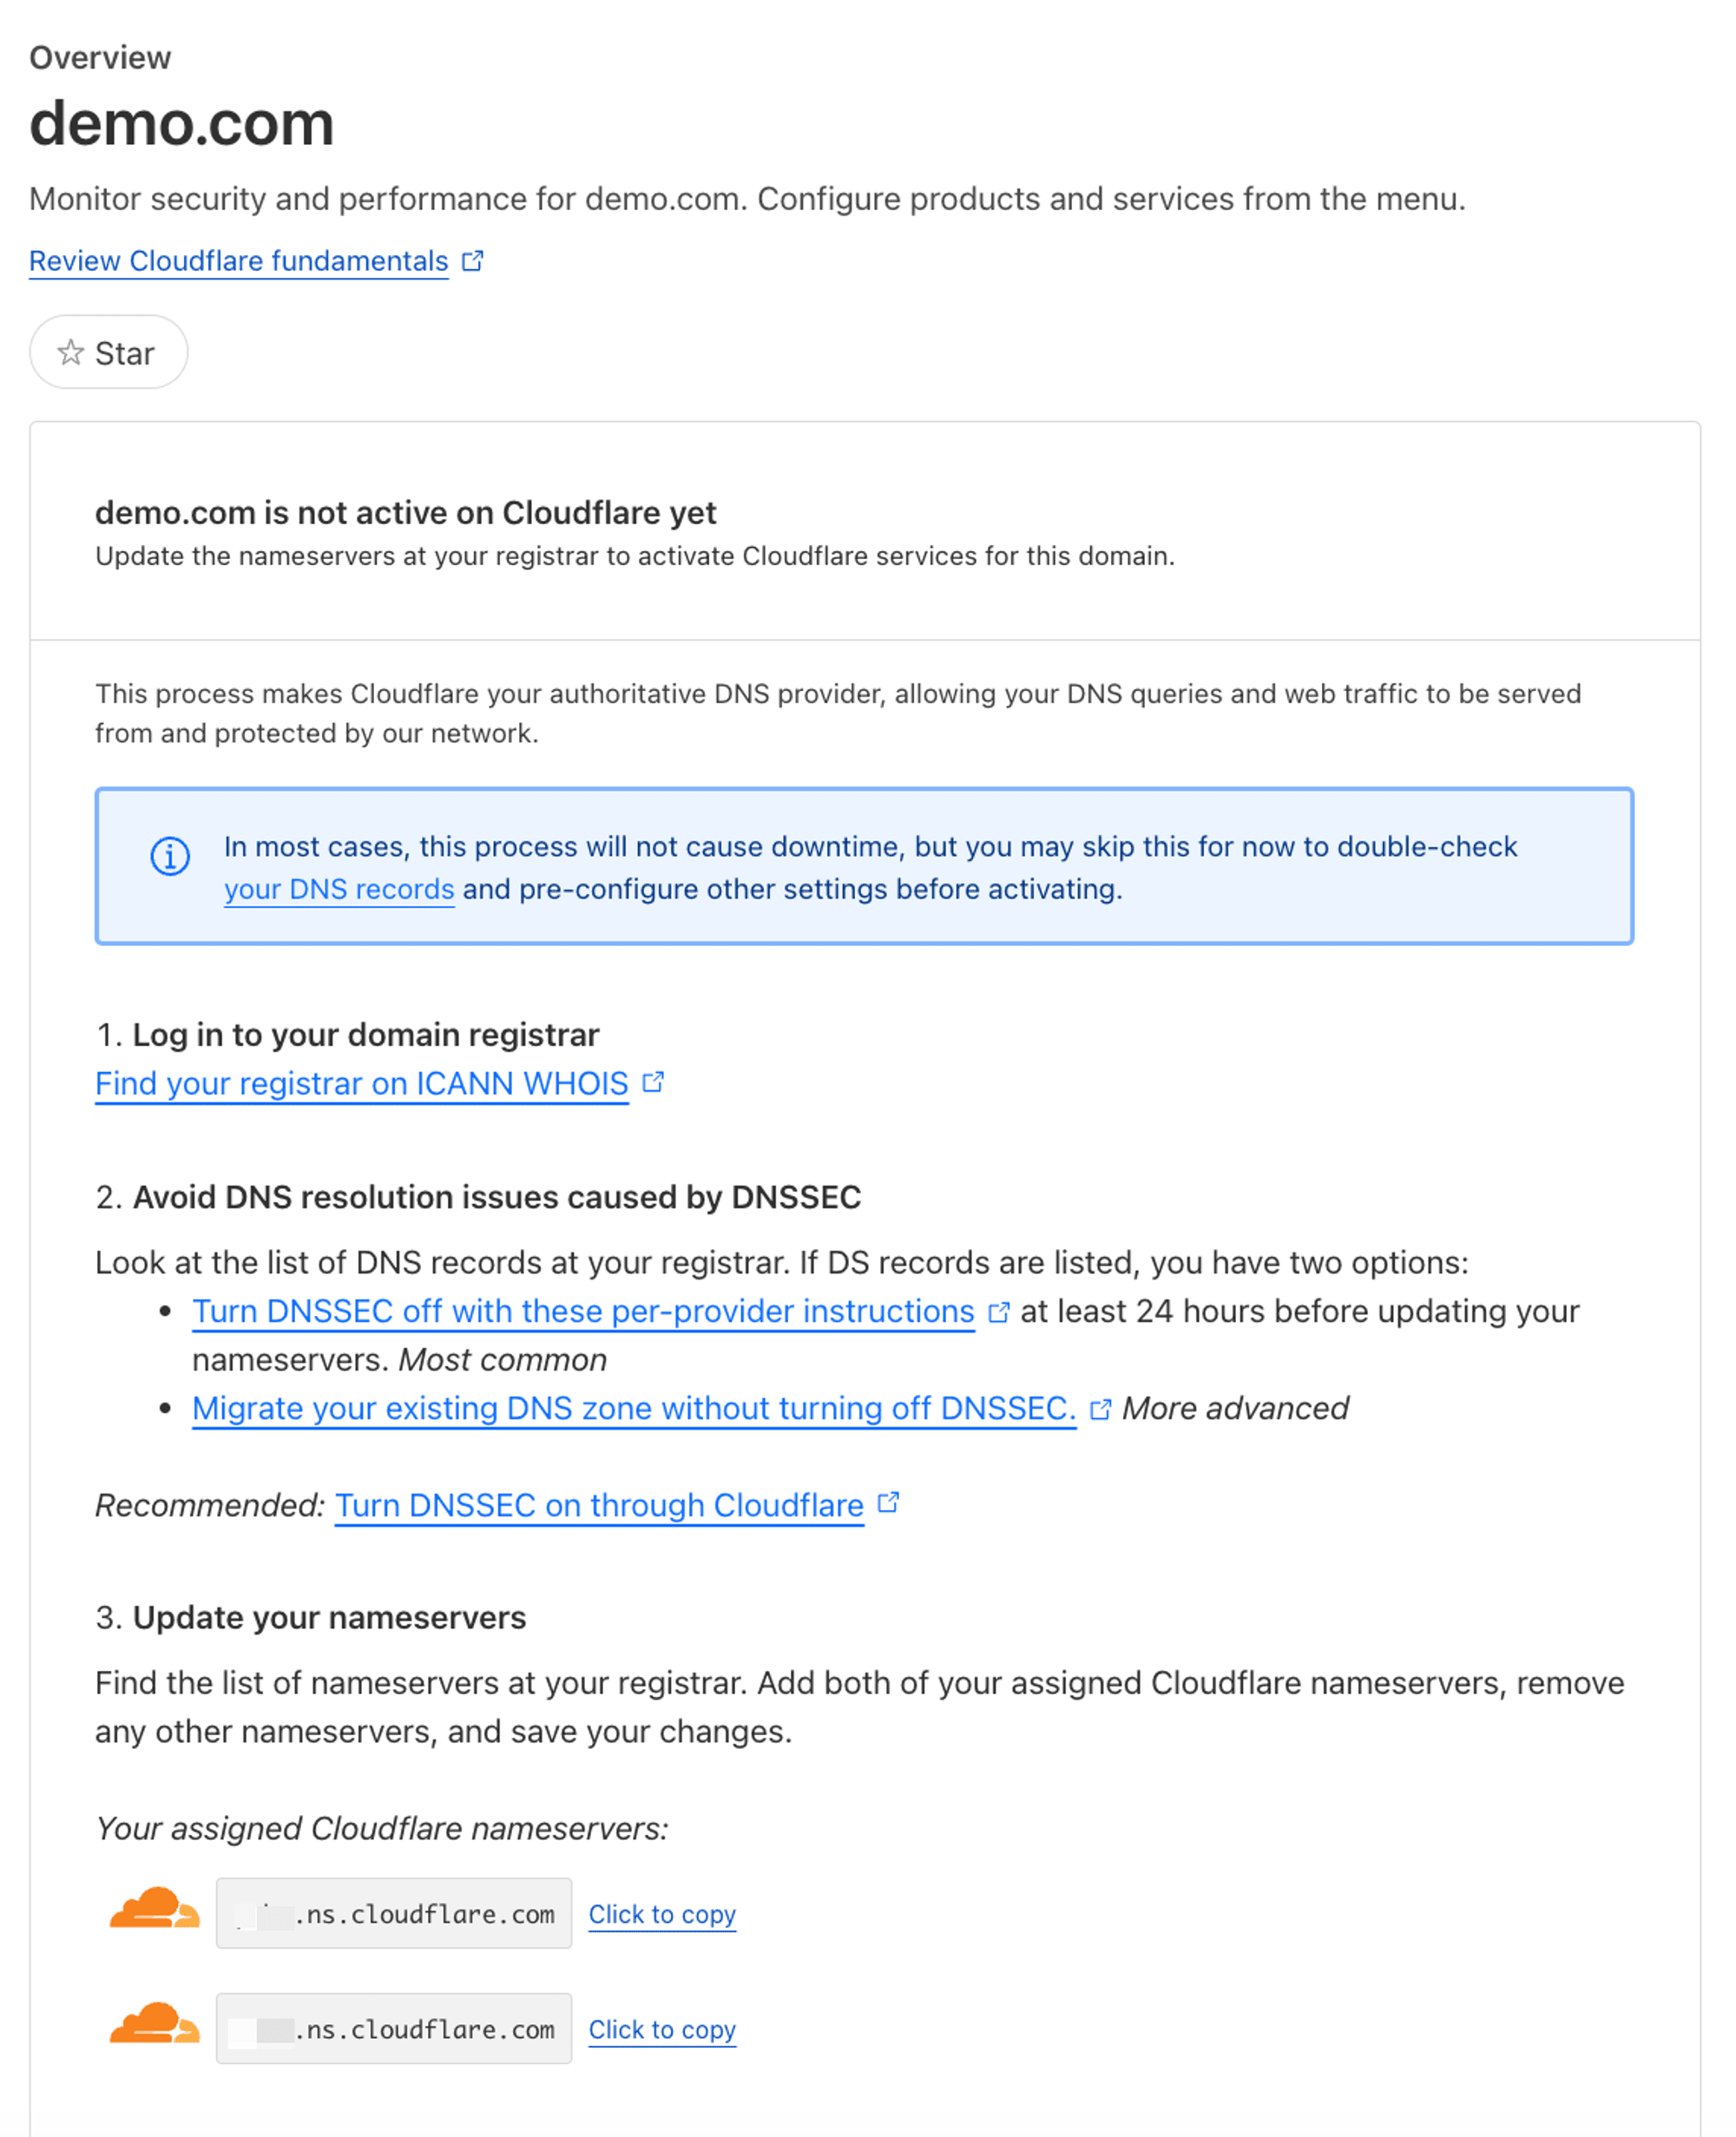
As shown in the figure, the added website has not been activated yet. You need to follow the guide on the page to log in to your domain registrar and update the nameservers of the domain to activate your website.
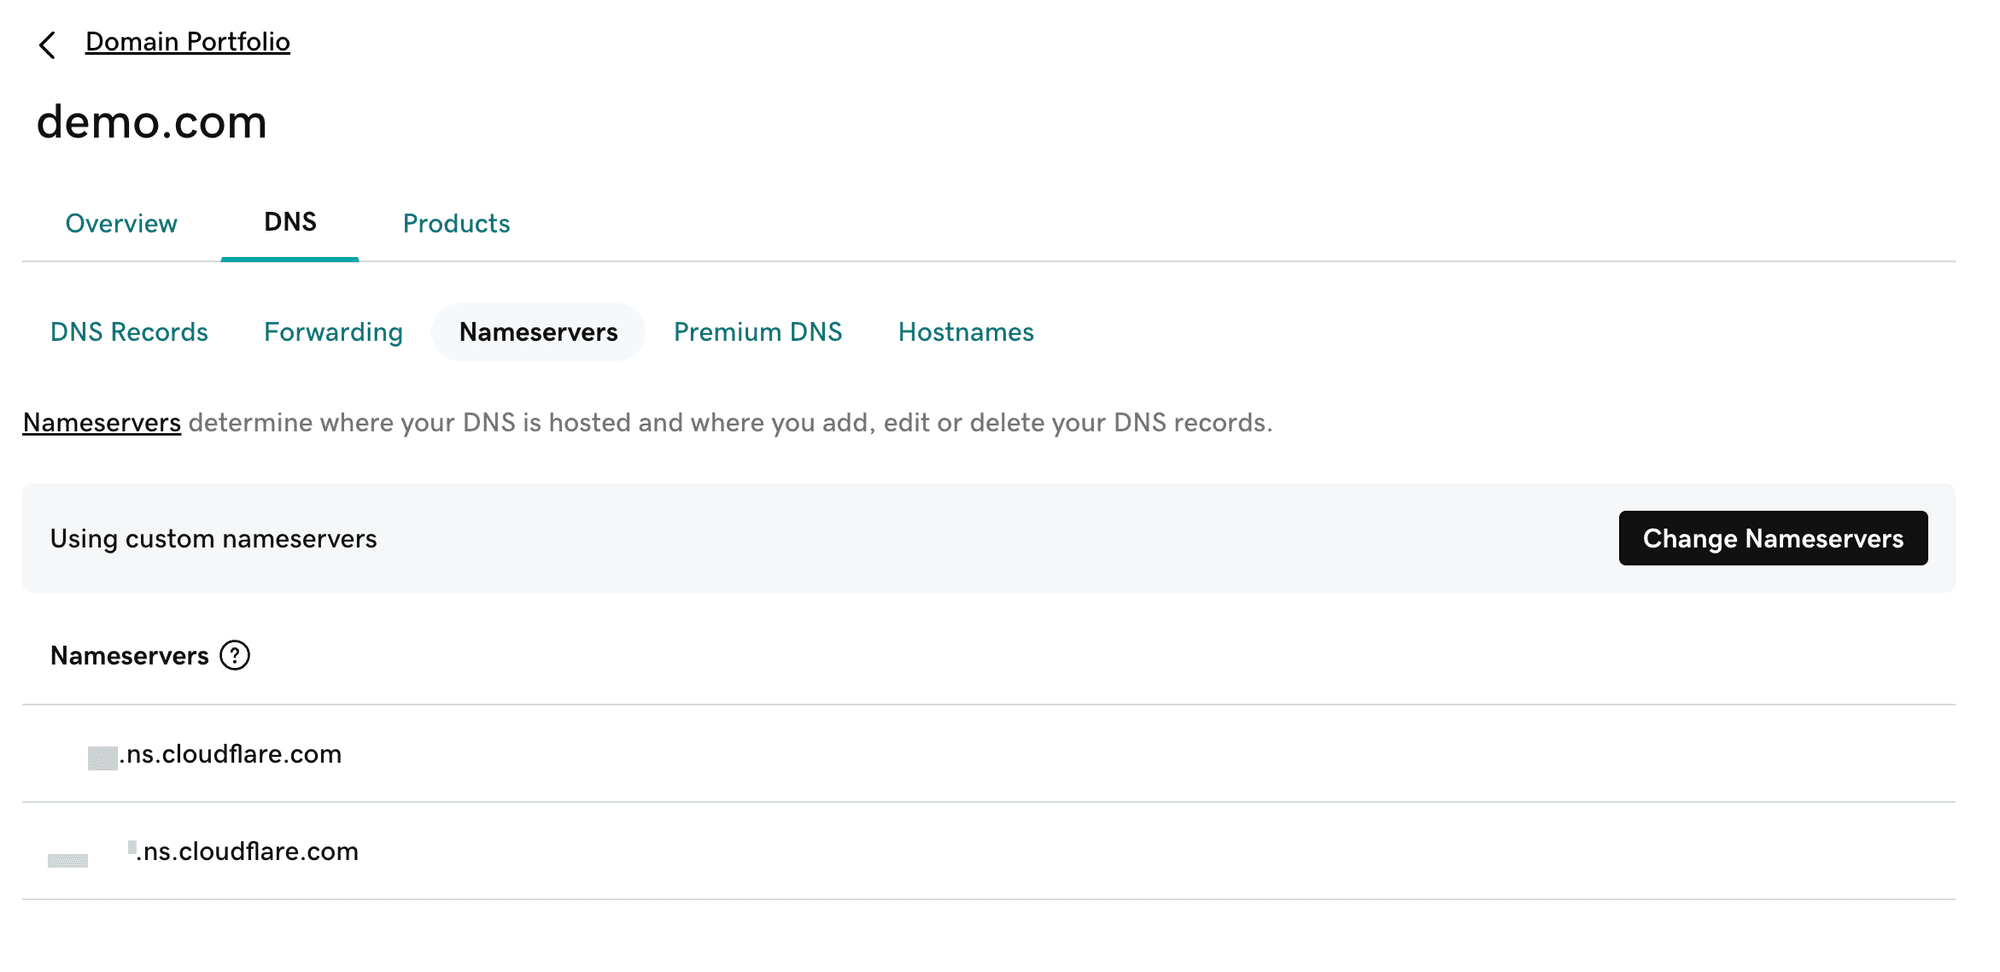
Taking the domain on Godaddy as an example:
Enter the Domain settings page, access the “Nameservers” option under the DNS Tab, and change the Nameservers to the values displayed in the guide:
After changing, wait for a short period of time, and the corresponding website on Cloudflare will be activated:
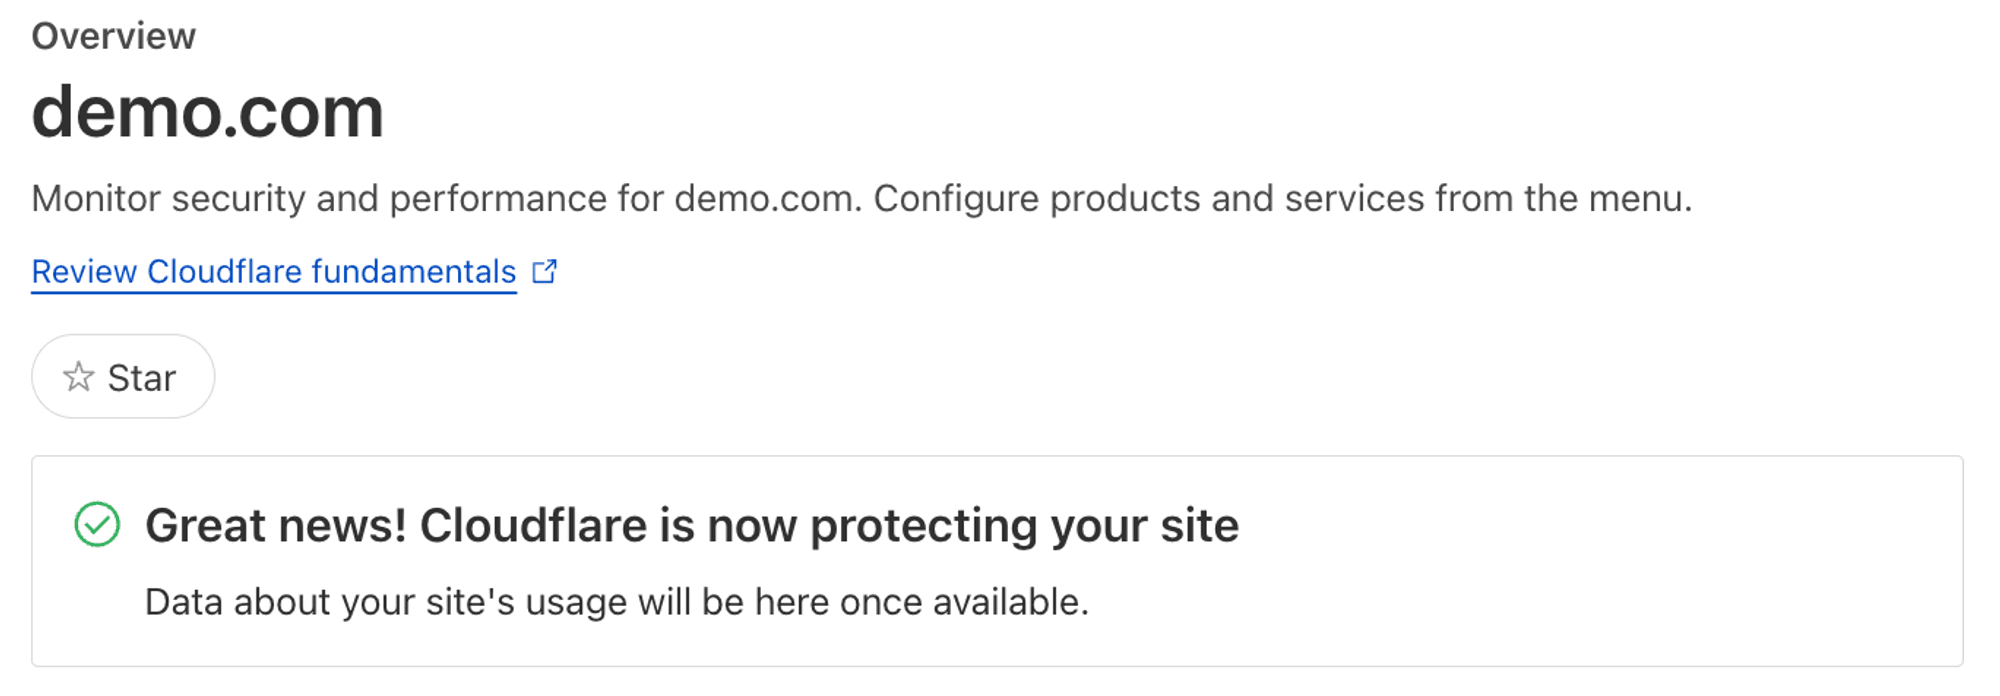
After you have configured these contents, your domain will be hosted on Cloudflare, and Cloudflare will automatically enable HTTPS for the domain.
Create tunnel
Go back to the Cloudflare Dashboard homepage, click "Zero Trust" in the left menu, and select "Tunnels" under the 'Access' directory. Then, click "Add a tunnel" on the page, and enter any tunnel name (e.g., my-dev-tunnel). According to the prompts on the page, connect your local development machine to the Cloudflare tunnel.
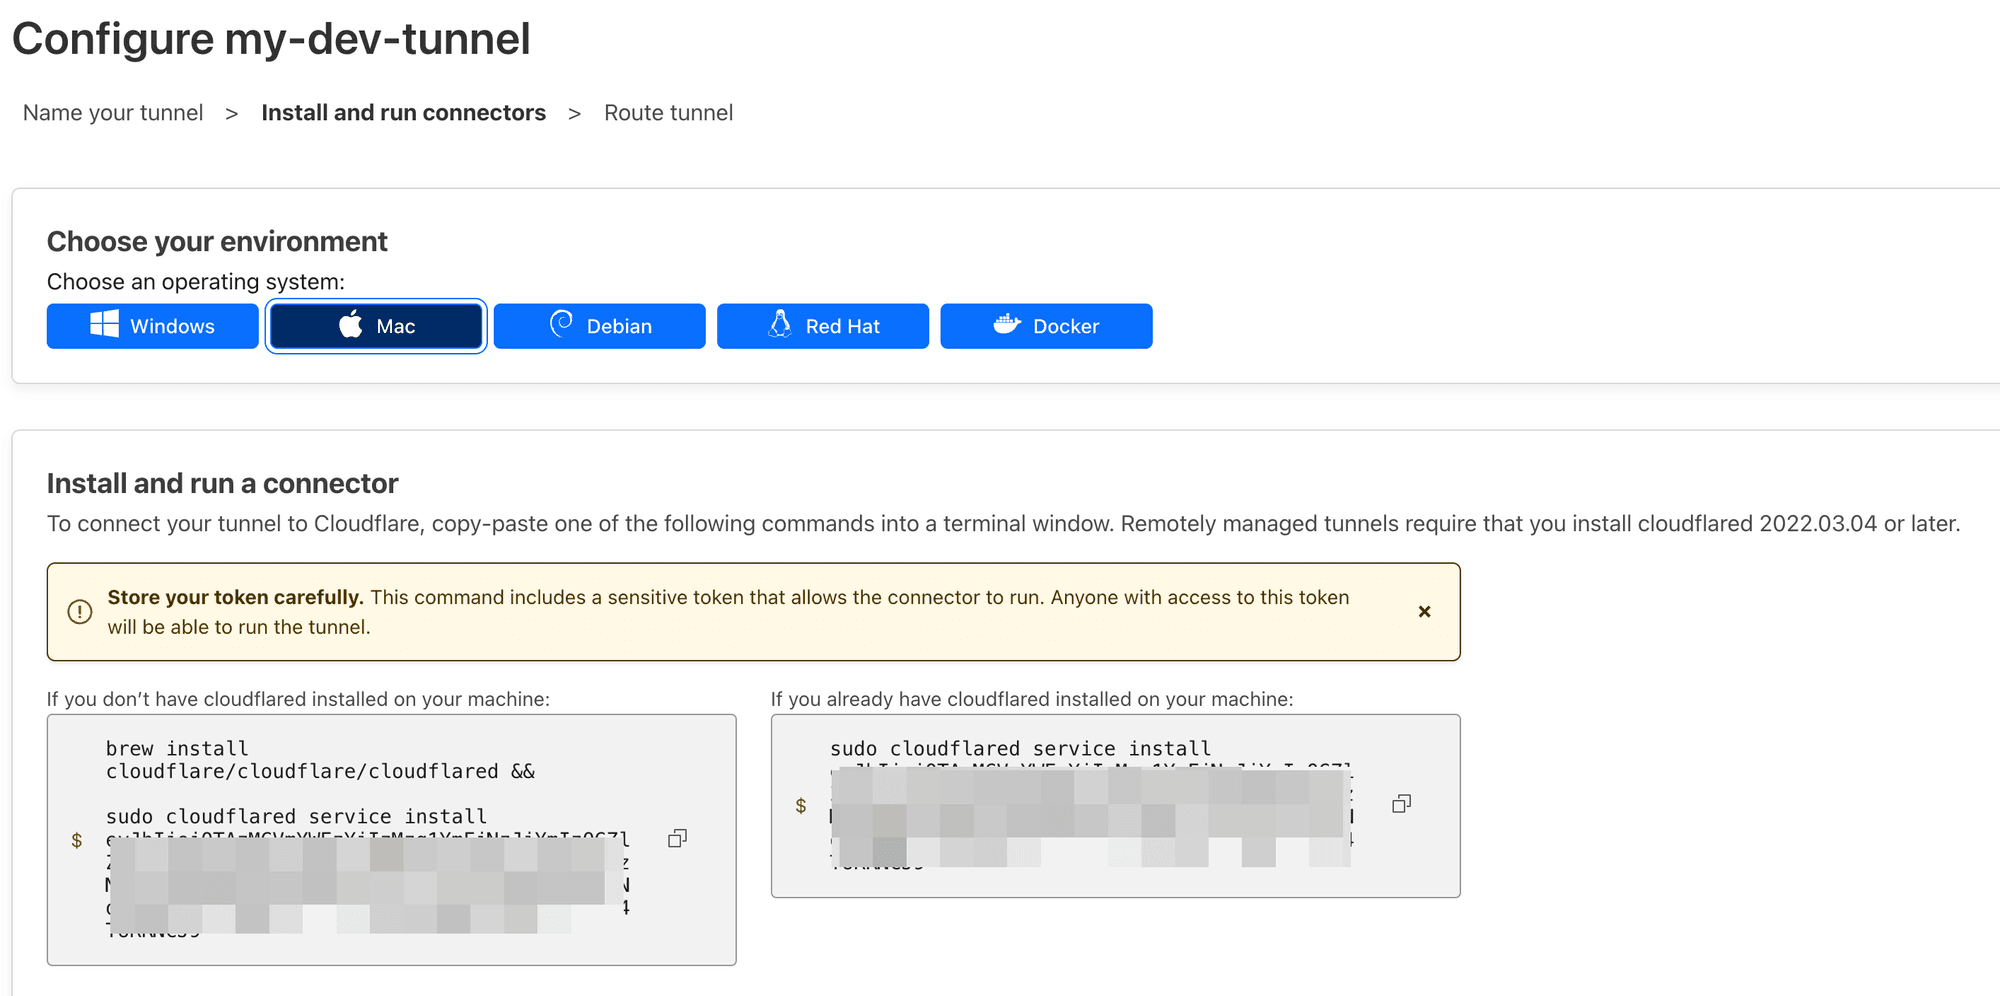
Taking MacOS as an example, open a terminal and execute the command displayed on the page:
If your machine has already installed "cloudflared" previously, you do not need to execute brew install cloudflare/cloudflare/cloudflared.

After that, execute cloudflared tunnel list in your terminal, and you will see that your machine is already connected to the tunnel:

Route traffic to the created tunnel
After creating the Tunnel, we will configure the route rules for the Tunnel.
Assume that our local application is running on port http://localhost:3000, and we want to forward all requests for https://dev.demo.com to the port where the local application is running.
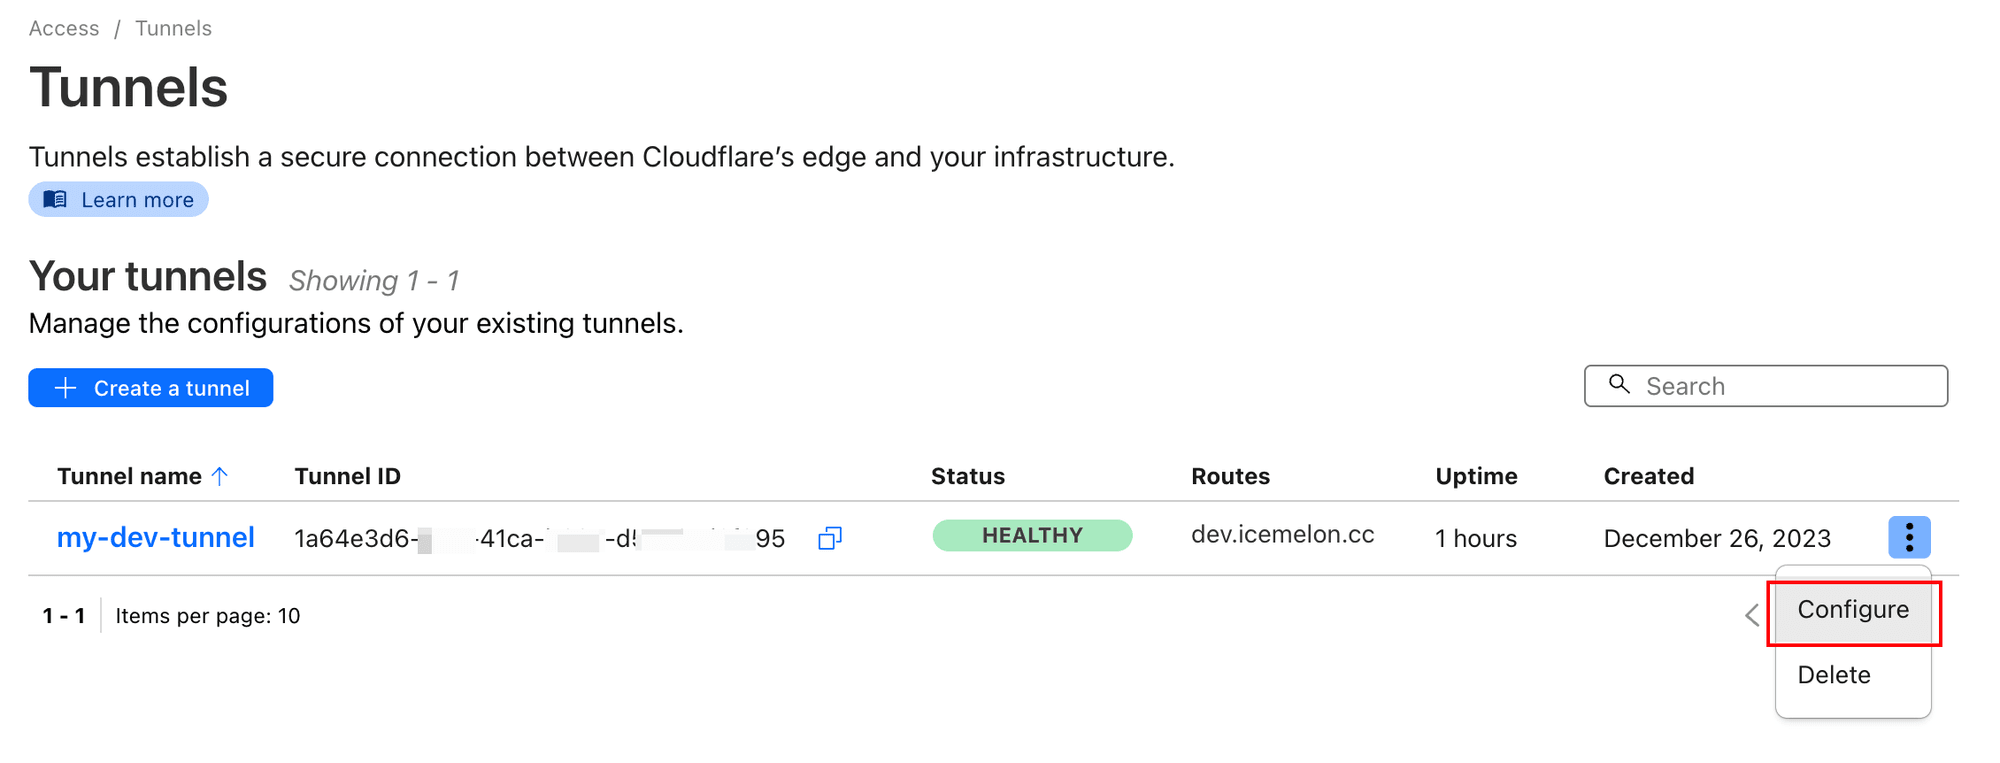
Firstly, we go back to our tunnel page, find the tunnel we just created, click the three dots button on the right, and select "Config".
Fill in the relevant configuration according to our requirements:
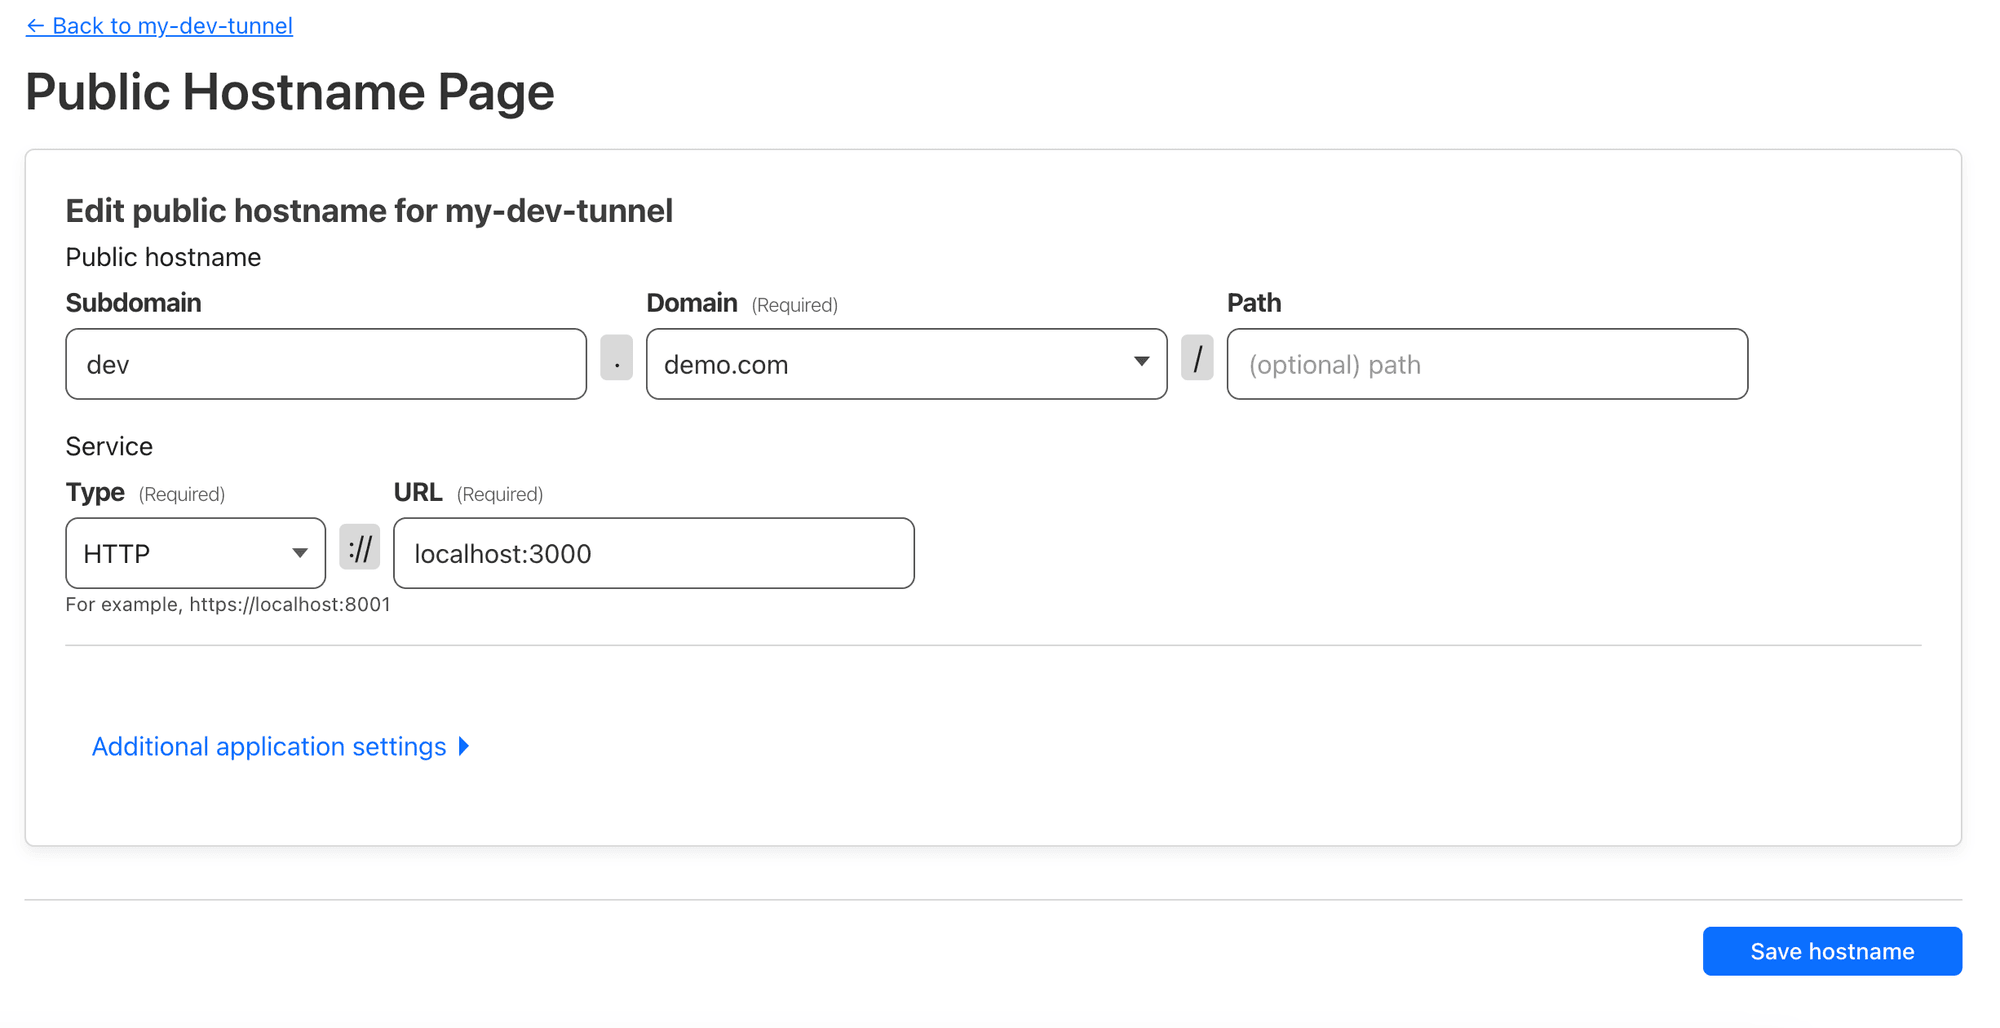
This configuration routes the address dev.demo.com to http://localhost:3000 on our machine. Then click "Save hostname".
After a short wait, access https://dev.demo.com, and you will the app running on our local machine:

Summary
Through this tutorial, you should now be able to easily implement HTTPS and custom hostname in your local development environment without having to worry about complex configurations and errors. I hope you can benefit from this tutorial!