Welcome back to our WebAuthn series. In our previous articles, we've covered the basics of WebAuthn, and a 101 guide. If you're just joining us, feel free to check out these foundational pieces to get up to speed.
Today, we're rolling up our sleeves to put theory into practice. We'll be harnessing the power of Next.js with the new feature “Server Actions”. Our goal? To implement WebAuthn in a Next.js application, and get ourselves ready for WebAuthn.
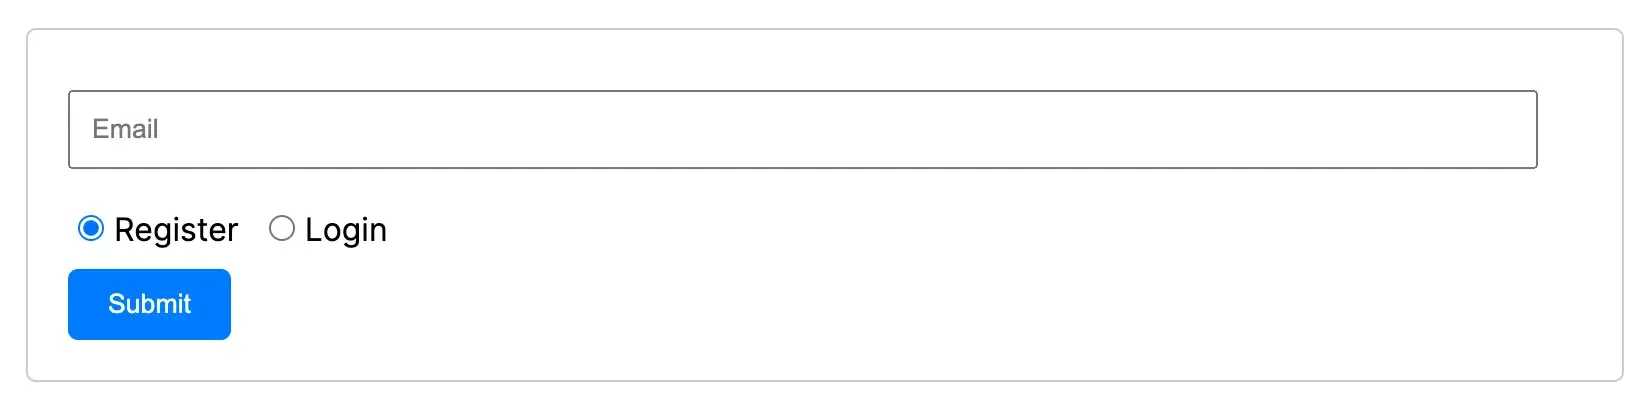
Before we dive into the coding sea, here's a glimpse of what awaits you at the journey's end - a fully functional demo website. Explore it to see WebAuthn in action and to get a taste of what you'll be building. In this demo website, you can register new users and login with the passkeys just registered.
And for those who prefer a map in hand, we've got you covered! All the code we'll be discussing is available in a public GitHub repository . This repository is your companion guide, offering the full source code of our implementation.
Ready to embark on this exciting adventure? Let's get started!
Before we begin, let's make sure we have everything we need:
A Next.js Project: If you haven't set up a Next.js project yet, here's a quick guide to get you started.
Simple WebAuthn Library: Several packages to help reduce the amount of work needed to incorporate WebAuthn into a website. Use your favorite package manager to install @simplewebauthn/browser, @simplewebauthn/server and @simplewebauthn/typescript-types
Session Storage: We'll be using session storage to manage WebAuthn challenges. We’ll use vercel’s KV to achieve this.
A User Database: A place to store our users' registered passkeys. To keep it simple, we’ll also use vercel’s KV to demonstrate.
Now, with our tools and materials at hand, we're ready to start building.
It is easy to initialize a KV storage both in production and local development, follow this guide to connect a KV store to your project and pull the environment values: https://vercel.com/docs/storage/vercel-kv/quickstart
Similarly to our session implementation, let's implement a simple user database.
We created functions to find user by email, and update user data by email. Remember, this is for demonstration only, in the real product, the user data is kept in database usually.
Congratulations on navigating through the intricacies of implementing WebAuthn in a Next.js application. As we wrap up, it's important to address some crucial considerations for deploying it in a production environment.
User Identifier Adjustment: In this tutorial, we used an email address as the user identifier. However, in a production scenario, you might need to use a different identifier, such as a userId or username.
Database Integration: While we utilized Vercel’s KV as a simple demonstration of session and user data management, a real-world application should integrate a more robust database system (like PostgreSQL, MongoDB, etc.)
Customizing WebAuthn Options: The WebAuthn options we explored are a starting point. Depending on your application's requirements and security policies, you may need to adjust these settings. Consult the WebAuthn documentation and the Simple WebAuthn library's documentation for guidance on customizing these options to suit your specific needs.
Thank you for joining us on this educational adventure. Even in this minimal example, integrating WebAuthn is not a simple task, there is another option, try WebAuthn in Logto’s MFA:

%3bfill:%23ECECFF%3b%7d%23mermaid-0 text.actor%26gt%3btspan%7bfill:black%3bstroke:none%3b%7d%23mermaid-0 .actor-line%7bstroke:hsl(259.6261682243%2c 59.7765363128%25%2c 87.9019607843%25)%3b%7d%23mermaid-0 .messageLine0%7bstroke-width:1.5%3bstroke-dasharray:none%3bstroke:%23333%3b%7d%23mermaid-0 .messageLine1%7bstroke-width:1.5%3bstroke-dasharray:2%2c2%3bstroke:%23333%3b%7d%23mermaid-0 %23arrowhead path%7bfill:%23333%3bstroke:%23333%3b%7d%23mermaid-0 .sequenceNumber%7bfill:white%3b%7d%23mermaid-0 %23sequencenumber%7bfill:%23333%3b%7d%23mermaid-0 %23crosshead path%7bfill:%23333%3bstroke:%23333%3b%7d%23mermaid-0 .messageText%7bfill:%23333%3bstroke:none%3b%7d%23mermaid-0 .labelBox%7bstroke:hsl(259.6261682243%2c 59.7765363128%25%2c 87.9019607843%25)%3bfill:%23ECECFF%3b%7d%23mermaid-0 .labelText%2c%23mermaid-0 .labelText%26gt%3btspan%7bfill:black%3bstroke:none%3b%7d%23mermaid-0 .loopText%2c%23mermaid-0 .loopText%26gt%3btspan%7bfill:black%3bstroke:none%3b%7d%23mermaid-0 .loopLine%7bstroke-width:2px%3bstroke-dasharray:2%2c2%3bstroke:hsl(259.6261682243%2c 59.7765363128%25%2c 87.9019607843%25)%3bfill:hsl(259.6261682243%2c 59.7765363128%25%2c 87.9019607843%25)%3b%7d%23mermaid-0 .note%7bstroke:%23aaaa33%3bfill:%23fff5ad%3b%7d%23mermaid-0 .noteText%2c%23mermaid-0 .noteText%26gt%3btspan%7bfill:black%3bstroke:none%3b%7d%23mermaid-0 .activation0%7bfill:%23f4f4f4%3bstroke:%23666%3b%7d%23mermaid-0 .activation1%7bfill:%23f4f4f4%3bstroke:%23666%3b%7d%23mermaid-0 .activation2%7bfill:%23f4f4f4%3bstroke:%23666%3b%7d%23mermaid-0 .actorPopupMenu%7bposition:absolute%3b%7d%23mermaid-0 .actorPopupMenuPanel%7bposition:absolute%3bfill:%23ECECFF%3bbox-shadow:0px 8px 16px 0px rgba(0%2c0%2c0%2c0.2)%3bfilter:drop-shadow(3px 5px 2px rgb(0 0 0 / 0.4))%3b%7d%23mermaid-0 .actor-man line%7bstroke:hsl(259.6261682243%2c 59.7765363128%25%2c 87.9019607843%25)%3bfill:%23ECECFF%3b%7d%23mermaid-0 .actor-man circle%2c%23mermaid-0 line%7bstroke:hsl(259.6261682243%2c 59.7765363128%25%2c 87.9019607843%25)%3bfill:%23ECECFF%3bstroke-width:2px%3b%7d%23mermaid-0 :root%7b--mermaid-font-family:arial%2csans-serif%3b%7d%3c/style%3e%3cg/%3e%3cdefs%3e%3csymbol height='24' width='24' id='computer'%3e%3cpath d='M2 2v13h20v-13h-20zm18 11h-16v-9h16v9zm-10.228 6l.466-1h3.524l.467 1h-4.457zm14.228 3h-24l2-6h2.104l-1.33 4h18.45l-1.297-4h2.073l2 6zm-5-10h-14v-7h14v7z' transform='scale(.5)'/%3e%3c/symbol%3e%3c/defs%3e%3cdefs%3e%3csymbol clip-rule='evenodd' fill-rule='evenodd' id='database'%3e%3cpath d='M12.258.001l.256.004.255.005.253.008.251.01.249.012.247.015.246.016.242.019.241.02.239.023.236.024.233.027.231.028.229.031.225.032.223.034.22.036.217.038.214.04.211.041.208.043.205.045.201.046.198.048.194.05.191.051.187.053.183.054.18.056.175.057.172.059.168.06.163.061.16.063.155.064.15.066.074.033.073.033.071.034.07.034.069.035.068.035.067.035.066.035.064.036.064.036.062.036.06.036.06.037.058.037.058.037.055.038.055.038.053.038.052.038.051.039.05.039.048.039.047.039.045.04.044.04.043.04.041.04.04.041.039.041.037.041.036.041.034.041.033.042.032.042.03.042.029.042.027.042.026.043.024.043.023.043.021.043.02.043.018.044.017.043.015.044.013.044.012.044.011.045.009.044.007.045.006.045.004.045.002.045.001.045v17l-.001.045-.002.045-.004.045-.006.045-.007.045-.009.044-.011.045-.012.044-.013.044-.015.044-.017.043-.018.044-.02.043-.021.043-.023.043-.024.043-.026.043-.027.042-.029.042-.03.042-.032.042-.033.042-.034.041-.036.041-.037.041-.039.041-.04.041-.041.04-.043.04-.044.04-.045.04-.047.039-.048.039-.05.039-.051.039-.052.038-.053.038-.055.038-.055.038-.058.037-.058.037-.06.037-.06.036-.062.036-.064.036-.064.036-.066.035-.067.035-.068.035-.069.035-.07.034-.071.034-.073.033-.074.033-.15.066-.155.064-.16.063-.163.061-.168.06-.172.059-.175.057-.18.056-.183.054-.187.053-.191.051-.194.05-.198.048-.201.046-.205.045-.208.043-.211.041-.214.04-.217.038-.22.036-.223.034-.225.032-.229.031-.231.028-.233.027-.236.024-.239.023-.241.02-.242.019-.246.016-.247.015-.249.012-.251.01-.253.008-.255.005-.256.004-.258.001-.258-.001-.256-.004-.255-.005-.253-.008-.251-.01-.249-.012-.247-.015-.245-.016-.243-.019-.241-.02-.238-.023-.236-.024-.234-.027-.231-.028-.228-.031-.226-.032-.223-.034-.22-.036-.217-.038-.214-.04-.211-.041-.208-.043-.204-.045-.201-.046-.198-.048-.195-.05-.19-.051-.187-.053-.184-.054-.179-.056-.176-.057-.172-.059-.167-.06-.164-.061-.159-.063-.155-.064-.151-.066-.074-.033-.072-.033-.072-.034-.07-.034-.069-.035-.068-.035-.067-.035-.066-.035-.064-.036-.063-.036-.062-.036-.061-.036-.06-.037-.058-.037-.057-.037-.056-.038-.055-.038-.053-.038-.052-.038-.051-.039-.049-.039-.049-.039-.046-.039-.046-.04-.044-.04-.043-.04-.041-.04-.04-.041-.039-.041-.037-.041-.036-.041-.034-.041-.033-.042-.032-.042-.03-.042-.029-.042-.027-.042-.026-.043-.024-.043-.023-.043-.021-.043-.02-.043-.018-.044-.017-.043-.015-.044-.013-.044-.012-.044-.011-.045-.009-.044-.007-.045-.006-.045-.004-.045-.002-.045-.001-.045v-17l.001-.045.002-.045.004-.045.006-.045.007-.045.009-.044.011-.045.012-.044.013-.044.015-.044.017-.043.018-.044.02-.043.021-.043.023-.043.024-.043.026-.043.027-.042.029-.042.03-.042.032-.042.033-.042.034-.041.036-.041.037-.041.039-.041.04-.041.041-.04.043-.04.044-.04.046-.04.046-.039.049-.039.049-.039.051-.039.052-.038.053-.038.055-.038.056-.038.057-.037.058-.037.06-.037.061-.036.062-.036.063-.036.064-.036.066-.035.067-.035.068-.035.069-.035.07-.034.072-.034.072-.033.074-.033.151-.066.155-.064.159-.063.164-.061.167-.06.172-.059.176-.057.179-.056.184-.054.187-.053.19-.051.195-.05.198-.048.201-.046.204-.045.208-.043.211-.041.214-.04.217-.038.22-.036.223-.034.226-.032.228-.031.231-.028.234-.027.236-.024.238-.023.241-.02.243-.019.245-.016.247-.015.249-.012.251-.01.253-.008.255-.005.256-.004.258-.001.258.001zm-9.258 20.499v.01l.001.021.003.021.004.022.005.021.006.022.007.022.009.023.01.022.011.023.012.023.013.023.015.023.016.024.017.023.018.024.019.024.021.024.022.025.023.024.024.025.052.049.056.05.061.051.066.051.07.051.075.051.079.052.084.052.088.052.092.052.097.052.102.051.105.052.11.052.114.051.119.051.123.051.127.05.131.05.135.05.139.048.144.049.147.047.152.047.155.047.16.045.163.045.167.043.171.043.176.041.178.041.183.039.187.039.19.037.194.035.197.035.202.033.204.031.209.03.212.029.216.027.219.025.222.024.226.021.23.02.233.018.236.016.24.015.243.012.246.01.249.008.253.005.256.004.259.001.26-.001.257-.004.254-.005.25-.008.247-.011.244-.012.241-.014.237-.016.233-.018.231-.021.226-.021.224-.024.22-.026.216-.027.212-.028.21-.031.205-.031.202-.034.198-.034.194-.036.191-.037.187-.039.183-.04.179-.04.175-.042.172-.043.168-.044.163-.045.16-.046.155-.046.152-.047.148-.048.143-.049.139-.049.136-.05.131-.05.126-.05.123-.051.118-.052.114-.051.11-.052.106-.052.101-.052.096-.052.092-.052.088-.053.083-.051.079-.052.074-.052.07-.051.065-.051.06-.051.056-.05.051-.05.023-.024.023-.025.021-.024.02-.024.019-.024.018-.024.017-.024.015-.023.014-.024.013-.023.012-.023.01-.023.01-.022.008-.022.006-.022.006-.022.004-.022.004-.021.001-.021.001-.021v-4.127l-.077.055-.08.053-.083.054-.085.053-.087.052-.09.052-.093.051-.095.05-.097.05-.1.049-.102.049-.105.048-.106.047-.109.047-.111.046-.114.045-.115.045-.118.044-.12.043-.122.042-.124.042-.126.041-.128.04-.13.04-.132.038-.134.038-.135.037-.138.037-.139.035-.142.035-.143.034-.144.033-.147.032-.148.031-.15.03-.151.03-.153.029-.154.027-.156.027-.158.026-.159.025-.161.024-.162.023-.163.022-.165.021-.166.02-.167.019-.169.018-.169.017-.171.016-.173.015-.173.014-.175.013-.175.012-.177.011-.178.01-.179.008-.179.008-.181.006-.182.005-.182.004-.184.003-.184.002h-.37l-.184-.002-.184-.003-.182-.004-.182-.005-.181-.006-.179-.008-.179-.008-.178-.01-.176-.011-.176-.012-.175-.013-.173-.014-.172-.015-.171-.016-.17-.017-.169-.018-.167-.019-.166-.02-.165-.021-.163-.022-.162-.023-.161-.024-.159-.025-.157-.026-.156-.027-.155-.027-.153-.029-.151-.03-.15-.03-.148-.031-.146-.032-.145-.033-.143-.034-.141-.035-.14-.035-.137-.037-.136-.037-.134-.038-.132-.038-.13-.04-.128-.04-.126-.041-.124-.042-.122-.042-.12-.044-.117-.043-.116-.045-.113-.045-.112-.046-.109-.047-.106-.047-.105-.048-.102-.049-.1-.049-.097-.05-.095-.05-.093-.052-.09-.051-.087-.052-.085-.053-.083-.054-.08-.054-.077-.054v4.127zm0-5.654v.011l.001.021.003.021.004.021.005.022.006.022.007.022.009.022.01.022.011.023.012.023.013.023.015.024.016.023.017.024.018.024.019.024.021.024.022.024.023.025.024.024.052.05.056.05.061.05.066.051.07.051.075.052.079.051.084.052.088.052.092.052.097.052.102.052.105.052.11.051.114.051.119.052.123.05.127.051.131.05.135.049.139.049.144.048.147.048.152.047.155.046.16.045.163.045.167.044.171.042.176.042.178.04.183.04.187.038.19.037.194.036.197.034.202.033.204.032.209.03.212.028.216.027.219.025.222.024.226.022.23.02.233.018.236.016.24.014.243.012.246.01.249.008.253.006.256.003.259.001.26-.001.257-.003.254-.006.25-.008.247-.01.244-.012.241-.015.237-.016.233-.018.231-.02.226-.022.224-.024.22-.025.216-.027.212-.029.21-.03.205-.032.202-.033.198-.035.194-.036.191-.037.187-.039.183-.039.179-.041.175-.042.172-.043.168-.044.163-.045.16-.045.155-.047.152-.047.148-.048.143-.048.139-.05.136-.049.131-.05.126-.051.123-.051.118-.051.114-.052.11-.052.106-.052.101-.052.096-.052.092-.052.088-.052.083-.052.079-.052.074-.051.07-.052.065-.051.06-.05.056-.051.051-.049.023-.025.023-.024.021-.025.02-.024.019-.024.018-.024.017-.024.015-.023.014-.023.013-.024.012-.022.01-.023.01-.023.008-.022.006-.022.006-.022.004-.021.004-.022.001-.021.001-.021v-4.139l-.077.054-.08.054-.083.054-.085.052-.087.053-.09.051-.093.051-.095.051-.097.05-.1.049-.102.049-.105.048-.106.047-.109.047-.111.046-.114.045-.115.044-.118.044-.12.044-.122.042-.124.042-.126.041-.128.04-.13.039-.132.039-.134.038-.135.037-.138.036-.139.036-.142.035-.143.033-.144.033-.147.033-.148.031-.15.03-.151.03-.153.028-.154.028-.156.027-.158.026-.159.025-.161.024-.162.023-.163.022-.165.021-.166.02-.167.019-.169.018-.169.017-.171.016-.173.015-.173.014-.175.013-.175.012-.177.011-.178.009-.179.009-.179.007-.181.007-.182.005-.182.004-.184.003-.184.002h-.37l-.184-.002-.184-.003-.182-.004-.182-.005-.181-.007-.179-.007-.179-.009-.178-.009-.176-.011-.176-.012-.175-.013-.173-.014-.172-.015-.171-.016-.17-.017-.169-.018-.167-.019-.166-.02-.165-.021-.163-.022-.162-.023-.161-.024-.159-.025-.157-.026-.156-.027-.155-.028-.153-.028-.151-.03-.15-.03-.148-.031-.146-.033-.145-.033-.143-.033-.141-.035-.14-.036-.137-.036-.136-.037-.134-.038-.132-.039-.13-.039-.128-.04-.126-.041-.124-.042-.122-.043-.12-.043-.117-.044-.116-.044-.113-.046-.112-.046-.109-.046-.106-.047-.105-.048-.102-.049-.1-.049-.097-.05-.095-.051-.093-.051-.09-.051-.087-.053-.085-.052-.083-.054-.08-.054-.077-.054v4.139zm0-5.666v.011l.001.02.003.022.004.021.005.022.006.021.007.022.009.023.01.022.011.023.012.023.013.023.015.023.016.024.017.024.018.023.019.024.021.025.022.024.023.024.024.025.052.05.056.05.061.05.066.051.07.051.075.052.079.051.084.052.088.052.092.052.097.052.102.052.105.051.11.052.114.051.119.051.123.051.127.05.131.05.135.05.139.049.144.048.147.048.152.047.155.046.16.045.163.045.167.043.171.043.176.042.178.04.183.04.187.038.19.037.194.036.197.034.202.033.204.032.209.03.212.028.216.027.219.025.222.024.226.021.23.02.233.018.236.017.24.014.243.012.246.01.249.008.253.006.256.003.259.001.26-.001.257-.003.254-.006.25-.008.247-.01.244-.013.241-.014.237-.016.233-.018.231-.02.226-.022.224-.024.22-.025.216-.027.212-.029.21-.03.205-.032.202-.033.198-.035.194-.036.191-.037.187-.039.183-.039.179-.041.175-.042.172-.043.168-.044.163-.045.16-.045.155-.047.152-.047.148-.048.143-.049.139-.049.136-.049.131-.051.126-.05.123-.051.118-.052.114-.051.11-.052.106-.052.101-.052.096-.052.092-.052.088-.052.083-.052.079-.052.074-.052.07-.051.065-.051.06-.051.056-.05.051-.049.023-.025.023-.025.021-.024.02-.024.019-.024.018-.024.017-.024.015-.023.014-.024.013-.023.012-.023.01-.022.01-.023.008-.022.006-.022.006-.022.004-.022.004-.021.001-.021.001-.021v-4.153l-.077.054-.08.054-.083.053-.085.053-.087.053-.09.051-.093.051-.095.051-.097.05-.1.049-.102.048-.105.048-.106.048-.109.046-.111.046-.114.046-.115.044-.118.044-.12.043-.122.043-.124.042-.126.041-.128.04-.13.039-.132.039-.134.038-.135.037-.138.036-.139.036-.142.034-.143.034-.144.033-.147.032-.148.032-.15.03-.151.03-.153.028-.154.028-.156.027-.158.026-.159.024-.161.024-.162.023-.163.023-.165.021-.166.02-.167.019-.169.018-.169.017-.171.016-.173.015-.173.014-.175.013-.175.012-.177.01-.178.01-.179.009-.179.007-.181.006-.182.006-.182.004-.184.003-.184.001-.185.001-.185-.001-.184-.001-.184-.003-.182-.004-.182-.006-.181-.006-.179-.007-.179-.009-.178-.01-.176-.01-.176-.012-.175-.013-.173-.014-.172-.015-.171-.016-.17-.017-.169-.018-.167-.019-.166-.02-.165-.021-.163-.023-.162-.023-.161-.024-.159-.024-.157-.026-.156-.027-.155-.028-.153-.028-.151-.03-.15-.03-.148-.032-.146-.032-.145-.033-.143-.034-.141-.034-.14-.036-.137-.036-.136-.037-.134-.038-.132-.039-.13-.039-.128-.041-.126-.041-.124-.041-.122-.043-.12-.043-.117-.044-.116-.044-.113-.046-.112-.046-.109-.046-.106-.048-.105-.048-.102-.048-.1-.05-.097-.049-.095-.051-.093-.051-.09-.052-.087-.052-.085-.053-.083-.053-.08-.054-.077-.054v4.153zm8.74-8.179l-.257.004-.254.005-.25.008-.247.011-.244.012-.241.014-.237.016-.233.018-.231.021-.226.022-.224.023-.22.026-.216.027-.212.028-.21.031-.205.032-.202.033-.198.034-.194.036-.191.038-.187.038-.183.04-.179.041-.175.042-.172.043-.168.043-.163.045-.16.046-.155.046-.152.048-.148.048-.143.048-.139.049-.136.05-.131.05-.126.051-.123.051-.118.051-.114.052-.11.052-.106.052-.101.052-.096.052-.092.052-.088.052-.083.052-.079.052-.074.051-.07.052-.065.051-.06.05-.056.05-.051.05-.023.025-.023.024-.021.024-.02.025-.019.024-.018.024-.017.023-.015.024-.014.023-.013.023-.012.023-.01.023-.01.022-.008.022-.006.023-.006.021-.004.022-.004.021-.001.021-.001.021.001.021.001.021.004.021.004.022.006.021.006.023.008.022.01.022.01.023.012.023.013.023.014.023.015.024.017.023.018.024.019.024.02.025.021.024.023.024.023.025.051.05.056.05.06.05.065.051.07.052.074.051.079.052.083.052.088.052.092.052.096.052.101.052.106.052.11.052.114.052.118.051.123.051.126.051.131.05.136.05.139.049.143.048.148.048.152.048.155.046.16.046.163.045.168.043.172.043.175.042.179.041.183.04.187.038.191.038.194.036.198.034.202.033.205.032.21.031.212.028.216.027.22.026.224.023.226.022.231.021.233.018.237.016.241.014.244.012.247.011.25.008.254.005.257.004.26.001.26-.001.257-.004.254-.005.25-.008.247-.011.244-.012.241-.014.237-.016.233-.018.231-.021.226-.022.224-.023.22-.026.216-.027.212-.028.21-.031.205-.032.202-.033.198-.034.194-.036.191-.038.187-.038.183-.04.179-.041.175-.042.172-.043.168-.043.163-.045.16-.046.155-.046.152-.048.148-.048.143-.048.139-.049.136-.05.131-.05.126-.051.123-.051.118-.051.114-.052.11-.052.106-.052.101-.052.096-.052.092-.052.088-.052.083-.052.079-.052.074-.051.07-.052.065-.051.06-.05.056-.05.051-.05.023-.025.023-.024.021-.024.02-.025.019-.024.018-.024.017-.023.015-.024.014-.023.013-.023.012-.023.01-.023.01-.022.008-.022.006-.023.006-.021.004-.022.004-.021.001-.021.001-.021-.001-.021-.001-.021-.004-.021-.004-.022-.006-.021-.006-.023-.008-.022-.01-.022-.01-.023-.012-.023-.013-.023-.014-.023-.015-.024-.017-.023-.018-.024-.019-.024-.02-.025-.021-.024-.023-.024-.023-.025-.051-.05-.056-.05-.06-.05-.065-.051-.07-.052-.074-.051-.079-.052-.083-.052-.088-.052-.092-.052-.096-.052-.101-.052-.106-.052-.11-.052-.114-.052-.118-.051-.123-.051-.126-.051-.131-.05-.136-.05-.139-.049-.143-.048-.148-.048-.152-.048-.155-.046-.16-.046-.163-.045-.168-.043-.172-.043-.175-.042-.179-.041-.183-.04-.187-.038-.191-.038-.194-.036-.198-.034-.202-.033-.205-.032-.21-.031-.212-.028-.216-.027-.22-.026-.224-.023-.226-.022-.231-.021-.233-.018-.237-.016-.241-.014-.244-.012-.247-.011-.25-.008-.254-.005-.257-.004-.26-.001-.26.001z' transform='scale(.5)'/%3e%3c/symbol%3e%3c/defs%3e%3cdefs%3e%3csymbol height='24' width='24' id='clock'%3e%3cpath d='M12 2c5.514 0 10 4.486 10 10s-4.486 10-10 10-10-4.486-10-10 4.486-10 10-10zm0-2c-6.627 0-12 5.373-12 12s5.373 12 12 12 12-5.373 12-12-5.373-12-12-12zm5.848 12.459c.202.038.202.333.001.372-1.907.361-6.045 1.111-6.547 1.111-.719 0-1.301-.582-1.301-1.301 0-.512.77-5.447 1.125-7.445.034-.192.312-.181.343.014l.985 6.238 5.394 1.011z' transform='scale(.5)'/%3e%3c/symbol%3e%3c/defs%3e%3cdefs%3e%3cmarker orient='auto-start-reverse' markerHeight='12' markerWidth='12' markerUnits='userSpaceOnUse' refY='5' refX='7.9' id='arrowhead'%3e%3cpath d='M -1 0 L 10 5 L 0 10 z'/%3e%3c/marker%3e%3c/defs%3e%3cdefs%3e%3cmarker refY='4.5' refX='4' orient='auto' markerHeight='8' markerWidth='15' id='crosshead'%3e%3cpath style='stroke-dasharray: 0%2c 0%3b' d='M 1%2c2 L 6%2c7 M 6%2c2 L 1%2c7' stroke-width='1pt' stroke='black' fill='none'/%3e%3c/marker%3e%3c/defs%3e%3cdefs%3e%3cmarker orient='auto' markerHeight='28' markerWidth='20' refY='7' refX='15.5' id='filled-head'%3e%3cpath d='M 18%2c7 L9%2c13 L14%2c7 L9%2c1 Z'/%3e%3c/marker%3e%3c/defs%3e%3cdefs%3e%3cmarker orient='auto' markerHeight='40' markerWidth='60' refY='15' refX='15' id='sequencenumber'%3e%3ccircle r='6' cy='15' cx='15'/%3e%3c/marker%3e%3c/defs%3e%3ctext style='font-family: arial%2c sans-serif%3b font-size: 16px%3b font-weight: 400%3b' dy='1em' class='messageText' alignment-baseline='middle' dominant-baseline='middle' text-anchor='middle' y='80' x='223'%3eRequest register a new passkey%3c/text%3e%3cline style='fill: none%3b' marker-end='url(%23arrowhead)' stroke='none' stroke-width='2' class='messageLine0' y2='109' x2='369' y1='109' x1='76'/%3e%3ctext style='font-family: arial%2c sans-serif%3b font-size: 16px%3b font-weight: 400%3b' dy='1em' class='messageText' alignment-baseline='middle' dominant-baseline='middle' text-anchor='middle' y='124' x='636'%3eGet registration options (generateWebAuthnRegistrationOptions)%3c/text%3e%3cline style='fill: none%3b' marker-end='url(%23arrowhead)' stroke='none' stroke-width='2' class='messageLine0' y2='153' x2='898' y1='153' x1='374'/%3e%3ctext style='font-family: arial%2c sans-serif%3b font-size: 16px%3b font-weight: 400%3b' dy='1em' class='messageText' alignment-baseline='middle' dominant-baseline='middle' text-anchor='middle' y='168' x='639'%3eoptions%3c/text%3e%3cline style='fill: none%3b' marker-end='url(%23arrowhead)' stroke='none' stroke-width='2' class='messageLine0' y2='197' x2='377' y1='197' x1='901'/%3e%3ctext style='font-family: arial%2c sans-serif%3b font-size: 16px%3b font-weight: 400%3b' dy='1em' class='messageText' alignment-baseline='middle' dominant-baseline='middle' text-anchor='middle' y='212' x='374'%3eCall WebAuthn API%3c/text%3e%3cpath style='fill: none%3b' marker-end='url(%23arrowhead)' stroke='none' stroke-width='2' class='messageLine0' d='M 374%2c241 C 434%2c231 434%2c271 374%2c261'/%3e%3ctext style='font-family: arial%2c sans-serif%3b font-size: 16px%3b font-weight: 400%3b' dy='1em' class='messageText' alignment-baseline='middle' dominant-baseline='middle' text-anchor='middle' y='286' x='226'%3ePrompt to authenticate%3c/text%3e%3cline style='fill: none%3b' marker-end='url(%23arrowhead)' stroke='none' stroke-width='2' class='messageLine0' y2='315' x2='79' y1='315' x1='372'/%3e%3ctext style='font-family: arial%2c sans-serif%3b font-size: 16px%3b font-weight: 400%3b' dy='1em' class='messageText' alignment-baseline='middle' dominant-baseline='middle' text-anchor='middle' y='330' x='223'%3ePerform auth%3c/text%3e%3cline style='fill: none%3b' marker-end='url(%23arrowhead)' stroke='none' stroke-width='2' class='messageLine0' y2='359' x2='369' y1='359' x1='76'/%3e%3ctext style='font-family: arial%2c sans-serif%3b font-size: 16px%3b font-weight: 400%3b' dy='1em' class='messageText' alignment-baseline='middle' dominant-baseline='middle' text-anchor='middle' y='374' x='636'%3eSend WebAuthn API response%3c/text%3e%3cline style='fill: none%3b' marker-end='url(%23arrowhead)' stroke='none' stroke-width='2' class='messageLine0' y2='403' x2='898' y1='403' x1='374'/%3e%3ctext style='font-family: arial%2c sans-serif%3b font-size: 16px%3b font-weight: 400%3b' dy='1em' class='messageText' alignment-baseline='middle' dominant-baseline='middle' text-anchor='middle' y='418' x='903'%3eVerify and save (verifyWebAuthnRegistration)%3c/text%3e%3cpath style='fill: none%3b' marker-end='url(%23arrowhead)' stroke='none' stroke-width='2' class='messageLine0' d='M 903%2c447 C 963%2c437 963%2c477 903%2c467'/%3e%3ctext style='font-family: arial%2c sans-serif%3b font-size: 16px%3b font-weight: 400%3b' dy='1em' class='messageText' alignment-baseline='middle' dominant-baseline='middle' text-anchor='middle' y='492' x='639'%3eReturn result%3c/text%3e%3cline style='fill: none%3b' marker-end='url(%23arrowhead)' stroke='none' stroke-width='2' class='messageLine0' y2='521' x2='377' y1='521' x1='901'/%3e%3ctext style='font-family: arial%2c sans-serif%3b font-size: 16px%3b font-weight: 400%3b' dy='1em' class='messageText' alignment-baseline='middle' dominant-baseline='middle' text-anchor='middle' y='536' x='226'%3e%e2%9c%85%3c/text%3e%3cline style='fill: none%3b' marker-end='url(%23arrowhead)' stroke='none' stroke-width='2' class='messageLine0' y2='569' x2='79' y1='569' x1='372'/%3e%3c/svg%3e)
%3bfill:%23ECECFF%3b%7d%23mermaid-1 text.actor%26gt%3btspan%7bfill:black%3bstroke:none%3b%7d%23mermaid-1 .actor-line%7bstroke:hsl(259.6261682243%2c 59.7765363128%25%2c 87.9019607843%25)%3b%7d%23mermaid-1 .messageLine0%7bstroke-width:1.5%3bstroke-dasharray:none%3bstroke:%23333%3b%7d%23mermaid-1 .messageLine1%7bstroke-width:1.5%3bstroke-dasharray:2%2c2%3bstroke:%23333%3b%7d%23mermaid-1 %23arrowhead path%7bfill:%23333%3bstroke:%23333%3b%7d%23mermaid-1 .sequenceNumber%7bfill:white%3b%7d%23mermaid-1 %23sequencenumber%7bfill:%23333%3b%7d%23mermaid-1 %23crosshead path%7bfill:%23333%3bstroke:%23333%3b%7d%23mermaid-1 .messageText%7bfill:%23333%3bstroke:none%3b%7d%23mermaid-1 .labelBox%7bstroke:hsl(259.6261682243%2c 59.7765363128%25%2c 87.9019607843%25)%3bfill:%23ECECFF%3b%7d%23mermaid-1 .labelText%2c%23mermaid-1 .labelText%26gt%3btspan%7bfill:black%3bstroke:none%3b%7d%23mermaid-1 .loopText%2c%23mermaid-1 .loopText%26gt%3btspan%7bfill:black%3bstroke:none%3b%7d%23mermaid-1 .loopLine%7bstroke-width:2px%3bstroke-dasharray:2%2c2%3bstroke:hsl(259.6261682243%2c 59.7765363128%25%2c 87.9019607843%25)%3bfill:hsl(259.6261682243%2c 59.7765363128%25%2c 87.9019607843%25)%3b%7d%23mermaid-1 .note%7bstroke:%23aaaa33%3bfill:%23fff5ad%3b%7d%23mermaid-1 .noteText%2c%23mermaid-1 .noteText%26gt%3btspan%7bfill:black%3bstroke:none%3b%7d%23mermaid-1 .activation0%7bfill:%23f4f4f4%3bstroke:%23666%3b%7d%23mermaid-1 .activation1%7bfill:%23f4f4f4%3bstroke:%23666%3b%7d%23mermaid-1 .activation2%7bfill:%23f4f4f4%3bstroke:%23666%3b%7d%23mermaid-1 .actorPopupMenu%7bposition:absolute%3b%7d%23mermaid-1 .actorPopupMenuPanel%7bposition:absolute%3bfill:%23ECECFF%3bbox-shadow:0px 8px 16px 0px rgba(0%2c0%2c0%2c0.2)%3bfilter:drop-shadow(3px 5px 2px rgb(0 0 0 / 0.4))%3b%7d%23mermaid-1 .actor-man line%7bstroke:hsl(259.6261682243%2c 59.7765363128%25%2c 87.9019607843%25)%3bfill:%23ECECFF%3b%7d%23mermaid-1 .actor-man circle%2c%23mermaid-1 line%7bstroke:hsl(259.6261682243%2c 59.7765363128%25%2c 87.9019607843%25)%3bfill:%23ECECFF%3bstroke-width:2px%3b%7d%23mermaid-1 :root%7b--mermaid-font-family:arial%2csans-serif%3b%7d%3c/style%3e%3cg/%3e%3cdefs%3e%3csymbol height='24' width='24' id='computer'%3e%3cpath d='M2 2v13h20v-13h-20zm18 11h-16v-9h16v9zm-10.228 6l.466-1h3.524l.467 1h-4.457zm14.228 3h-24l2-6h2.104l-1.33 4h18.45l-1.297-4h2.073l2 6zm-5-10h-14v-7h14v7z' transform='scale(.5)'/%3e%3c/symbol%3e%3c/defs%3e%3cdefs%3e%3csymbol clip-rule='evenodd' fill-rule='evenodd' id='database'%3e%3cpath d='M12.258.001l.256.004.255.005.253.008.251.01.249.012.247.015.246.016.242.019.241.02.239.023.236.024.233.027.231.028.229.031.225.032.223.034.22.036.217.038.214.04.211.041.208.043.205.045.201.046.198.048.194.05.191.051.187.053.183.054.18.056.175.057.172.059.168.06.163.061.16.063.155.064.15.066.074.033.073.033.071.034.07.034.069.035.068.035.067.035.066.035.064.036.064.036.062.036.06.036.06.037.058.037.058.037.055.038.055.038.053.038.052.038.051.039.05.039.048.039.047.039.045.04.044.04.043.04.041.04.04.041.039.041.037.041.036.041.034.041.033.042.032.042.03.042.029.042.027.042.026.043.024.043.023.043.021.043.02.043.018.044.017.043.015.044.013.044.012.044.011.045.009.044.007.045.006.045.004.045.002.045.001.045v17l-.001.045-.002.045-.004.045-.006.045-.007.045-.009.044-.011.045-.012.044-.013.044-.015.044-.017.043-.018.044-.02.043-.021.043-.023.043-.024.043-.026.043-.027.042-.029.042-.03.042-.032.042-.033.042-.034.041-.036.041-.037.041-.039.041-.04.041-.041.04-.043.04-.044.04-.045.04-.047.039-.048.039-.05.039-.051.039-.052.038-.053.038-.055.038-.055.038-.058.037-.058.037-.06.037-.06.036-.062.036-.064.036-.064.036-.066.035-.067.035-.068.035-.069.035-.07.034-.071.034-.073.033-.074.033-.15.066-.155.064-.16.063-.163.061-.168.06-.172.059-.175.057-.18.056-.183.054-.187.053-.191.051-.194.05-.198.048-.201.046-.205.045-.208.043-.211.041-.214.04-.217.038-.22.036-.223.034-.225.032-.229.031-.231.028-.233.027-.236.024-.239.023-.241.02-.242.019-.246.016-.247.015-.249.012-.251.01-.253.008-.255.005-.256.004-.258.001-.258-.001-.256-.004-.255-.005-.253-.008-.251-.01-.249-.012-.247-.015-.245-.016-.243-.019-.241-.02-.238-.023-.236-.024-.234-.027-.231-.028-.228-.031-.226-.032-.223-.034-.22-.036-.217-.038-.214-.04-.211-.041-.208-.043-.204-.045-.201-.046-.198-.048-.195-.05-.19-.051-.187-.053-.184-.054-.179-.056-.176-.057-.172-.059-.167-.06-.164-.061-.159-.063-.155-.064-.151-.066-.074-.033-.072-.033-.072-.034-.07-.034-.069-.035-.068-.035-.067-.035-.066-.035-.064-.036-.063-.036-.062-.036-.061-.036-.06-.037-.058-.037-.057-.037-.056-.038-.055-.038-.053-.038-.052-.038-.051-.039-.049-.039-.049-.039-.046-.039-.046-.04-.044-.04-.043-.04-.041-.04-.04-.041-.039-.041-.037-.041-.036-.041-.034-.041-.033-.042-.032-.042-.03-.042-.029-.042-.027-.042-.026-.043-.024-.043-.023-.043-.021-.043-.02-.043-.018-.044-.017-.043-.015-.044-.013-.044-.012-.044-.011-.045-.009-.044-.007-.045-.006-.045-.004-.045-.002-.045-.001-.045v-17l.001-.045.002-.045.004-.045.006-.045.007-.045.009-.044.011-.045.012-.044.013-.044.015-.044.017-.043.018-.044.02-.043.021-.043.023-.043.024-.043.026-.043.027-.042.029-.042.03-.042.032-.042.033-.042.034-.041.036-.041.037-.041.039-.041.04-.041.041-.04.043-.04.044-.04.046-.04.046-.039.049-.039.049-.039.051-.039.052-.038.053-.038.055-.038.056-.038.057-.037.058-.037.06-.037.061-.036.062-.036.063-.036.064-.036.066-.035.067-.035.068-.035.069-.035.07-.034.072-.034.072-.033.074-.033.151-.066.155-.064.159-.063.164-.061.167-.06.172-.059.176-.057.179-.056.184-.054.187-.053.19-.051.195-.05.198-.048.201-.046.204-.045.208-.043.211-.041.214-.04.217-.038.22-.036.223-.034.226-.032.228-.031.231-.028.234-.027.236-.024.238-.023.241-.02.243-.019.245-.016.247-.015.249-.012.251-.01.253-.008.255-.005.256-.004.258-.001.258.001zm-9.258 20.499v.01l.001.021.003.021.004.022.005.021.006.022.007.022.009.023.01.022.011.023.012.023.013.023.015.023.016.024.017.023.018.024.019.024.021.024.022.025.023.024.024.025.052.049.056.05.061.051.066.051.07.051.075.051.079.052.084.052.088.052.092.052.097.052.102.051.105.052.11.052.114.051.119.051.123.051.127.05.131.05.135.05.139.048.144.049.147.047.152.047.155.047.16.045.163.045.167.043.171.043.176.041.178.041.183.039.187.039.19.037.194.035.197.035.202.033.204.031.209.03.212.029.216.027.219.025.222.024.226.021.23.02.233.018.236.016.24.015.243.012.246.01.249.008.253.005.256.004.259.001.26-.001.257-.004.254-.005.25-.008.247-.011.244-.012.241-.014.237-.016.233-.018.231-.021.226-.021.224-.024.22-.026.216-.027.212-.028.21-.031.205-.031.202-.034.198-.034.194-.036.191-.037.187-.039.183-.04.179-.04.175-.042.172-.043.168-.044.163-.045.16-.046.155-.046.152-.047.148-.048.143-.049.139-.049.136-.05.131-.05.126-.05.123-.051.118-.052.114-.051.11-.052.106-.052.101-.052.096-.052.092-.052.088-.053.083-.051.079-.052.074-.052.07-.051.065-.051.06-.051.056-.05.051-.05.023-.024.023-.025.021-.024.02-.024.019-.024.018-.024.017-.024.015-.023.014-.024.013-.023.012-.023.01-.023.01-.022.008-.022.006-.022.006-.022.004-.022.004-.021.001-.021.001-.021v-4.127l-.077.055-.08.053-.083.054-.085.053-.087.052-.09.052-.093.051-.095.05-.097.05-.1.049-.102.049-.105.048-.106.047-.109.047-.111.046-.114.045-.115.045-.118.044-.12.043-.122.042-.124.042-.126.041-.128.04-.13.04-.132.038-.134.038-.135.037-.138.037-.139.035-.142.035-.143.034-.144.033-.147.032-.148.031-.15.03-.151.03-.153.029-.154.027-.156.027-.158.026-.159.025-.161.024-.162.023-.163.022-.165.021-.166.02-.167.019-.169.018-.169.017-.171.016-.173.015-.173.014-.175.013-.175.012-.177.011-.178.01-.179.008-.179.008-.181.006-.182.005-.182.004-.184.003-.184.002h-.37l-.184-.002-.184-.003-.182-.004-.182-.005-.181-.006-.179-.008-.179-.008-.178-.01-.176-.011-.176-.012-.175-.013-.173-.014-.172-.015-.171-.016-.17-.017-.169-.018-.167-.019-.166-.02-.165-.021-.163-.022-.162-.023-.161-.024-.159-.025-.157-.026-.156-.027-.155-.027-.153-.029-.151-.03-.15-.03-.148-.031-.146-.032-.145-.033-.143-.034-.141-.035-.14-.035-.137-.037-.136-.037-.134-.038-.132-.038-.13-.04-.128-.04-.126-.041-.124-.042-.122-.042-.12-.044-.117-.043-.116-.045-.113-.045-.112-.046-.109-.047-.106-.047-.105-.048-.102-.049-.1-.049-.097-.05-.095-.05-.093-.052-.09-.051-.087-.052-.085-.053-.083-.054-.08-.054-.077-.054v4.127zm0-5.654v.011l.001.021.003.021.004.021.005.022.006.022.007.022.009.022.01.022.011.023.012.023.013.023.015.024.016.023.017.024.018.024.019.024.021.024.022.024.023.025.024.024.052.05.056.05.061.05.066.051.07.051.075.052.079.051.084.052.088.052.092.052.097.052.102.052.105.052.11.051.114.051.119.052.123.05.127.051.131.05.135.049.139.049.144.048.147.048.152.047.155.046.16.045.163.045.167.044.171.042.176.042.178.04.183.04.187.038.19.037.194.036.197.034.202.033.204.032.209.03.212.028.216.027.219.025.222.024.226.022.23.02.233.018.236.016.24.014.243.012.246.01.249.008.253.006.256.003.259.001.26-.001.257-.003.254-.006.25-.008.247-.01.244-.012.241-.015.237-.016.233-.018.231-.02.226-.022.224-.024.22-.025.216-.027.212-.029.21-.03.205-.032.202-.033.198-.035.194-.036.191-.037.187-.039.183-.039.179-.041.175-.042.172-.043.168-.044.163-.045.16-.045.155-.047.152-.047.148-.048.143-.048.139-.05.136-.049.131-.05.126-.051.123-.051.118-.051.114-.052.11-.052.106-.052.101-.052.096-.052.092-.052.088-.052.083-.052.079-.052.074-.051.07-.052.065-.051.06-.05.056-.051.051-.049.023-.025.023-.024.021-.025.02-.024.019-.024.018-.024.017-.024.015-.023.014-.023.013-.024.012-.022.01-.023.01-.023.008-.022.006-.022.006-.022.004-.021.004-.022.001-.021.001-.021v-4.139l-.077.054-.08.054-.083.054-.085.052-.087.053-.09.051-.093.051-.095.051-.097.05-.1.049-.102.049-.105.048-.106.047-.109.047-.111.046-.114.045-.115.044-.118.044-.12.044-.122.042-.124.042-.126.041-.128.04-.13.039-.132.039-.134.038-.135.037-.138.036-.139.036-.142.035-.143.033-.144.033-.147.033-.148.031-.15.03-.151.03-.153.028-.154.028-.156.027-.158.026-.159.025-.161.024-.162.023-.163.022-.165.021-.166.02-.167.019-.169.018-.169.017-.171.016-.173.015-.173.014-.175.013-.175.012-.177.011-.178.009-.179.009-.179.007-.181.007-.182.005-.182.004-.184.003-.184.002h-.37l-.184-.002-.184-.003-.182-.004-.182-.005-.181-.007-.179-.007-.179-.009-.178-.009-.176-.011-.176-.012-.175-.013-.173-.014-.172-.015-.171-.016-.17-.017-.169-.018-.167-.019-.166-.02-.165-.021-.163-.022-.162-.023-.161-.024-.159-.025-.157-.026-.156-.027-.155-.028-.153-.028-.151-.03-.15-.03-.148-.031-.146-.033-.145-.033-.143-.033-.141-.035-.14-.036-.137-.036-.136-.037-.134-.038-.132-.039-.13-.039-.128-.04-.126-.041-.124-.042-.122-.043-.12-.043-.117-.044-.116-.044-.113-.046-.112-.046-.109-.046-.106-.047-.105-.048-.102-.049-.1-.049-.097-.05-.095-.051-.093-.051-.09-.051-.087-.053-.085-.052-.083-.054-.08-.054-.077-.054v4.139zm0-5.666v.011l.001.02.003.022.004.021.005.022.006.021.007.022.009.023.01.022.011.023.012.023.013.023.015.023.016.024.017.024.018.023.019.024.021.025.022.024.023.024.024.025.052.05.056.05.061.05.066.051.07.051.075.052.079.051.084.052.088.052.092.052.097.052.102.052.105.051.11.052.114.051.119.051.123.051.127.05.131.05.135.05.139.049.144.048.147.048.152.047.155.046.16.045.163.045.167.043.171.043.176.042.178.04.183.04.187.038.19.037.194.036.197.034.202.033.204.032.209.03.212.028.216.027.219.025.222.024.226.021.23.02.233.018.236.017.24.014.243.012.246.01.249.008.253.006.256.003.259.001.26-.001.257-.003.254-.006.25-.008.247-.01.244-.013.241-.014.237-.016.233-.018.231-.02.226-.022.224-.024.22-.025.216-.027.212-.029.21-.03.205-.032.202-.033.198-.035.194-.036.191-.037.187-.039.183-.039.179-.041.175-.042.172-.043.168-.044.163-.045.16-.045.155-.047.152-.047.148-.048.143-.049.139-.049.136-.049.131-.051.126-.05.123-.051.118-.052.114-.051.11-.052.106-.052.101-.052.096-.052.092-.052.088-.052.083-.052.079-.052.074-.052.07-.051.065-.051.06-.051.056-.05.051-.049.023-.025.023-.025.021-.024.02-.024.019-.024.018-.024.017-.024.015-.023.014-.024.013-.023.012-.023.01-.022.01-.023.008-.022.006-.022.006-.022.004-.022.004-.021.001-.021.001-.021v-4.153l-.077.054-.08.054-.083.053-.085.053-.087.053-.09.051-.093.051-.095.051-.097.05-.1.049-.102.048-.105.048-.106.048-.109.046-.111.046-.114.046-.115.044-.118.044-.12.043-.122.043-.124.042-.126.041-.128.04-.13.039-.132.039-.134.038-.135.037-.138.036-.139.036-.142.034-.143.034-.144.033-.147.032-.148.032-.15.03-.151.03-.153.028-.154.028-.156.027-.158.026-.159.024-.161.024-.162.023-.163.023-.165.021-.166.02-.167.019-.169.018-.169.017-.171.016-.173.015-.173.014-.175.013-.175.012-.177.01-.178.01-.179.009-.179.007-.181.006-.182.006-.182.004-.184.003-.184.001-.185.001-.185-.001-.184-.001-.184-.003-.182-.004-.182-.006-.181-.006-.179-.007-.179-.009-.178-.01-.176-.01-.176-.012-.175-.013-.173-.014-.172-.015-.171-.016-.17-.017-.169-.018-.167-.019-.166-.02-.165-.021-.163-.023-.162-.023-.161-.024-.159-.024-.157-.026-.156-.027-.155-.028-.153-.028-.151-.03-.15-.03-.148-.032-.146-.032-.145-.033-.143-.034-.141-.034-.14-.036-.137-.036-.136-.037-.134-.038-.132-.039-.13-.039-.128-.041-.126-.041-.124-.041-.122-.043-.12-.043-.117-.044-.116-.044-.113-.046-.112-.046-.109-.046-.106-.048-.105-.048-.102-.048-.1-.05-.097-.049-.095-.051-.093-.051-.09-.052-.087-.052-.085-.053-.083-.053-.08-.054-.077-.054v4.153zm8.74-8.179l-.257.004-.254.005-.25.008-.247.011-.244.012-.241.014-.237.016-.233.018-.231.021-.226.022-.224.023-.22.026-.216.027-.212.028-.21.031-.205.032-.202.033-.198.034-.194.036-.191.038-.187.038-.183.04-.179.041-.175.042-.172.043-.168.043-.163.045-.16.046-.155.046-.152.048-.148.048-.143.048-.139.049-.136.05-.131.05-.126.051-.123.051-.118.051-.114.052-.11.052-.106.052-.101.052-.096.052-.092.052-.088.052-.083.052-.079.052-.074.051-.07.052-.065.051-.06.05-.056.05-.051.05-.023.025-.023.024-.021.024-.02.025-.019.024-.018.024-.017.023-.015.024-.014.023-.013.023-.012.023-.01.023-.01.022-.008.022-.006.023-.006.021-.004.022-.004.021-.001.021-.001.021.001.021.001.021.004.021.004.022.006.021.006.023.008.022.01.022.01.023.012.023.013.023.014.023.015.024.017.023.018.024.019.024.02.025.021.024.023.024.023.025.051.05.056.05.06.05.065.051.07.052.074.051.079.052.083.052.088.052.092.052.096.052.101.052.106.052.11.052.114.052.118.051.123.051.126.051.131.05.136.05.139.049.143.048.148.048.152.048.155.046.16.046.163.045.168.043.172.043.175.042.179.041.183.04.187.038.191.038.194.036.198.034.202.033.205.032.21.031.212.028.216.027.22.026.224.023.226.022.231.021.233.018.237.016.241.014.244.012.247.011.25.008.254.005.257.004.26.001.26-.001.257-.004.254-.005.25-.008.247-.011.244-.012.241-.014.237-.016.233-.018.231-.021.226-.022.224-.023.22-.026.216-.027.212-.028.21-.031.205-.032.202-.033.198-.034.194-.036.191-.038.187-.038.183-.04.179-.041.175-.042.172-.043.168-.043.163-.045.16-.046.155-.046.152-.048.148-.048.143-.048.139-.049.136-.05.131-.05.126-.051.123-.051.118-.051.114-.052.11-.052.106-.052.101-.052.096-.052.092-.052.088-.052.083-.052.079-.052.074-.051.07-.052.065-.051.06-.05.056-.05.051-.05.023-.025.023-.024.021-.024.02-.025.019-.024.018-.024.017-.023.015-.024.014-.023.013-.023.012-.023.01-.023.01-.022.008-.022.006-.023.006-.021.004-.022.004-.021.001-.021.001-.021-.001-.021-.001-.021-.004-.021-.004-.022-.006-.021-.006-.023-.008-.022-.01-.022-.01-.023-.012-.023-.013-.023-.014-.023-.015-.024-.017-.023-.018-.024-.019-.024-.02-.025-.021-.024-.023-.024-.023-.025-.051-.05-.056-.05-.06-.05-.065-.051-.07-.052-.074-.051-.079-.052-.083-.052-.088-.052-.092-.052-.096-.052-.101-.052-.106-.052-.11-.052-.114-.052-.118-.051-.123-.051-.126-.051-.131-.05-.136-.05-.139-.049-.143-.048-.148-.048-.152-.048-.155-.046-.16-.046-.163-.045-.168-.043-.172-.043-.175-.042-.179-.041-.183-.04-.187-.038-.191-.038-.194-.036-.198-.034-.202-.033-.205-.032-.21-.031-.212-.028-.216-.027-.22-.026-.224-.023-.226-.022-.231-.021-.233-.018-.237-.016-.241-.014-.244-.012-.247-.011-.25-.008-.254-.005-.257-.004-.26-.001-.26.001z' transform='scale(.5)'/%3e%3c/symbol%3e%3c/defs%3e%3cdefs%3e%3csymbol height='24' width='24' id='clock'%3e%3cpath d='M12 2c5.514 0 10 4.486 10 10s-4.486 10-10 10-10-4.486-10-10 4.486-10 10-10zm0-2c-6.627 0-12 5.373-12 12s5.373 12 12 12 12-5.373 12-12-5.373-12-12-12zm5.848 12.459c.202.038.202.333.001.372-1.907.361-6.045 1.111-6.547 1.111-.719 0-1.301-.582-1.301-1.301 0-.512.77-5.447 1.125-7.445.034-.192.312-.181.343.014l.985 6.238 5.394 1.011z' transform='scale(.5)'/%3e%3c/symbol%3e%3c/defs%3e%3cdefs%3e%3cmarker orient='auto-start-reverse' markerHeight='12' markerWidth='12' markerUnits='userSpaceOnUse' refY='5' refX='7.9' id='arrowhead'%3e%3cpath d='M -1 0 L 10 5 L 0 10 z'/%3e%3c/marker%3e%3c/defs%3e%3cdefs%3e%3cmarker refY='4.5' refX='4' orient='auto' markerHeight='8' markerWidth='15' id='crosshead'%3e%3cpath style='stroke-dasharray: 0%2c 0%3b' d='M 1%2c2 L 6%2c7 M 6%2c2 L 1%2c7' stroke-width='1pt' stroke='black' fill='none'/%3e%3c/marker%3e%3c/defs%3e%3cdefs%3e%3cmarker orient='auto' markerHeight='28' markerWidth='20' refY='7' refX='15.5' id='filled-head'%3e%3cpath d='M 18%2c7 L9%2c13 L14%2c7 L9%2c1 Z'/%3e%3c/marker%3e%3c/defs%3e%3cdefs%3e%3cmarker orient='auto' markerHeight='40' markerWidth='60' refY='15' refX='15' id='sequencenumber'%3e%3ccircle r='6' cy='15' cx='15'/%3e%3c/marker%3e%3c/defs%3e%3ctext style='font-family: arial%2c sans-serif%3b font-size: 16px%3b font-weight: 400%3b' dy='1em' class='messageText' alignment-baseline='middle' dominant-baseline='middle' text-anchor='middle' y='80' x='199'%3eRequest login to an email%3c/text%3e%3cline style='fill: none%3b' marker-end='url(%23arrowhead)' stroke='none' stroke-width='2' class='messageLine0' y2='109' x2='322' y1='109' x1='76'/%3e%3ctext style='font-family: arial%2c sans-serif%3b font-size: 16px%3b font-weight: 400%3b' dy='1em' class='messageText' alignment-baseline='middle' dominant-baseline='middle' text-anchor='middle' y='124' x='576'%3eGet authentication options (generateWebAuthnLoginOptions)%3c/text%3e%3cline style='fill: none%3b' marker-end='url(%23arrowhead)' stroke='none' stroke-width='2' class='messageLine0' y2='153' x2='825' y1='153' x1='327'/%3e%3ctext style='font-family: arial%2c sans-serif%3b font-size: 16px%3b font-weight: 400%3b' dy='1em' class='messageText' alignment-baseline='middle' dominant-baseline='middle' text-anchor='middle' y='168' x='579'%3eoptions%3c/text%3e%3cline style='fill: none%3b' marker-end='url(%23arrowhead)' stroke='none' stroke-width='2' class='messageLine0' y2='197' x2='330' y1='197' x1='828'/%3e%3ctext style='font-family: arial%2c sans-serif%3b font-size: 16px%3b font-weight: 400%3b' dy='1em' class='messageText' alignment-baseline='middle' dominant-baseline='middle' text-anchor='middle' y='212' x='327'%3eCall WebAuthn API%3c/text%3e%3cpath style='fill: none%3b' marker-end='url(%23arrowhead)' stroke='none' stroke-width='2' class='messageLine0' d='M 327%2c241 C 387%2c231 387%2c271 327%2c261'/%3e%3ctext style='font-family: arial%2c sans-serif%3b font-size: 16px%3b font-weight: 400%3b' dy='1em' class='messageText' alignment-baseline='middle' dominant-baseline='middle' text-anchor='middle' y='286' x='202'%3ePrompt to authenticate%3c/text%3e%3cline style='fill: none%3b' marker-end='url(%23arrowhead)' stroke='none' stroke-width='2' class='messageLine0' y2='315' x2='79' y1='315' x1='325'/%3e%3ctext style='font-family: arial%2c sans-serif%3b font-size: 16px%3b font-weight: 400%3b' dy='1em' class='messageText' alignment-baseline='middle' dominant-baseline='middle' text-anchor='middle' y='330' x='199'%3ePerform auth%3c/text%3e%3cline style='fill: none%3b' marker-end='url(%23arrowhead)' stroke='none' stroke-width='2' class='messageLine0' y2='359' x2='322' y1='359' x1='76'/%3e%3ctext style='font-family: arial%2c sans-serif%3b font-size: 16px%3b font-weight: 400%3b' dy='1em' class='messageText' alignment-baseline='middle' dominant-baseline='middle' text-anchor='middle' y='374' x='576'%3eSend WebAuthn API response%3c/text%3e%3cline style='fill: none%3b' marker-end='url(%23arrowhead)' stroke='none' stroke-width='2' class='messageLine0' y2='403' x2='825' y1='403' x1='327'/%3e%3ctext style='font-family: arial%2c sans-serif%3b font-size: 16px%3b font-weight: 400%3b' dy='1em' class='messageText' alignment-baseline='middle' dominant-baseline='middle' text-anchor='middle' y='418' x='830'%3eVerify (verifyWebAuthnLogin)%3c/text%3e%3cpath style='fill: none%3b' marker-end='url(%23arrowhead)' stroke='none' stroke-width='2' class='messageLine0' d='M 830%2c447 C 890%2c437 890%2c477 830%2c467'/%3e%3ctext style='font-family: arial%2c sans-serif%3b font-size: 16px%3b font-weight: 400%3b' dy='1em' class='messageText' alignment-baseline='middle' dominant-baseline='middle' text-anchor='middle' y='492' x='579'%3eReturn result%3c/text%3e%3cline style='fill: none%3b' marker-end='url(%23arrowhead)' stroke='none' stroke-width='2' class='messageLine0' y2='521' x2='330' y1='521' x1='828'/%3e%3ctext style='font-family: arial%2c sans-serif%3b font-size: 16px%3b font-weight: 400%3b' dy='1em' class='messageText' alignment-baseline='middle' dominant-baseline='middle' text-anchor='middle' y='536' x='202'%3e%e2%9c%85%3c/text%3e%3cline style='fill: none%3b' marker-end='url(%23arrowhead)' stroke='none' stroke-width='2' class='messageLine0' y2='569' x2='79' y1='569' x1='325'/%3e%3c/svg%3e)